
The landscape of solo content within World of Warcraft has undergone a significant transformation over the last few expansions. What began as niche challenges like the Brawler’s Guild — which returned for patch 11.2.7 — and the prestigious Mage Tower has evolved into a core pillar of the endgame experience. For many adventurers, the reward lies not just in high-level equipment, but in the mastery of mechanics and the execution of strategy without any reliance on a group!
In The War Within, Delves established themselves as a critical component of this ecosystem. With the imminent launch of Midnight on March 2nd, the Delve system has been refined and expanded, offering a sophisticated progression path that rivals traditional group content. While gear and class specialization still dictate the difficulty curve, the new systems reward knowledge and preparation above all else.
Season 1 opens with 10 Delves available immediately and The Darkway joining the roster on the 24th of March with Parhelion Plaza launching on the 31st of March. No waiting for a “week two” drop. You log in, you pick a door, you run. That matters because Delves aren’t background content in Midnight — they’re a season-long loop with their own identity, and the game expects you to learn them like you learn dungeons: route feel, enemy behavior, and where the run tries to slip a knife between your cooldowns.
Each Delve comes with its own theme, enemy set, and encounter pacing. That pacing is the real hook. Some runs want you to keep moving and never let the room “reset” your momentum. Others slow you down with layered threats that punish sloppy target swaps and lazy kicks.
Delves reward players who treat the first clears as reconnaissance, not a speedrun: so read the pull sizes the place is pushing you into. Notice where the run tries to bait you into overcommitting. Identify the pulls where you should spend a defensive early instead of “saving it for later” and then dying with it up.
Take a look at the list of all new Delves that'll be present in Midnight Season 1:
| Delve Name | Zone / Area |
|---|---|
| The Shadow Enclave | Eversong Woods ; /way #2248 45.5, 86.0 |
| Collegiate Calamity | Silvermoon City ; /way #2248 40.6 53.7 |
| Parhelion Plaza | Isle of Quel’Danas, Sunwell Ramparts ; /way #2248 46.8, 40.9 |
| The Darkway | Silvermoon City ; /way #2248 39.3, 31.7 |
| Twilight Crypts | Zul’Aman ; /way #2248 25.4, 84.4 |
| Atal'Aman | Zul’Aman Region ; /way #2248 63.7, 80.1 |
| The Grudge Pit | Harandar ; /way #2248 70.4, 64.8 |
| The Gulf of Memory | Harandar ; /way #2248 36.7, 49.6 |
| Sunkiller Sanctum | Voidstorm ; /way #2248 54.8, 47.1 |
| Shadowguard Point | Voidstorm ; /way #2248 37.1, 49.1 |
| Torment's Rise | Voidstorm, South to Nexus-Point Xenas |
| Den of Echoes | Unknown |
Torment's Rise is the standout. It serves as the Nemesis Delve for Season 1 and houses the primary seasonal challenge boss. Translation: this is the season’s “no excuses” check. Whatever habits you got away with in easier runs get audited here — your pacing, your cooldown discipline, your ability to keep control when the run stops cooperating.
The best way to handle this roster is to find a loop that works. Don't try to master everything — just learn the rooms and the one-shot mechanics, then farm the Delves that fit your class strengths. Do them until they feel automatic. If it feels boring, you're doing it right, because it means you aren't dying. Pushing higher keys isn't about flashy plays; it's about clean execution. Kick early, plan your defensive CDs, and keep the run moving smoothly without bad positioning forcing you to recover.
Season 1 gives you a full Delve lineup up front for a reason: it wants you to build consistency early. The faster you find your rhythm across the roster, the sooner Torment's Rise becomes a test you can pass on demand instead of a wall you keep headbutting.
Midnight Delves are gated at level 90 — so you just need to be level 90 to unlock any tier in any Delve. Gear doesn’t hard-block you, but it absolutely decides how the run feels. Walk in undergeared and every pull turns into a tax: slower kills, more mistakes punished, and a much higher chance the delve simply breaks you before the boss does.
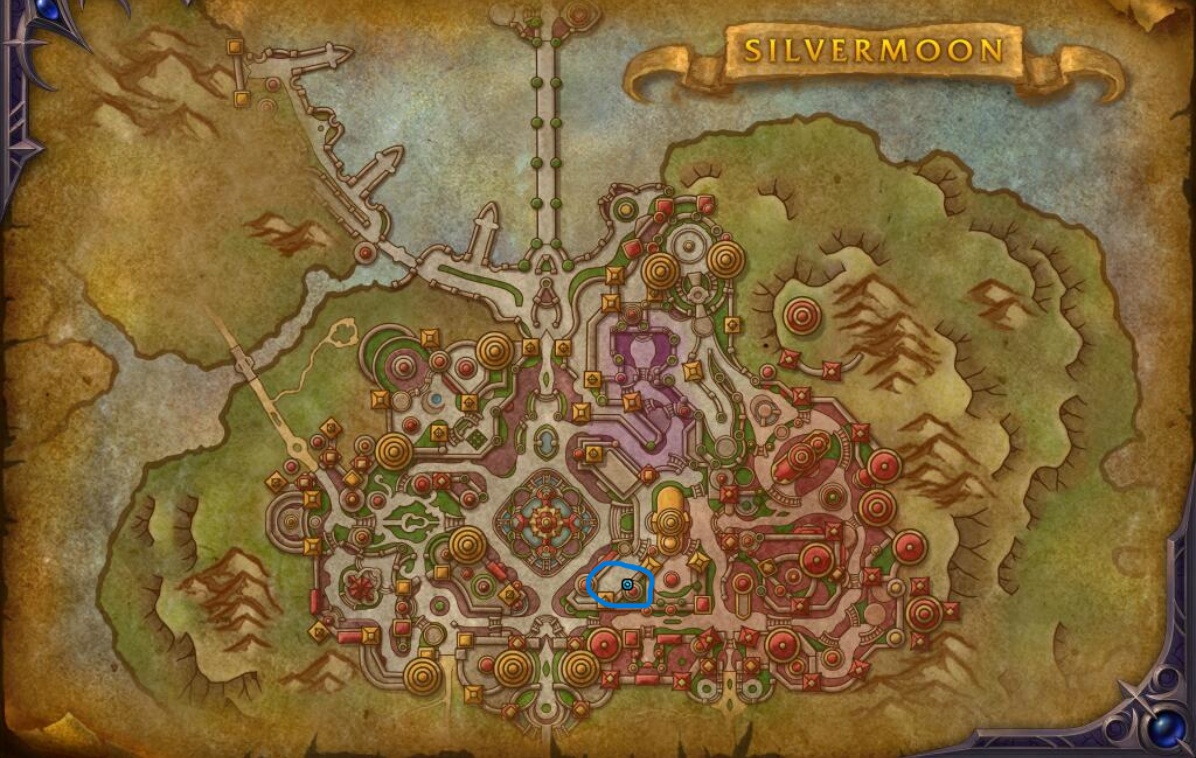
Delve tiers unlock step by step, so the entry point is Tier 1. Start there, then climb as new tiers open up. Before you dive in, swing by the delve hub — The Bazaar in Silvermoon — and grab the related quests. Valeera Sanguinar hands out the first introductory chain that puts you on the rails and gets your delving started clean.
The Delver's Headquarters for Midnight is located in Silvermoon City. This is where you can find the Midnight Delve Companion Valeera Sanguinar and the Delver's Guide. The Guide lets you track your Delver's Journey progress, customize your Delve Companion abilities, and check the current Bountiful Delves rotation.
/way #2393 52.4 78.2 Delver's HQ
The Headquarters is also the practical hub for rewards: vendors here sell seasonal transmogs, mounts, and housing decor in exchange for Undercoin and Voidlight Marl. Once you reach level 90, Valeera offers a short questline at the Delver's Headquarters that introduces the vendors and the new Season Nemesis:
These quests are not required to reach max-level delves, but they do provide unique rewards for defeating the Season Nemesis.
Midnight Delves reward far more than end-of-run gear. By clicking the button below, you can jump to our full Delve rewards guide and see exactly what you can earn from this activity, which rewards matter most, and where each of them comes from.
Midnight Delve RewardsDelves run on a simple track: Delver's Journey. Think Renown, but built for repeatable runs instead of reputation chores. Every rank on the Delver's Journey bar pays out a reward. No mystery box nonsense, don't worry.
Checking it is straightforward. Click the Delver's Guide on Valeera's desk at the Delver's Headquarters in Midnight, or open the Adventure Guide and look under the Journeys tab.
Progress comes from completing Bountiful Delves. Fill the bar and you finish the track. The full bar takes 42000 Delver's Journey.
| Source | Progress Amount |
|---|---|
| Tier 4 Bountiful Delve Completion | 50 Delver's Journey |
| Tier 5 Bountiful Delve Completion | 75 Delver's Journey |
| Tier 6 Bountiful Delve Completion | 100 Delver's Journey |
| Tier 7 Bountiful Delve Completion | 125 Delver's Journey |
| Tier 8 Bountiful Delve Completion | 150 Delver's Journey |
| Opening a Bountiful Coffer with a Restored Coffer Key (any Tier) | 250 Delver's Journey |
| Looting Archaic Cipher Key from Delve Chests and turning in the Weekly Quest The Key to Success | 1.500 Delver's Journey |
It takes 42000 points to complete the Delver's Journey track. If you only finish Tier 8 Bountiful Delves, this will take approximately 280 Tier 8 Bountiful Delve completions, or 70 days for the season (with 1 character running 4 Bountiful Delves per day).
These numbers are reduced by Season Nemesis encounters and opening Bountiful Coffers with Restored Coffer Keys.
Each step of the Delver's Journey offers rewards, from bonuses and improvements in Delves themselves to unlocked cosmetic purchases.
| Journey Rank | Reward |
|---|---|
| Rank 1 |
Mislaid Curiosities and Heavy Trunks found in delves will now contain temporary buffs to your character. You can purchase the Twilight Tabernacle decor from Telemancer Astrandis. |
| Rank 2 |
A Gilded Stash now appears after completing a Tier 11 delve. This is a chest that contains 7 Myth Dawncrest. 3 stashes can be earned in a week. You can also purchase Fungal Chest decor from Telemancer Astrandis. |
| Rank 3 |
A Sanctified Banner now has a chance to manifest within a bountiful delve. Finding it will provide extra rewards at the end of your delve. You can purchase Amani Strongbox decor from Telemancer Astrandis. |
| Rank 4 |
Gilded Stashes now also grant Myth Crests. You can purchase the Ancient Kaldorei Coffer from Telemancer Astrandis. |
| Rank 5 |
Zah'ran will now appear at the end of Tier 6 delves and above with a random stock of equipment. You can purchase the Silvermoon's Arcane Defender mount from Telemancer Astrandis. |
| Rank 6 |
You can purchase 2 Restored Coffer Keys from Naleidea Rivergleam. You can purchase the Sin'dorei Gravestone from Telemancer Astrandis. New gravestones can be equipped in the basement of the Delver's Headquarters. |
| Rank 7 |
You can purchase the Midnight Delver's Flare Gun toy and Root-Wrapped Reliquary decor from Telemancer Astrandis. |
| Rank 8 |
Champion Warbound gear may now be obtained from Tier 9 Delves and above. You can purchase the Corewarden's Spoils decor from Telemancer Astrandis. |
| Rank 9 |
Tier 11 Bountiful Coffers now have a chance to provide either a piece of Hero gear or Untainted Mana-Crystals, used to purchase powerful equipment from Zah'ran. Tiers 8, 9, and 10 Bountiful Coffers also reward smaller quantities of Untainted Mana-Crystals. |
| Rank 10 |
Earn the title "Void Breacher". The amount of all Coffer Key Shards earned from all sources is increased. You can purchase the Delver's Bountiful Coffer decor and Corewarden's Hearthstone from Telemancer Astrandis. |
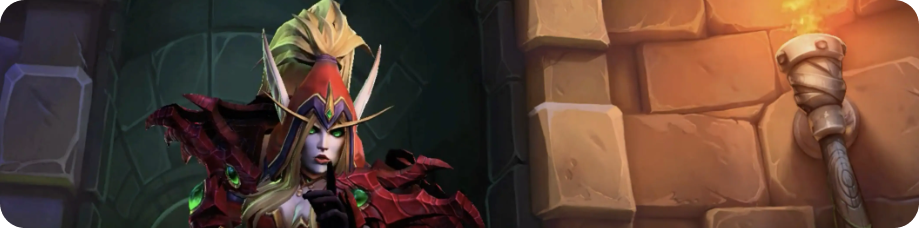
The exploration-focused support of Brann Bronzebeard has been succeeded by the lethal efficiency of Valeera Sanguinar. Unlike her predecessor, Valeera Sanguinar introduces a rogue-inspired toolkit to the player's arsenal.
During the initial Beta testing phases, there were concerns regarding her durability, as she often struggled to survive against large groups of enemies. However, in the release builds leading up to launch, Blizzard has implemented substantial buffs to her survivability. Her Vampiric Reaping passive has been reworked, transforming her from a fragile damage-dealer into a versatile hybrid capable of off-tanking and self-sustaining through combat. This adjustment ensures that players of all classes — from sturdy tanks to fragile casters — will find her to be a reliable partner in high-tier content.
Combat Curios are the slot where a companion stops feeling like “extra DPS”: a stun that buys you tempo, a shield that saves a low-health moment, a proc that snowballs into real AoE pressure. In Midnight Season 1, these options range from clean control to defensive spikes and scaling damage:
Utility Curios: raw stats that ramp, procs that turn trash into free cleave, and movement tricks that keep the group alive when the pull goes sideways. In Midnight Season 1, these picks lean hard into either scaling power or control over the pace of the fight.

Offensive picks. Sanctum's Edict is the cleanest “kill faster / snowball harder” lever because it ramps while you fight and then turns that ramp into a shield spike instead of a fragile glass moment. Valeera gains Sanctum's Blessings in combat and from kills (Elites grant 10, normal mobs 2). Each Blessing gives +1% to damage and healing, and at 30 stacks she converts 60% of her current health into an absorb shield, and while that shield is up the Blessing bonuses get stronger.
That’s why it plays so well early: it’s damage, it’s tempo, and it quietly patches survivability at the exact point you’re most stacked. Pair it with Overflowing Voidspire when your pulls actually last: after 25 seconds of combat, you and Valeera deal 18% more damage and healing for 35 seconds (with a 35-second cooldown). If your route is “short pulls, constant resets,” Voidspire can starve; in that case, Ebon Crown of Subjugation becomes the more reliable second slot because it pays out whenever you open Mislaid Curiosities — each Subjugated Burden adds +2% Primary Stat, up to 12 Burdens, and the per-Burden value increases after 6 worshipers.
Defensive picks. If wipes are coming from sudden drops (or you’re pushing tiers undergeared), Mantle of Stars is the “stop the bleed” button: when any party member falls below 40% health, it grants an absorb shield equal to 50% max health, knocks up nearby enemies, and makes them take 25% more damage for 12 seconds (with a 2-minute internal cooldown). It’s not a DPS race tool; it’s an insurance policy that turns a near-death dip into a recoverable pull.
For movement-heavy delves and kiting patterns, Time Lost Edict is the utility-style defensive: it procs a sanctified area at a party member’s location for 12 seconds, giving allies +20% movement speed while enemies suffer the opposite. Motionless Nulltide is the “control” pick: standing still stacks movement speed up to 20 stacks, and jumping at 20 converts it into a haste burst (2% Haste per stack for 20 seconds) plus a knock-up, but it demands discipline and can feel awkward in mechanics that force jumps.
What’s “really best” right now:
Delves don’t feel like a side activity anymore as they are like a real mode with teeth now! The runs are denser, the mistakes are louder, and the “free” pulls punish you the moment you stop paying attention. That’s the upside too: every decision matters. Which Curio you slot, how you pace combat uptime, when you trade a defensive proc for damage — it all shows up on the screen. The better you get at reading pressure and controlling tempo, the more Delves start rewarding you instead of merely allowing you to finish.
Once you reach Rank 1 of the Delver's Journey, Mislaid Curiosities provide you with boons that increase your stats. Each boon lasts only 5 seconds, so use them well. Look for them marked on your map:
Strange Disturbance vignettes are rares that you can see marked on your map. Defeat a Strange Disturbance to get an extra passive ability.
Delves Tier 4 and higher will have the Nemesis Strongbox affix. This adds groups of Nullaes' allies to the delve. Defeating these groups will upgrade a Nemesis Strongbox in the treasure room at the end of the delve. You can see how many groups need to be defeated for maximum rewards by hovering over the icon in your objectives.
You may encounter any of the following:
After reaching the 5th level of the Delver's Journey, you'll unlock Zah'ran, a Delve trinket vendor who appears at the end of Delves Tier 6 or higher. Zah'ran offers a selection of trinkets that refresh daily on a 5-day rotation. Each trinket is available twice during the 5-day rotation period.
Zah'ran accepts Undercoins, but once you have reached Rank 9 of the Delver's Journey, they will also accept Untainted Mana-Crystals, which have a chance to drop from Tier 11 Bountiful Coffer.
Midnight Delves represent the definitive evolution of the format, finally realizing the true potential of the system. We are moving beyond the claustrophobic constraints of the past into sprawling outdoor layouts, joined by companions who carry actual narrative weight, and facing down Nemesis bosses that demand genuine mechanical skill. With tight integration into the seasonal gearing path, this is a far cry from the experimental systems of TWW; it is now a robust, fully realized endgame pillar that heavily rewards the time and effort you invest.
The divide between the casual and the competitive will be forged here. Players who treat Delves as a non-negotiable daily ritual — systematically clearing Bountiful runs, pushing tier limits in lockstep with their gear progression, and aggressively targeting 'Torment's Rise' before the mid-season plateau — will secure a massive statistical advantage over those who ignore the system. It is a very efficient engine for early player power, and ignoring it is a strategic error.
Season 1 launches on March 17, 2026. The race for the prestigious Nemesis title begins the second the servers go live. Do not wait for the meta to settle — analyze the track, prepare your strategy, and get ahead of the curve.