Login

Forgot password?

Sign up

Recover password

Contact us

Support working hours
Ready to help 24/7
Link copied to clipboard!
Table of Contents

Loa-Blessed Wayfarer Mount Guide

Updated 18 Oct 2026 | Author: Invord | ~7 min

The Loa-Blessed Wayfarer is a spectral, otherworldly construct said to be as ancient as the Loa themselves. Its form carries the weight of ancient rituals and the solemn duty of guiding souls to De Other Side, wrapped in the striking, spiritual aesthetic of the Amani and the Labyrinth. The flavour text hints at its eternal purpose: "A construct as ancient as the loa themselves, tasked with ferrying spirits unto De Other Side." For collectors who thrive on solo challenges and seek mounts that reflect their prowess in the most demanding Delve content, the Loa-Blessed Wayfarer is a striking trophy.

Introduced in patch 12.1.5 "Curse of Ula'tek", the Loa-Blessed Wayfarer is the seasonal reward for defeating the Labyrinth's final boss, Kindo'jan, on Tier 11 entirely solo. Unlike some mounts that can be brute-forced through gear alone, this one requires a true test of skill, mechanical awareness, and patience, as a single misstep in Kindo'jan's arena can end the run. For players who love the challenge of the "Let Me Solo Him" achievements, this is your next great conquest.

  • Added in patch: 12.1.5 "Curse of Ula'tek"
  • Mount type: Flying
  • Source: Achievement reward
  • Requirements: Defeat Kindo'jan on Tier 11 solo
  • Availability: Limited-time (Midnight Season 2)

How to Get Loa-Blessed Wayfarer

Loa-Blessed Wayfarer

The Loa-Blessed Wayfarer is obtained by completing the achievement Let Me Solo Him: Kindo'jan. This requires you to defeat the Labyrinth's final boss, Kindo'jan, on Tier 11 — the highest difficulty available — without any other players in your party. Valeera Sanguinar is allowed as your companion. This is a 100% guaranteed acquisition once you complete the achievement, but the encounter is notorious for its punishing mechanics and strict no-hit requirements.

Important: This mount is tied to Midnight Season 2. While the base achievement for the mount does not have the strict one-week deadline of the Fabled title, seasonal rewards are typically removed once the season ends. Do not put this off indefinitely if you want to secure the mount.

Where to Find Kindo'jan

Kindo'jan does not appear in a standard Delve or open-world encounter. Instead, he is the final boss of the The Labyrinth of Kindo'jan, a massive, procedurally generated challenge located north of Amani Pass in Eversong Woods, on the border with Zul'Aman.
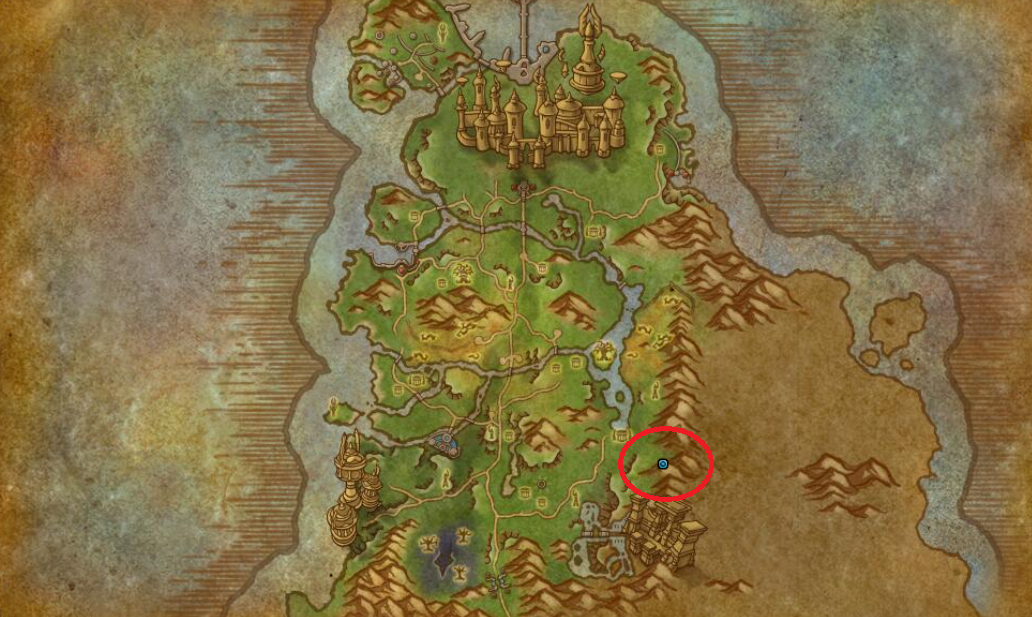
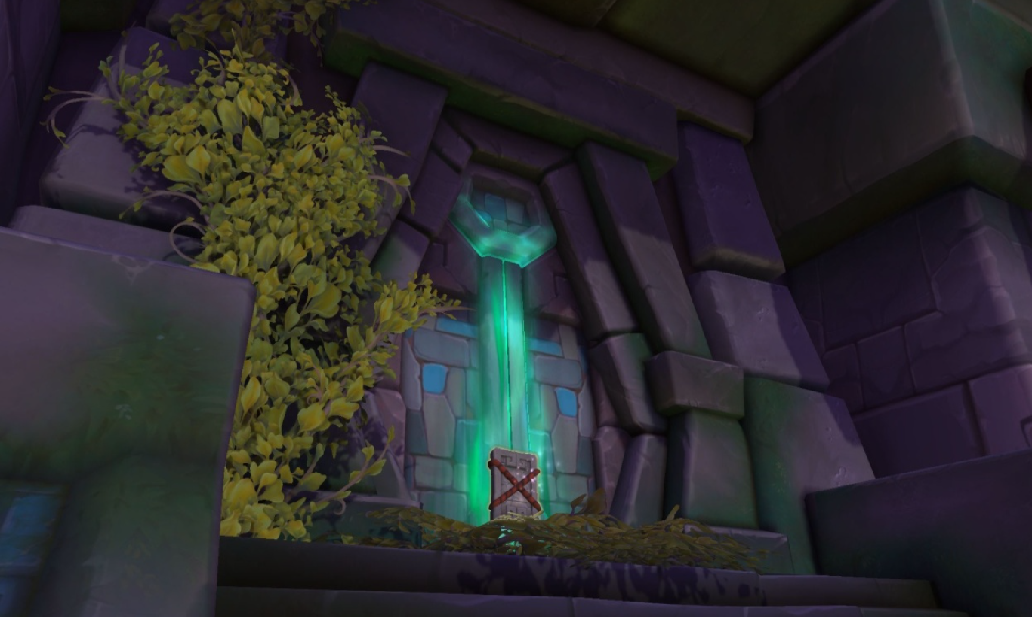
  • /way #2395 63.0 72.2 - Labyrinth of Kindo'jan Entrance

Unlocking the Labyrinth of Kindo'jan

Before you can challenge Kindo'jan, you must unlock the Labyrinth itself. Fly to Tokka's Landing and pick up the quest The Labyrinth from Kul'amara the Fierce. After accepting the quest, meet with Valeera at the Labyrinth entrance to get started.

Your first run will serve as a tutorial to demonstrate how to traverse the many chambers. Starting with the quests Dangers Untold and Hardships Unnumbered, you will clear the initial Chamber of Rites at the entrance. Your path will then be blocked by an impassable Spirit Gate. Fortunately, the spirit of Kinduru — Akil'zon's most recent speaker who was killed by Zul'jan — appears to help. With his aid, access to the next two chambers is made available.

After clearing these initial chambers, your tutorial run will end, and you will be forced to return to Kul'amara. At this point, the full Labyrinth experience is unlocked Warband-wide.

Reaching the Boss Arena

To reach Kindo'jan's arena, you must clear all nine chambers of the Labyrinth in a single run on Tier 8 or higher. Once you have defeated him for the first time, subsequent runs will only require clearing about four chambers to reach him again, making repeated attempts much faster.

  • Access NPC: Kul'amara the Fierce at Tokka's Landing
  • Entrance Location: North of Amani Pass in Eversong Woods

Unlocking Tier 11

To access the difficulty required for the mount, you must first prove your ability in the Labyrinth. Tier 11 is the highest tier available, and it is unlocked through standard Delve/Labyrinth progression. You will also want to ensure you have a high enough item level; community testing for the encounter puts the recommended item level at 309 for a comfortable Tier 11 solo.

Companion and Class Recommendations

Unlike previous Nemesis fights, Valeera Sanguinar plays a crucial role here and does not have a deadly interrupt or dispel that you need to manage. Your setup should focus on survivability and controlling the adds:

  • Valeera's Role: Set her as a Healer if you struggle to survive, or as DPS so she can automatically interrupt the Amani Juggernaut's shield (Amani Aegis).
  • Curios and Poisons: PTR clears favored the Corrosive Bilespear (Combat), Soul-Cracking Dreamcatcher (Utility, to increase the Juggernaut's damage taken when interrupted), and Bursting Toad Toxin (Poison).
  • Survivability over DPS: The 10-minute enrage timer is generous. Passive self-healing and mobility are far more valuable than raw damage, as the fight is a test of avoiding hits rather than a DPS check.

Extra Tips and Common Mistakes

  • The Three-Strike Rule: The single most important mechanic is "Disgraceful Display." Every time an avoidable mechanic hits you, you gain a stack. At three stacks, you are instantly removed from the encounter. You must play flawlessly to succeed.
  • Clear every chamber for Boons: Before pulling Kindo'jan on Tier 11, make sure you fully clear all nine chambers and loot every Mislaid Curiosity. These Boons (health, speed, stats) persist into the boss fight and are essential for a smooth kill.
  • Save cooldowns for Phase 2: Do not use Bloodlust/Heroism or major offensive cooldowns on the mini-boss or in Phase 1. Save them for Phase 2 when Kindo'jan returns and the Loa mechanics overlap with his standard abilities.
  • The mount is solo-only: You must defeat Kindo'jan on Tier 11 without any other players in your party. No group kills count for the achievement. Valeera does not count as a party member.
  • Practice on Tier 8: The mechanics are identical on lower tiers. Spend a few attempts learning the Loa intermissions and the Amani Juggernaut's charge behavior before committing to a Tier 11 run.
  • This mount is seasonal: Once Midnight Season 2 ends, the Loa-Blessed Wayfarer will become unobtainable. Do not wait until the final weeks of the season to start learning the fight.

Want to master the encounter? If you want to learn more about all of Kindo'jan's abilities, study the fight tactics in detail, and understand the perfect Valeera setup, we highly recommend checking out our dedicated guide:

Kindo'jan Solo Guide

Useful Addons for Getting Loa-Blessed Wayfarer

Farming the Loa-Blessed Wayfarer requires flawless execution and a deep understanding of the Labyrinth's mechanics. The right addons can help you track your progress and react to the boss's abilities.


  • Deadly Boss Mods (DBM) – Delves/Labyrinth Module: Provides timers and warnings for Kindo'jan's abilities, including the start of the Loa intermission and the timing of Crushing Blow or Whirling Axes.
  • HandyNotes – Delves (plugin): Displays Labyrinth locations and points of interest on your map, helping you navigate to Tokka's Landing and the Labyrinth entrance quickly.
  • TomTom / Paste: Quickly set waypoints to the Labyrinth entrance and key NPCs.
  • SavedInstances: Tracks which characters have completed the Labyrinth and unlocked Tier 11, which is useful if you are attempting this on multiple characters.
  • Leatrix Plus: Quality-of-life improvements like auto-repair and auto-sell junk, which save time during the long, multi-chamber Labyrinth runs.
The Loa-Blessed Wayfarer demands flawless execution in one of Midnight's most punishing solo encounters. If you want to secure this seasonal mount without the stress of learning every mechanic from scratch, information about professional assistance is available through our Loa-Blessed Wayfarer service.
Table of Contents