
The Prey system is one of Midnight's most distinctive endgame features, built around high-stakes hunts, escalating difficulty, and rewards that scale with how far you are willing to push. It turns open-world progression into something far more deliberate, asking you to track targets, prepare for tougher encounters, and make each completed hunt feel like real forward momentum rather than routine checklist content.
What makes Prey stand out is the way it blends structure with pressure. The system is easy to approach at first glance, but once the harder layers open up, it quickly becomes something players need to understand properly if they want efficient progression, smoother clears, and access to its best rewards.
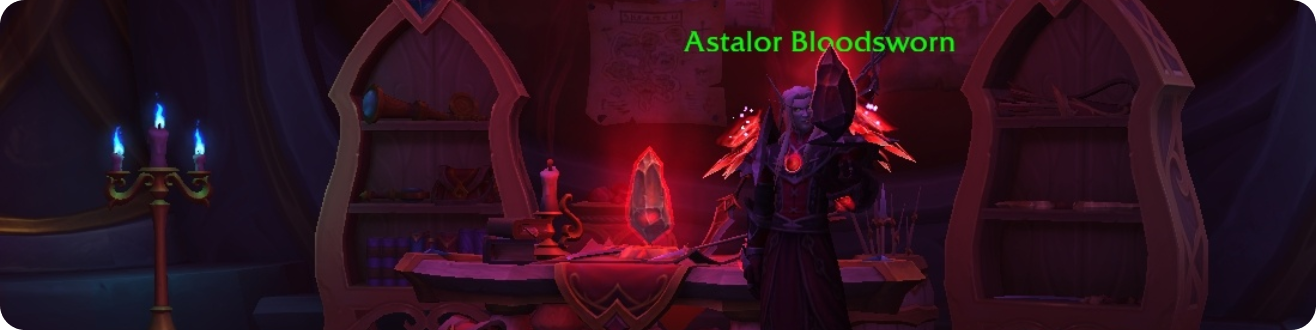
Unlocking Prey starts at Level 90, but reaching the level cap is only part of it. You also need to finish the main Midnight campaign before the system becomes available. Once that requirement is done, head to Silvermoon City and speak with Astalor Bloodsworn, who begins the introductory quest chain with Prey: Astalor's Initiative.
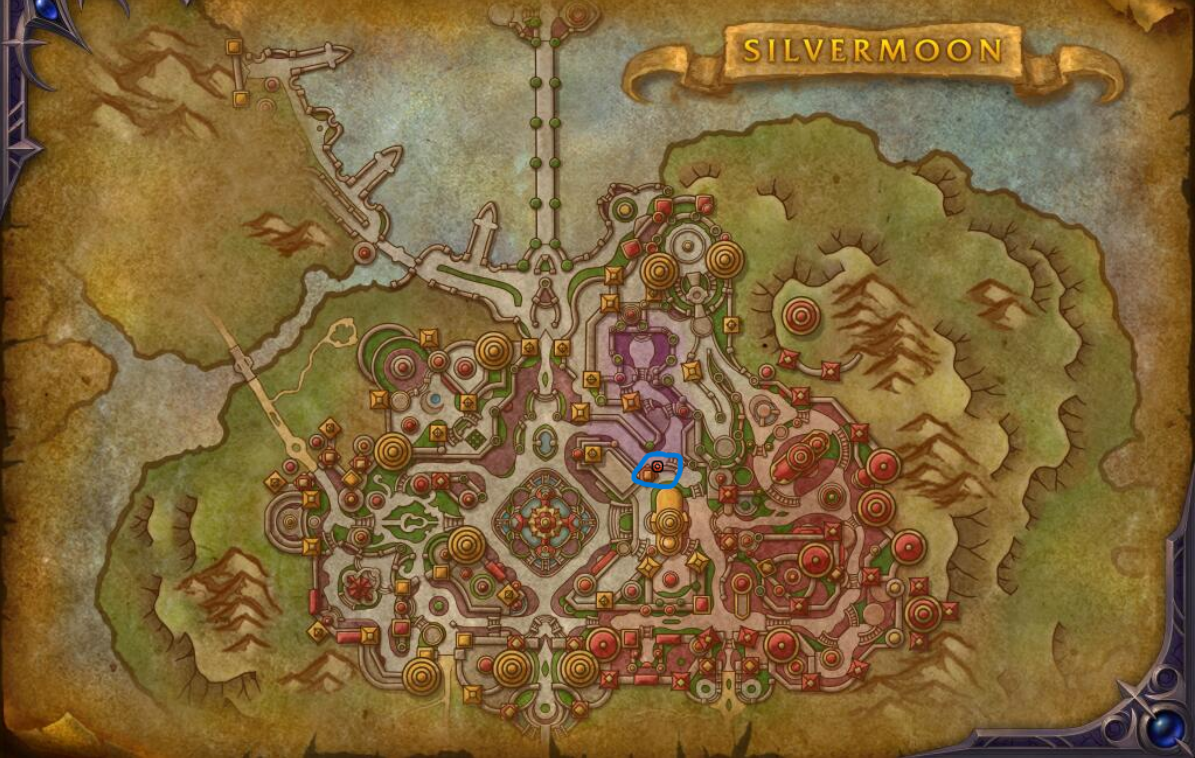
Astalor's Sanctum is marked on your map, so finding the starting point is straightforward once the quest unlocks. If you want the exact location, use /way 2393 55.0 63.4 Astalor Bloodsworn. This sends you directly to the NPC in Silvermoon and lets you start the unlock sequence without wasting time searching through the city.
From there, keep following the questline until you complete To the Sanctum!. Finishing that step opens your first set of Normal Hunts through the Hunt Table inside Astalor's Sanctum. That is the point where the system fully becomes available, giving you access to the basic version of Prey before you move into its harder difficulty tiers later on.
After choosing a contract, head into the zone tied to that hunt. Almost any relevant outdoor activity helps move the process forward, including World Quests, the extra world content tied to the system, rare kills, treasure interactions, and other Prey-specific objectives. Each step helps Astalor Bloodsworn narrow down your target's location and pushes the hunt closer to its final stage.
Prey also adds its own zone-based interactions that only appear while the system is active. Your target can ambush you while you are out doing world content, traps can be disarmed and then turned against that target to force an immediate retreat, and you may also need to deal with Coalesced Anguish enemies that spawn in the area.
Once you have completed enough of these objectives, Astalor Bloodsworn will reveal where your prey is hiding. At that point, you can summon the target, kill it, and claim the rewards tied to the difficulty you completed:
The Prey system has three difficulty tiers, and you can complete one hunt per difficulty, per zone, each week:
Hard and Nightmare hunts also include extra affixes during the encounter. These affixes depend on difficulty and are expected to rotate over time.
Each Hunt difficulty adds new affixes, making encounters more demanding as you move up the system.
Nightmare Hunts include every affix from the lower difficulties:
| Affix | Difficulty | Description |
|---|---|---|
| Ambush | Normal | Your target can occasionally jump you while you are fighting other enemies or after you trigger a trap. |
| Torment | Hard | Astalor Bloodsworn's artifact afflicts you with Torment, increasing damage taken by 2%. The effect builds further as your hunt progresses. |
| Hunter's Momentum | Hard | Dying anywhere in the zone reduces your current hunt progress. |
| Seeping Gore | Hard | During combat, gore can appear beneath you and explode after a short delay, dealing Shadow damage. |
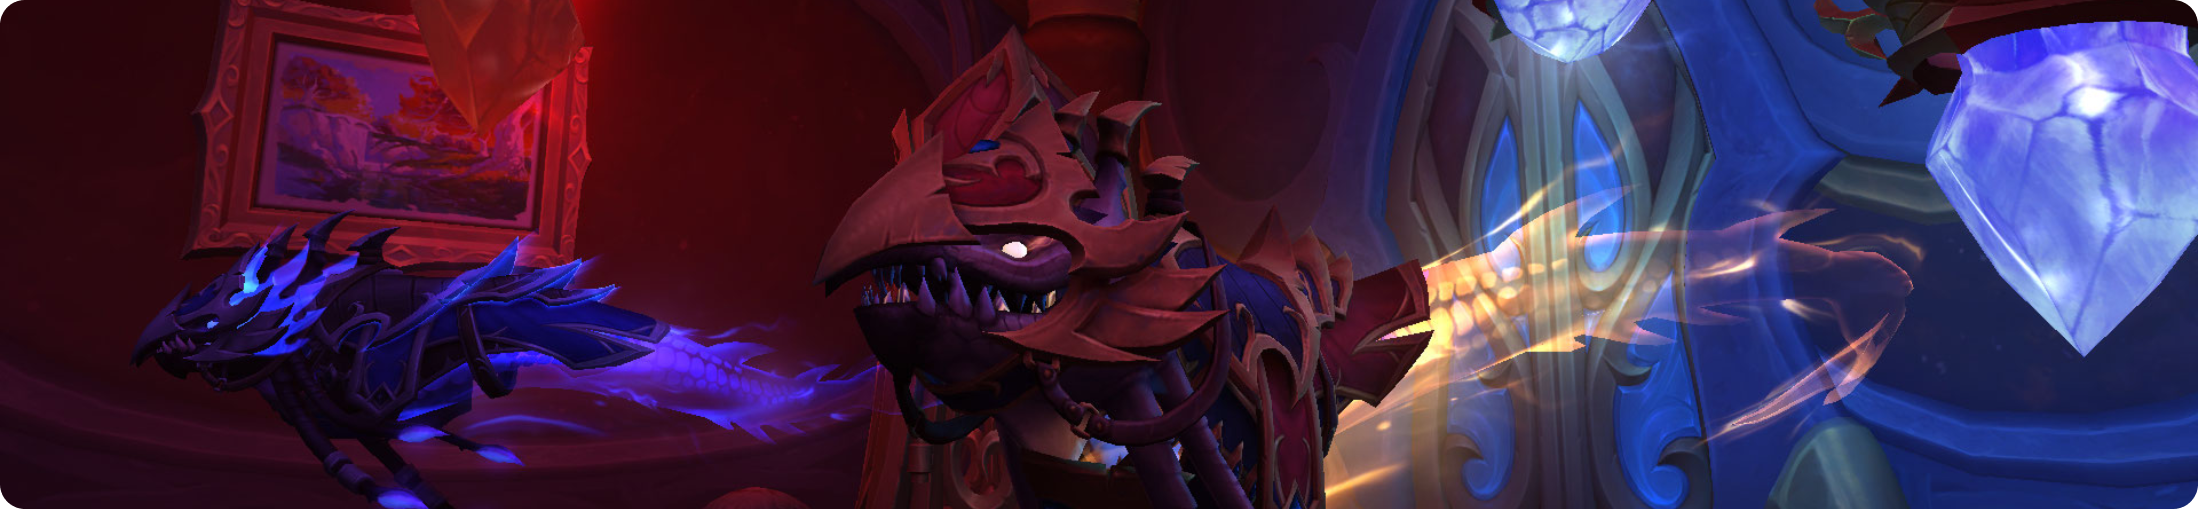
| Echo of Predation | Nightmare | A bloody spirit periodically stalks you and deals massive Shadow damage if it reaches you. |
| Bloody Command | Nightmare | Astalor Bloodsworn occasionally orders you to kill an enemy. Failing to do so causes a heavy bleed that deals massive Physical damage. |
Once Prey is unlocked, you can begin each hunt from Astalor's Table inside his sanctum in Silvermoon City.
Interacting with the table opens a map of all four Midnight zones, where you choose the target you want to pursue. Each week, you get one hunt per difficulty in every zone. After selecting your prey, travel to the corresponding zone to begin tracking it.
While you are in that zone, a red crystal icon appears on your interface and shows how close you are to locating the target. Progress comes from local activities such as World Quests, rare kills, and hunt-specific objectives tied to Prey.
A fast way to move the hunt forward is to complete the prey-related World Quest that appears for that target. The surrounding area can also contain traps you can interact with for extra progress.
At times, your target will jump you before the hunt is finished. When that happens, reduce it to 50% health and it will retreat. After it escapes, look for the faint red cloud marking its position. Moving close to it lets you interact with the hidden target and use Riposte for additional hunt progress.
When the progress bar is full, the game reveals your prey's final location. Head there, click the crystal to start the encounter, and kill the target to complete the hunt.
Hard and Nightmare difficulty are not available right away. To access both tiers, you first need a Level 90 character and must finish the introductory Prey questline that begins with Prey: Astalor's Initiative. That opening sequence unlocks the system itself and sets up the progression path into the harder Hunt tiers.
Hard opens through a follow-up quest from Astalor. He offers One Hero's Prey, which requires you to complete a Hunt on Normal difficulty. Once that objective is finished, Hard difficulty Prey unlocks and gives you access to a more demanding version of the system.
Nightmare difficulty comes later. To unlock it, you need to reach Rank 4 in the Prey progression track. After that, Astalor offers a short questline that starts with Dark Mending and ends with The Sheep or the Wolf. Completing that chain unlocks Nightmare difficulty, the highest tier tied to the system.
Both harder modes add extra affixes and require more objectives before your target can be fully tracked down. Hunts take longer, punish mistakes more heavily, and ask for better preparation, but the return is stronger progression value across the board:
Like Delver's Journey, Prey has its own seasonal progression track built around steady long-term advancement rather than a single chest at the end of each Hunt. Prey: Season 1 has 10 ranks, and each rank adds another layer of rewards to the system. That gives Prey a second progression path running alongside the direct loot from Hunts themselves, so the feature keeps rewarding you even when you are not chasing one specific item drop.
You move through that track by earning Preyseeker's Journey from completed Hunts. Every successful Hunt therefore contributes in two ways at once: it gives you the immediate reward tied to the difficulty you finished, and it also pushes your seasonal Prey progress forward. That extra layer is what makes the activity feel more persistent over time. Instead of treating Hunts as isolated weekly kills, the system ties them into a broader reward structure that keeps building from one completion to the next.
That progression matters because Preyseeker's Journey is also tied to a meaningful part of the reward ecosystem around Prey. As you climb through the ranks, you unlock access to more of the system's cosmetic and collection-based items, including rewards sold by Construct V'anore. In practice, that means the Journey track is not just background flavor or a passive renown bar. It directly shapes how much of the full Prey reward pool you can actually access, especially if you care about transmogs, mounts, pets, toys, and housing decor rather than gear alone.
The result is a system with much better long-term structure than a simple hunt-and-loot loop. Even when a specific Hunt does not give you the exact item you wanted, it still adds value by feeding the seasonal track and moving you closer to the next rank breakpoint. That makes Prey more consistent as a weekly activity, because each completion still contributes to visible account progression instead of feeling wasted once the immediate chest is opened.
The Prey system is not built around a single reward chest. Its value comes from how many different progression paths it feeds at once. Completing Hunts gives you immediate loot based on difficulty, advances your seasonal progress through Prey: Season 1, and contributes toward the World row of the Great Vault. That layered structure is what makes Prey worth doing beyond the first clear, since each Hunt can still move several parts of your weekly and long-term progression forward at the same time.
That reward spread also gives the system a much broader purpose than simple open-world gearing. Some rewards are aimed at character power, such as upgrade-track gear, currencies, and Great Vault progress, while others support longer collection goals through vendor unlocks, cosmetic sets, mounts, pets, toys, profession recipes, and Housing decor. Because of that, Prey stays relevant for more than one type of player. Whether you care most about efficient gearing, seasonal progression, or building out cosmetic and collection rewards, the system offers multiple reasons to keep engaging with it over time.
The sections below break those rewards down by category, starting with what you get directly from Hunts and then moving into the seasonal Journey track, Great Vault value, vendor purchases, and the cosmetic and collection rewards tied to deeper Prey progression.
Completing a Hunt grants Preyseeker's Journey progress, gold, and a Preyseeker's Adventurer Chest with several possible rewards.
Repeating the same difficulty after that still gives Preyseeker's Journey and rewards a Preyseeker's Adventurer Sack. It contains the same general reward pool as the chest, but without the gear piece.
Completing Hunts adds progress to the World row of the Great Vault. To unlock all World Great Vault slots, you need a combined total of 8 Delves, Hunts, and/or other Open World activities.
Prey Hunts count toward that World-row progress, making the system another way to help fill your weekly Great Vault options.
The reward track from Prey Hunts scales with difficulty:
Construct V'anore, found inside Astalor's Sanctum, serves as the main vendor for several Prey-related rewards. Its inventory includes currency exchanges, cosmetic items, transmogs, and mounts.
Prey Hunts can drop three tiers of Anguish Runes: Anguish-Scribed Runes, Anguish-Infused Runes, and Anguish-Permeated Runes. These can be traded to Construct V'anore for several different currencies.
Construct V'anore sells transmog ensembles and individual cosmetic armor pieces purchased with Prey currency. The ensembles are the more accessible option, since they can be bought immediately without any rank requirement, making them an easy way to pick up a full cosmetic set early. The standalone armor pieces are more restricted and unlock at specific Preyseeker's Journey ranks, so collecting the full cosmetic lineup takes more time and steady progress through the system:
| Item | Cost | Required Preyseeker's Journey |
|---|---|---|
| Ensemble: Preyseeker's Refined Armor | 1600 Remnant of Anguish | - |
| Ensemble: Preyseeker's Sleek Armor | 1600 Remnant of Anguish | - |
| Ensemble: Preyseeker's Rugged Armor | 1600 Remnant of Anguish | - |
| Ensemble: Preyseeker's Polished Armor | 1600 Remnant of Anguish | - |
| Skilled Preyseeker's Plumed Helm | 400 Remnant of Anguish | Rank 3 |
| Skilled Preyseeker's Shoulder-spikes | 400 Remnant of Anguish | Rank 3 |
| Famed Preyseeker's Shoulder-spikes | 500 Remnant of Anguish | Rank 6 |
| Famed Preyseeker's Knapsack | 500 Remnant of Anguish | Rank 6 |
Construct V'anore sells profession recipes for Enchanting and Inscription. Buying them requires at least Level 50 in the matching profession. In addition to Remnant of Anguish, these recipes also cost either Artisan Enchanter's Moxie or Artisan Scribe's Moxie:
Construct V'anore also offers two pets, two mounts, and a toy through the Preyseeker's Journey reward lineup. Voldy can be bought right away, while the other rewards unlock at specific Preyseeker's Journey ranks:
| Item | Cost | Required Preyseeker's Journey |
|---|---|---|
| Voldy | 800 Remnant of Anguish | - |
| Preyseeker's Hubris | 2000 Remnant of Anguish | Rank 5 |
| Preyseeker's Hearthstone | 2000 Remnant of Anguish | Rank 6 |
| Lil' Preyseeker | 1200 Remnant of Anguish | Rank 9 |
| Preyseeker's Wrath | 2550 Remnant of Anguish | Rank 10 |
The final mount reward, Preyseeker's Nightmare, comes from completing Prey: Nightmare Mode III. That achievement requires you to defeat every unique Prey target on Nightmare difficulty.
Prey also adds a dedicated set of Housing decor rewards, and Construct V'anore is the vendor tied to that part of the system. In addition to mounts, pets, transmogs, and currency exchanges, Construct V'anore sells three decor-focused Inscription techniques that let players unlock extra furnishing options for Player Housing. These rewards are tied less to power progression and more to long-term collection value, giving Prey another reward layer beyond gear and seasonal currency.
Housing decor is not limited to vendor purchases. Prey also ties a large part of its cosmetic collection to boss-specific achievements, turning the harder versions of the system into another source of long-term decorative rewards. Instead of giving the same item across every tier, these achievements split the decor by difficulty, so the reward itself reflects how far you pushed each encounter.
Defeating a boss on Hard grants its Bust variant, while the Nightmare version awards the matching Effigy. That creates a clear progression path for collectors: Hard fills out one side of the decor set, and Nightmare completes the more demanding counterpart. For players interested in Player Housing rewards, Prey is not just a gearing activity, but also a steady source of boss-themed display pieces tied directly to achievement completion:
