




Jewelcrafting is built around compression. Ore comes in rough and bulky; a Jewelcrafter turns it into gems, rings, necklaces, and profession accessories that carry a lot of value in small packages. It is also one of the most market-sensitive professions in the game, because its materials move through several stages: prospecting, crushing, cutting, crafting, and finally selling either the finished item or the reagent another profession needs.
Leveling Midnight Jewelcrafting should be planned around material flow, not just recipe color. Prospecting alone is rarely enough, because specific materials are needed at specific points, and crushing, reagents, jewelry, and production all pull the profession in different directions. This guide keeps those decisions clear so you can move from 1 to 100 without treating every ore stack as a gamble or spending Knowledge before you know whether you are building for sockets, jewelry, reagents, or Crafting Orders.
You can learn Midnight Jewelcrafting from Amin in Silvermoon City. If your character has never learned Jewelcrafting before, pick up the base profession first, then train the Midnight version from the same trainer.
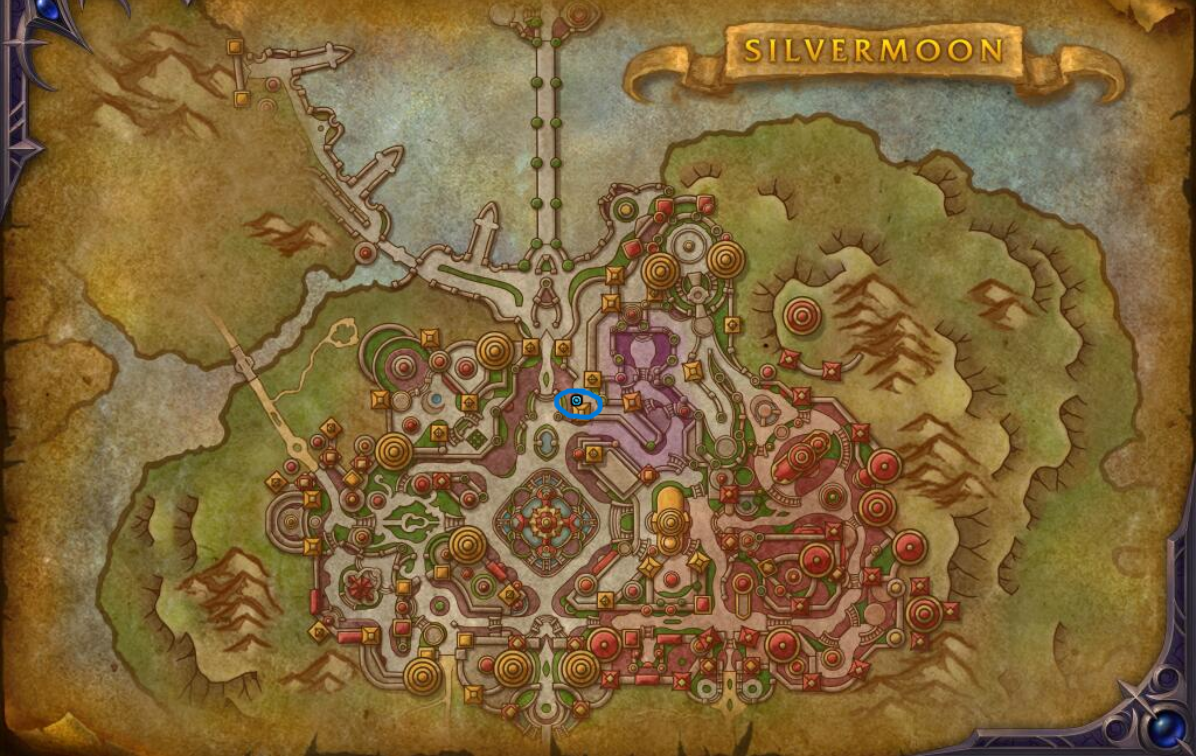
If you do not have Jewelcrafting tools yet, buy a Jeweler's Toolset from the Jewelcrafting supply vendor near the trainer. Gelanthis is the main supply vendor you will use in Silvermoon City, and he is also important later if you decide to finish the profession through profession equipment recipes.
Midnight Jewelcrafting has a clean early route and a much more flexible final stretch. The first 65 skill points are mostly built around Midnight Prospecting, trainer recipes, First Craft bonuses, and one cheap filler craft. After that, the path depends on recipe access, Auction House prices, Crafting Orders, and whether you want to invest in rare or epic profession equipment.
The route below is built around a practical 1-100 leveling path with a strong Auction House focus. Mining helps a lot because you can gather your own ore and prospect it into gems, but the profession can still be leveled entirely through purchased materials if you have enough gold. The key is to avoid forcing expensive crafts too early and use Crafting Orders whenever they can replace personal material costs.
This shopping list covers the reliable early route through skill 65. You will get some gems and dust from prospecting, but the results are not perfectly predictable, so expect to buy missing materials from the Auction House after you finish your first batch of ore.
The 60 ore for prospecting can be whichever eligible ore is cheapest on your realm. The extra 5x Refulgent Copper Ore and 5x Umbral Tin Ore are listed separately because specific trainer crafts can require those materials directly.
The first part of Midnight Jewelcrafting is straightforward. Start by prospecting cheap ore, craft your early reagent, then use the First Craft Bonus filter to move through every trainer recipe up to the skill 50 batch. Keep returning to Amin as new recipes unlock.
The First Craft Bonus is what keeps the early route efficient. Open your profession window, click Filter, enable First Craft Bonus, and keep the trainer window open next to it. Craft every visible recipe once, then check the trainer again whenever you hit the next 5-skill breakpoint.
Do not mass-craft random gems during this section unless you have checked the recipe color and material price first. The route works because you take the cheap guaranteed points from first crafts, then switch to Monologuer's Chalice once the trainer-based burst is finished.
| Skill Range | Crafts | Materials and Notes |
|---|---|---|
| 1-14 |
12x Midnight Prospecting 4x Sin'dorei Lens |
Use the 60x cheap ore from the shopping list for Midnight Prospecting. After that, craft 4x Sin'dorei Lens with 4x Glimmering Gemdust and 12x Crystalline Glass. |
| 14-50 | Every trainer recipe with a First Craft Bonus | Learn new recipes from Amin whenever they appear, keep the First Craft Bonus filter enabled, and craft each new recipe once. This section uses the gems, flawless gems, Glimmering Gemdust, Crystalline Glass, Duskshrouded Stone, and small ore amounts from the shopping list. |
| 50-65 | 40x Monologuer's Chalice | Turn off the First Craft Bonus filter and craft Monologuer's Chalice until it turns grey. This costs 80x Crystalline Glass and is the cleanest cheap bridge into the 65+ range. |
You unlock your first Midnight Jewelcrafting specialization at skill 25. There is no mandatory leveling-only pick for the early route, so choose based on what you actually want to do after leveling. Glamorous Gems supports gemcutting, Alluring Accessories supports rings, necklaces, and profession accessories, Proficient Processor supports reagents, Prospecting, and Crushing, while Thoughtful Throughput improves general crafting stats.
If your goal is simple Auction House sales, gemcutting or reagent crafting is usually the easiest starting direction. If you want to fill high-value Crafting Orders later, rings, necklaces, and profession equipment become more important.
The 65-100 stretch is where Midnight Jewelcrafting becomes market-dependent. You do not have to rush these points unless you need the extra skill for higher-quality crafts without spending Concentration. If you are not trying to compete in gem or jewelry crafting immediately, stopping around 65 and finishing through Patron Orders, Public Orders, and later First Craft bonuses is a reasonable plan.
If you do want to push to 100, use the options below in the order that makes sense for your realm economy. Optional reagents and Eversong Diamond cuts can be efficient if the recipes and materials are cheap, profession equipment gives a direct gold-heavy route, and epic jewelry is best handled through Crafting Orders because Spark-based materials are too expensive to mass-craft personally.
Optional reagent recipes can be a cheap leveling tool, but only if you can get the recipes at a reasonable price. Both recipes are tradeable, so check the Auction House before committing to this path. If the recipe cost is too high, skip this option and use diamonds, profession equipment, or orders instead.
| Recipe | Materials | Recipe Access |
|---|---|---|
| Prismatic Focusing Iris | 2x Sin'dorei Lens, 2x Glimmering Gemdust | Tradeable recipe; check the Auction House |
| Stabilizing Gemstone Bandolier | 1x Sanguine Garnet, 1x Amani Lapis, 1x Tenebrous Amethyst, 1x Harandar Peridot, 3x Glimmering Gemdust | Tradeable recipe; check the Auction House |
Cut Eversong Diamond recipes are another strong option if the recipe price is reasonable. Each diamond cut gives 2 skill points, stays orange until skill 80, and then becomes yellow. The recipes drop in Midnight dungeons, but they are not Bind on Pickup, which means you can also buy them from the Auction House.
All four recipes use the same core material package: 2x Petrified Root, 1x Kaleidoscopic Prism, and 1x Eversong Diamond. Check all three material prices before crafting, because this route can become expensive if Petrified Root or Eversong Diamond spikes on your realm.
| Recipe | Shared Materials | Recipe Source |
|---|---|---|
| Powerful Eversong Diamond | 2x Petrified Root, 1x Kaleidoscopic Prism, 1x Eversong Diamond | Midnight dungeons or Auction House |
| Telluric Eversong Diamond | 2x Petrified Root, 1x Kaleidoscopic Prism, 1x Eversong Diamond | Midnight dungeons or Auction House |
| Stoic Eversong Diamond | 2x Petrified Root, 1x Kaleidoscopic Prism, 1x Eversong Diamond | Midnight dungeons or Auction House |
| Indecipherable Eversong Diamond | 2x Petrified Root, 1x Kaleidoscopic Prism, 1x Eversong Diamond | Midnight dungeons or Auction House |
Profession equipment is the most direct 65-100 route if you have enough gold. Rare profession equipment does not require time-gated materials, so you can buy the recipe and craft repeatedly if the materials are affordable. You can also use Crafting Orders to reduce your own material cost when other players need these items.
Most of these recipes are bought from Gelanthis in Silvermoon City. Expect recipe purchases to cost Artisan Jewelcrafter's Moxie, so do not unlock every profession equipment recipe blindly unless you plan to craft or sell it.
| Rare Recipe | Materials | Source |
|---|---|---|
| Sin'dorei Jeweler's Loupes | 1x Void-Tempered Hide, 6x Sin'dorei Lens, 3x Glimmering Gemdust, 3x Duskshrouded Stone | Gelanthis |
| Sin'dorei Enchanter's Crystal | 10x Glimmering Gemdust, 5x Duskshrouded Stone, 1x Dawn Crystal, 1x Silvermoon Weapon Wrap | Gelanthis |
| Improved Right-Handed Magnifying Glass | 2x Sin'dorei Lens, 10x Glimmering Gemdust, 5x Duskshrouded Stone, 1x Silvermoon Weapon Wrap | Gelanthis |
| Sin'dorei Scribe's Spectacles | 2x Sin'dorei Lens, 15x Glimmering Gemdust, 1x Duskshrouded Stone | Gelanthis |
Epic profession equipment gives 3 skill points per craft and stays orange all the way to 100. These crafts are stronger for guaranteed progress, but they use Fused Vitality and are much more expensive, so they are better handled through Crafting Orders whenever possible.
| Epic Recipe | Materials | Source |
|---|---|---|
| Mage-Eye Precision Loupes | 20x Fused Vitality, 1x Majestic Hide, 10x Sin'dorei Lens, 10x Glimmering Gemdust, 6x Duskshrouded Stone, 1x Infused Scalewoven Hide | Gelanthis |
| Thalassian Scribe's Crystalline Lens | 20x Fused Vitality, 3x Sin'dorei Lens, 20x Glimmering Gemdust, 10x Duskshrouded Stone, 1x Silvermoon Weapon Wrap | Gelanthis |
| Flawless Text Scrutinizers | 20x Fused Vitality, 4x Sin'dorei Lens, 20x Glimmering Gemdust, 4x Duskshrouded Stone | Gelanthis |
| Attuned Thalassian Rune-Prism | 20x Fused Vitality, 1x Kaleidoscopic Prism, 5x Glimmering Gemdust, 5x Duskshrouded Stone, 1x Dawn Crystal, 1x Silvermoon Weapon Wrap | Gelanthis |
If you invested into Alluring Accessories, epic rings and necklaces become one of the best ways to gain the final points. These recipes stay orange to 100, but they require Spark-based materials, so you should not mass-craft them for personal leveling unless you are deliberately making gear for yourself or a buyer.
Crafting Orders are the practical way to use this route. Customers provide the expensive bind-on-pickup materials, while you receive the skill point, First Craft value if applicable, and any commission attached to the order. This is much safer than burning your own Sparks or expensive reagents just to finish the profession.
| Jewelry Recipe | Source or Unlock |
|---|---|
| Masterwork Sin'dorei Band | Specialization: Alluring Accessories - Regal Rings |
| Loa Worshiper's Band | Vendor: Magovu in Zul'Aman |
| Signet of Azerothian Blessings | Vendor: Naynar in Harandar |
| Masterwork Sin'dorei Amulet | Specialization: Alluring Accessories - Luxurious Lockets |
| Thalassian Phoenix Torque | Drop: Belo'ren on the Isle of Quel'Danas |
| Voidstone Shielding Array | Drop: Charonus in Voidscar Arena |
Public Orders do not always appear automatically when you open the Crafting Orders interface. Open the Public Orders tab and press Search manually. Availability is realm-specific, so Jewelcrafting order volume can vary heavily depending on your server and how many players are actively gearing.
Patron Orders are NPC-generated orders that appear for your character over time. They are especially useful after skill 65 because they can give extra skill points, profession Knowledge, and progress without needing to force every point through your own materials. If you are not in a rush, checking Patron Orders regularly is usually cheaper than crafting expensive diamonds, profession gear, or jewelry only for skill-ups.





