
The Valiance is a haunting undead warhorse tied to one of the most atmospheric legacy secrets added back into the game during Dragonflight. It combines the classic Scourge/Naxxramas vibe with a modern secret-style progression chain, making it far more than a “kill a boss and pray” mount. If you enjoy collecting mounts with history, story, and puzzle-like steps, Valiance feels like a true collector’s trophy.
What makes this mount especially desirable is the contrast between effort and reward. The final item, Reins of Valiance, is a guaranteed drop once you meet the requirements - but those requirements are the real journey. You’ll unlock old versions of Scholomance and Naxxramas, gather specific items, complete a ritual, open vendor access inside old Naxxramas, and finish with a very specific interaction during the Instructor Razuvious section.

The Valiance mount is a guaranteed drop from Instructor Razuvious in old Naxxramas - but only after completing a long multipart secret chain. In other words, defeating the boss is the easy part. The time investment comes from unlocking the correct “legacy state” of two dungeons and gaining access to the vendor and items that enable the final steps.
The old versions of Scholomance and Naxxramas were reintroduced in patch 10.1.5. You must unlock both first, then unlock a vendor inside old Naxxramas to purchase key items used in the final ritual. This guide follows the exact order so you don’t waste time backtracking.
Your first goal is unlocking old Scholomance. To begin, you need someone in your party who owns the Krastinov's Bag of Horrors toy. This toy drops from the rare elite Doctor Theolen Krastinov, who can sometimes spawn after killing Rattlegore in the Mists of Pandaria Heroic version of Scholomance. You do not need the toy yourself - bringing a friend who has it works perfectly.
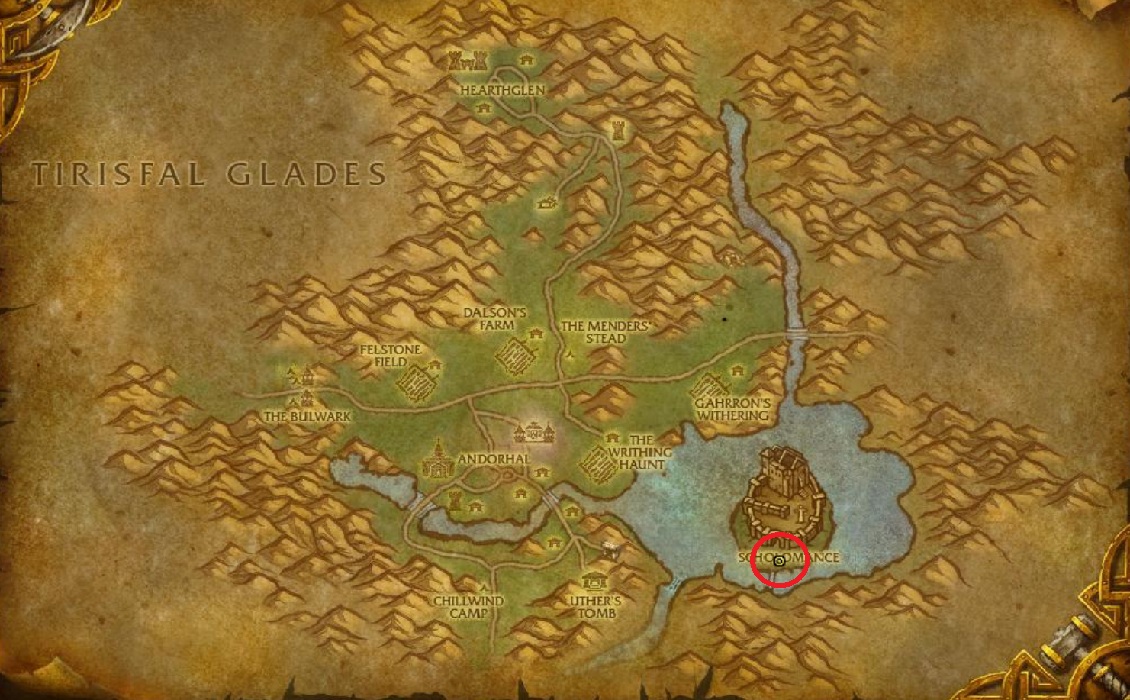
Next, head to the Western Plaguelands in the Eastern Kingdoms.
Once you arrive in Western Plaguelands, enter the MoP revamped Scholomance.
The dungeon entrance is located here: /way 69.8 73.5
Clear the dungeon and defeat all bosses. After you kill the final boss, Darkmaster Gandling, stay in his room. Go back up the stairs to the top level and enter the center room. In the back-left area, you should find a pile of bones.

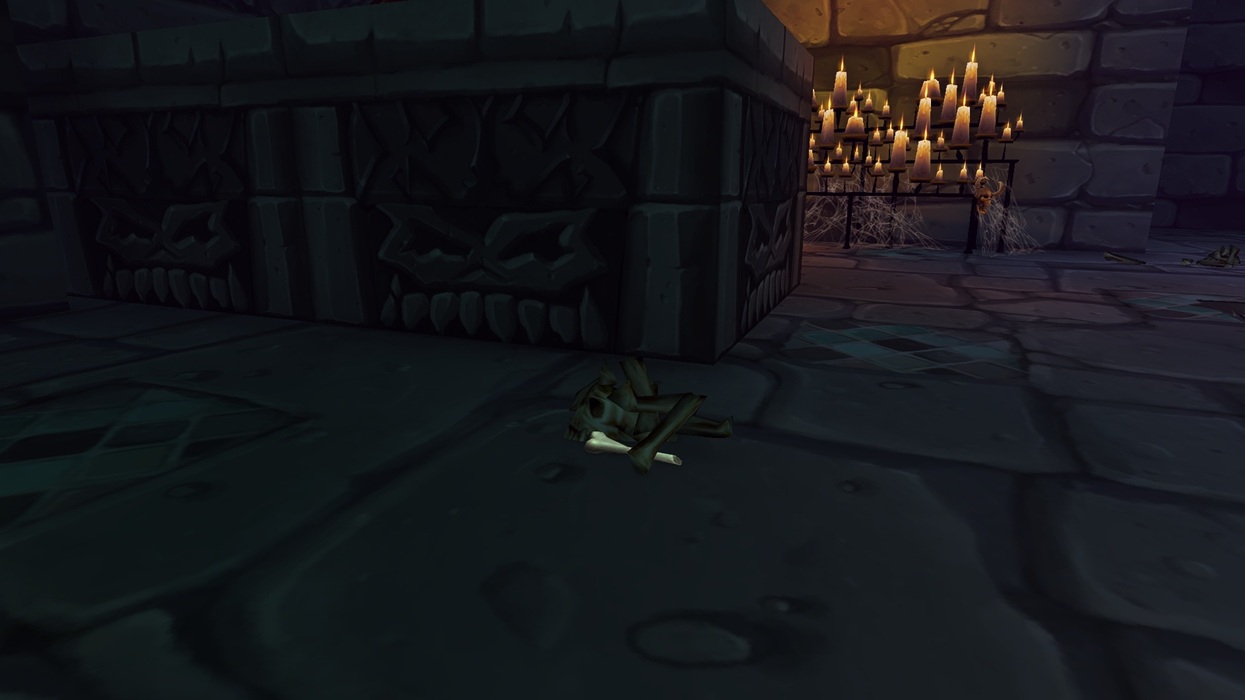
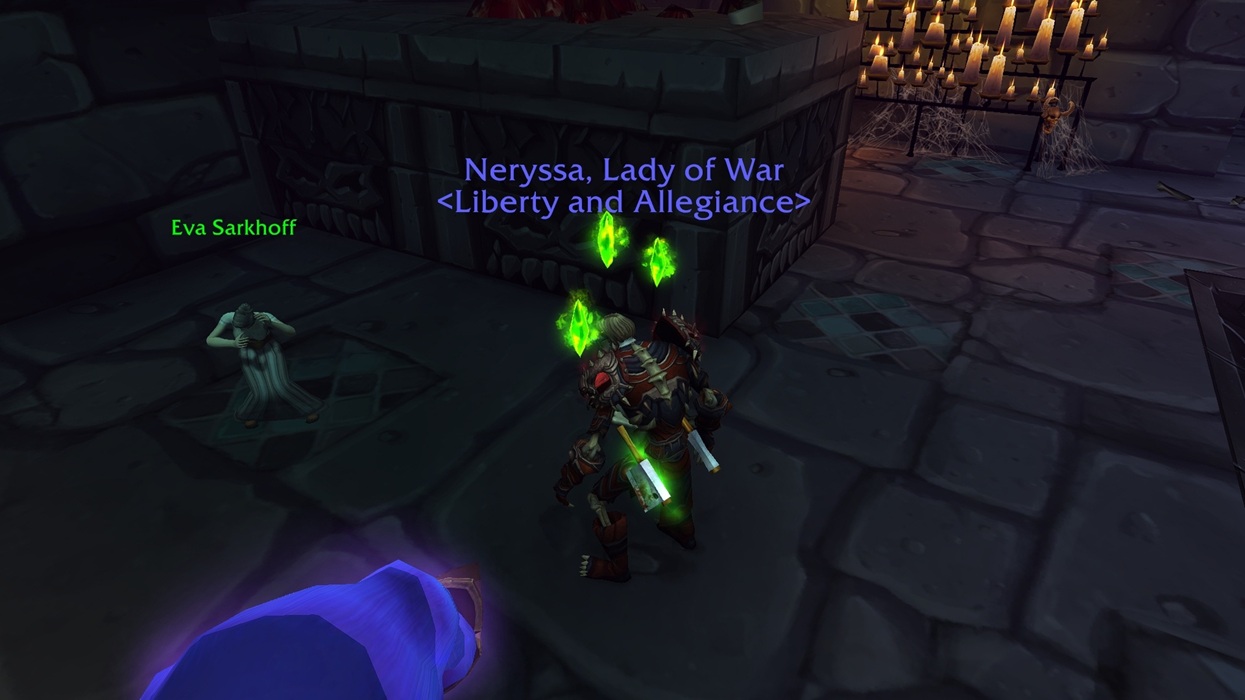
At this point, the player with Krastinov's Bag of Horrors must use the toy directly on the bones. You should see the ghost of Eva Sarkhoff. Speak to her and she will give you an Inert Spectral Essence.
Important detail: the toy applies a transformation effect. Remove/cancel the transformation buff before talking to Eva, otherwise she will refuse to speak to you because she is “afraid.”
Now repair the essence using the items you bought earlier: 3 Dark Rune and 5 Essence of Undeath. The repaired version becomes Spectral Essence, a trinket that lets you see and interact with specific ghosts for the remainder of the chain.
Before you leave the instance, there are two more important pickups. First, loot Eva's Femur from the ground near the same bones pile.
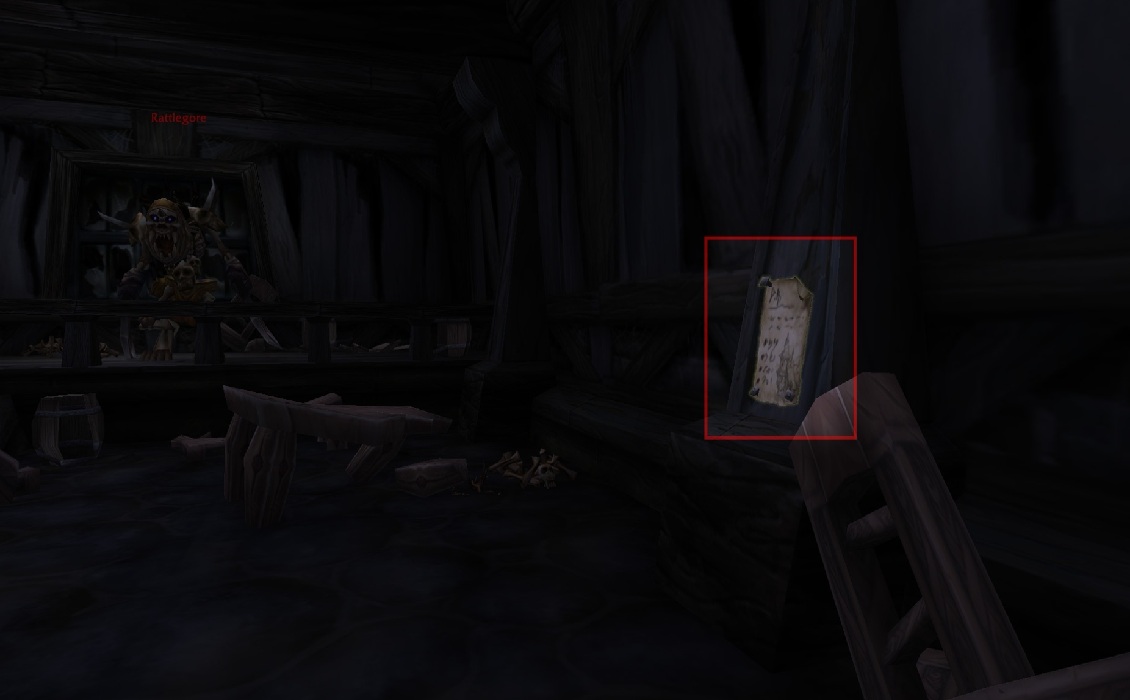
Second, backtrack to the Viewing Room (the room right before Gandling’s). On the bottom level, to the right of the corridor entrance back into Gandling’s room, you’ll see a glowing purple brazier and two bookcases. On the left bookcase, look for a well-hidden book on the right side of the middle shelf level.

Loot the hidden book to obtain Eva's Journal. After that, leave the instance. Walking out is recommended because your next steps continue in Western/Eastern Plaguelands.
Outside of Scholomance, speak to Eva again. She will task you with finding five candles. You can collect the needed objects first and then complete the trades in Caer Darrow in one trip if you prefer efficiency over back-and-forth travel.
The first item is in the Andorhal town hall, hanging on the wall to the right of where Rattlegore normally appears. Loot The Deed to Andorhal, then trade it to the ghost Magistrate Marduke to receive Authentic Andorhal Candle. The Magistrate stands near the entrance to Scholomance, to the right of a wagon.

Andorhal Town Hall
The Deed to Andorhal
Pick up Caer Darrow Fountain Water. It appears as a bucket sitting on the edge of the fountain in Caer Darrow. Bring it to Joseph Dirte, found on the second level near a wall to the left side of town. He will trade you the Stinky Candle.
Caer Darrow Fountain
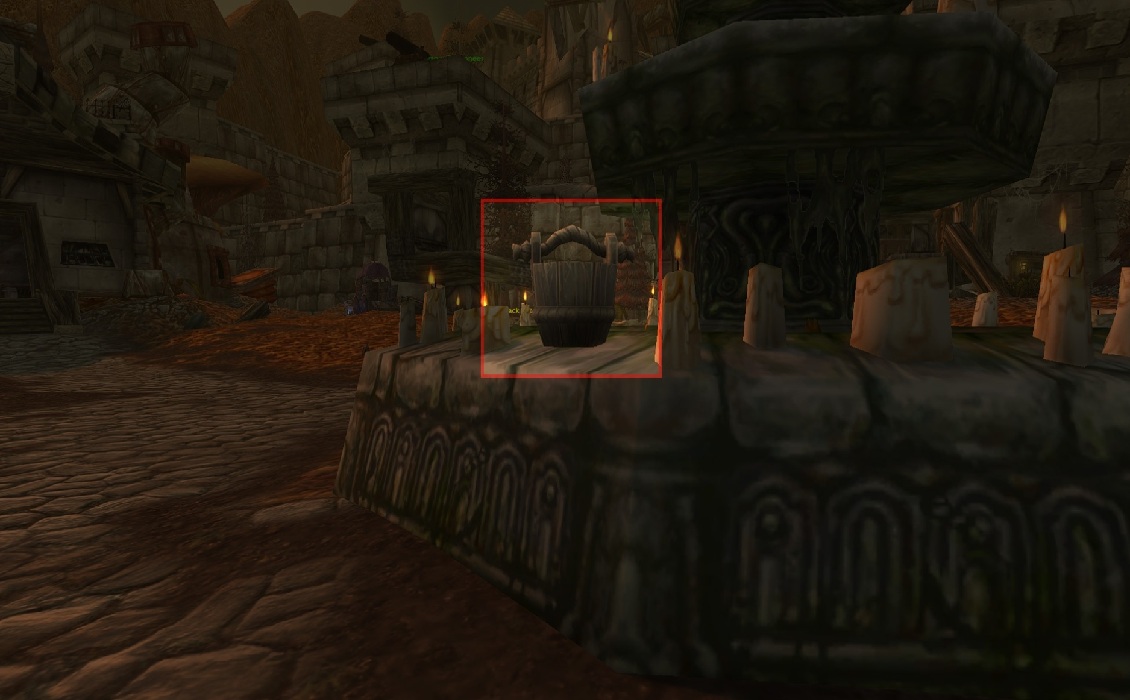
Caer Darrow Fountain Water
For the third candle, travel to Eastern Plaguelands. You’re looking for a Trampled Doll near a meat wagon in Darrowshire.
Bring the doll back to the ghost child Sammy, near the Caer Darrow fountain, to receive the Ghost-Warding Candle.
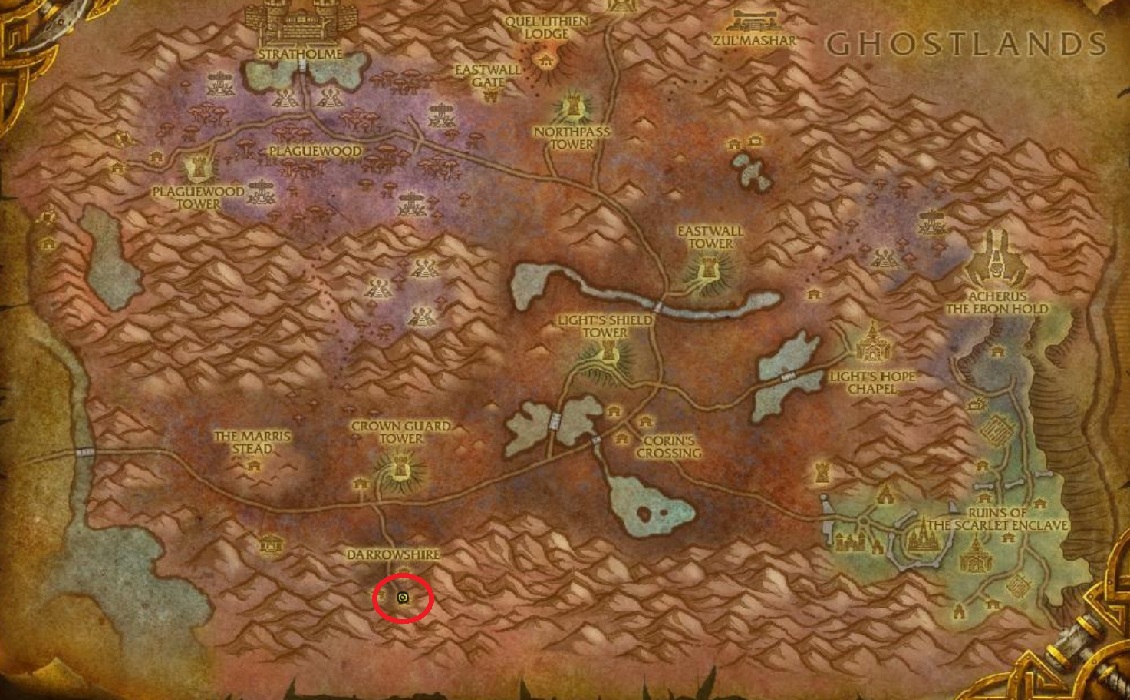
Darrowshire Meat Wagon
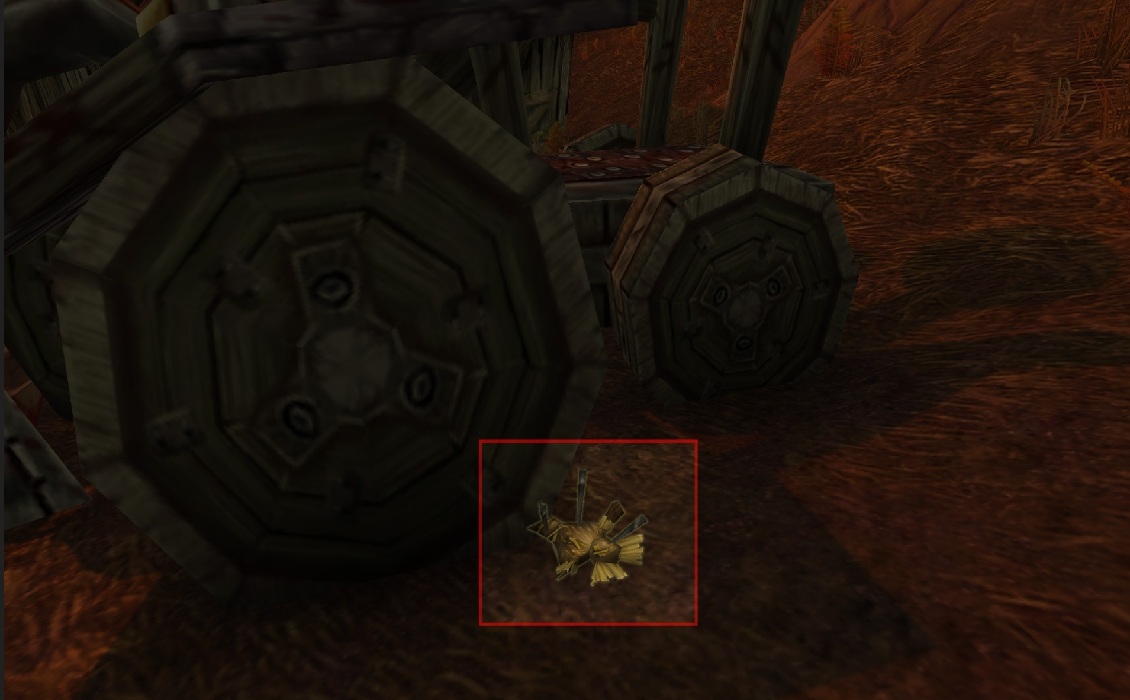
Trampled Doll
Next, return to Corrin’s Crossing and look inside what used to be the inn. You need a painting of trees on the first floor - it’s on the wall beside the staircase leading up to the second level. Loot The Road Ahead, then trade it to Artist Renfray in Caer Darrow (house near the docks) for the Imported Candle.
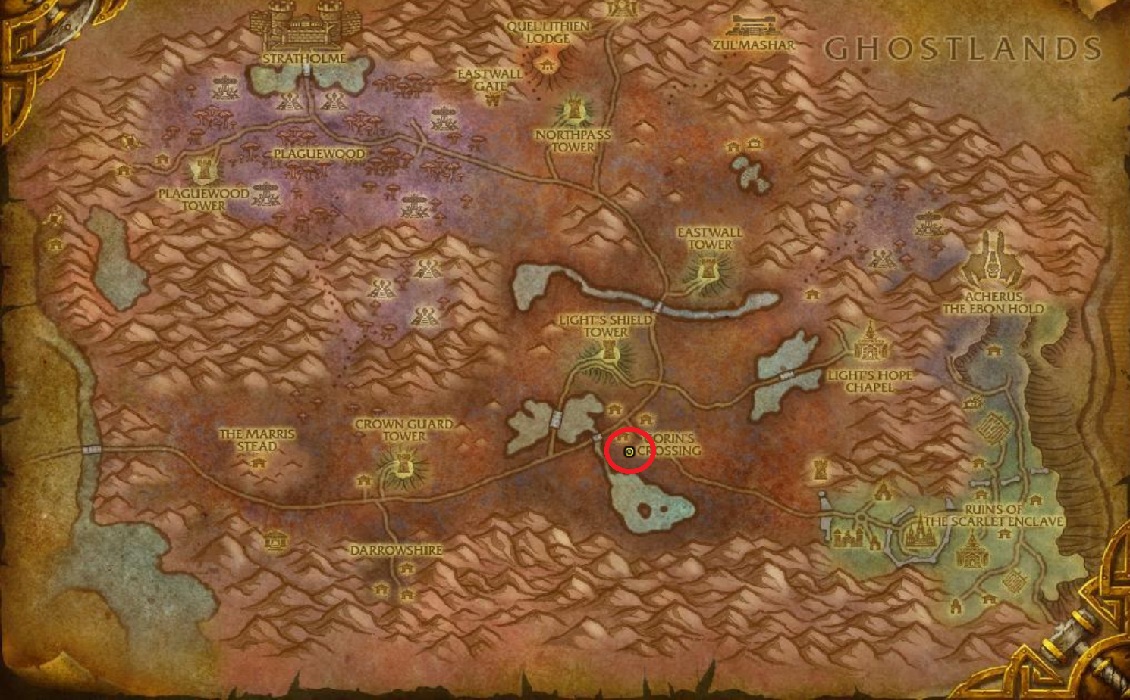
Corrin's Crossing
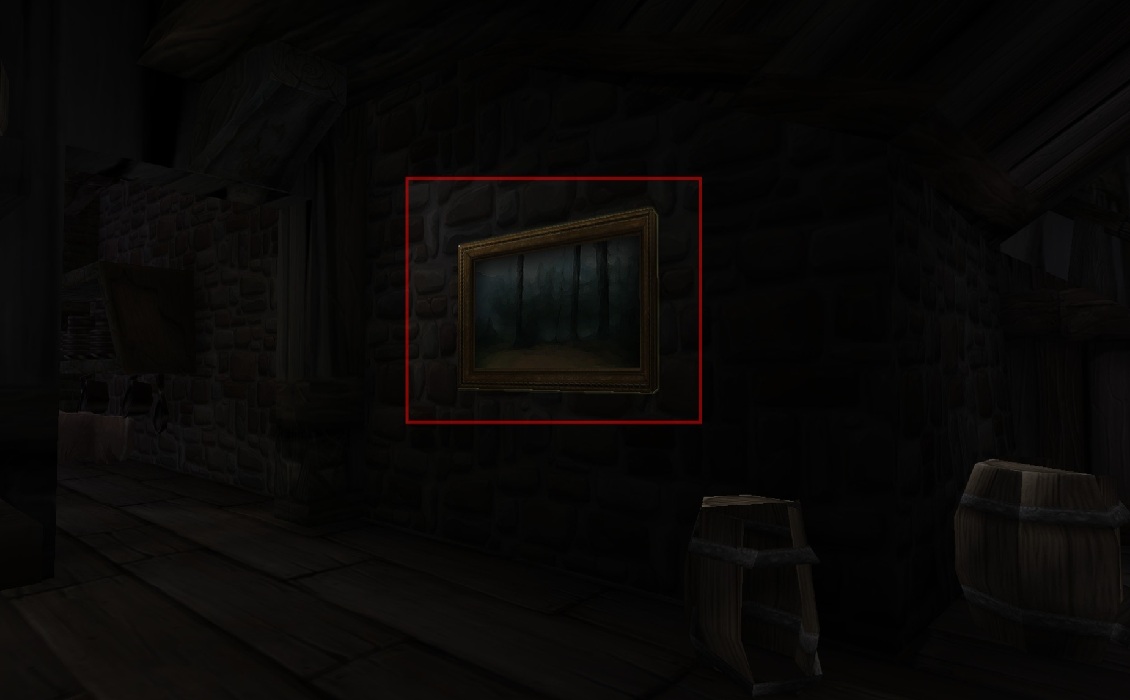
The Road Ahead
The final candle requires a trip into Stratholme. Enter through the front gate (the “living” side). You will know it’s correct if you see bosses like Balnazzar and Timmy the Cruel on the dungeon map.
Once inside, take two left turns until you reach a fountain. Go behind it and check inside the cart for a package. Loot Undelivered Shipment of Smokes, then deliver it to Rory, who roams near the docks outside Caer Darrow. He trades it for the Tobacco-Filled Candle.
Stratholme Entrance
Undelivered Shipment of Smokes
Once you have all five candles, plus Eva's Journal and Eva's Femur, you are ready for the ritual that unlocks old Scholomance account-wide.
Go to the building that contains the Scholomance entrance. Instead of turning left into the dungeon, turn right and go forward. You’ll find a floor grate surrounded by bones.
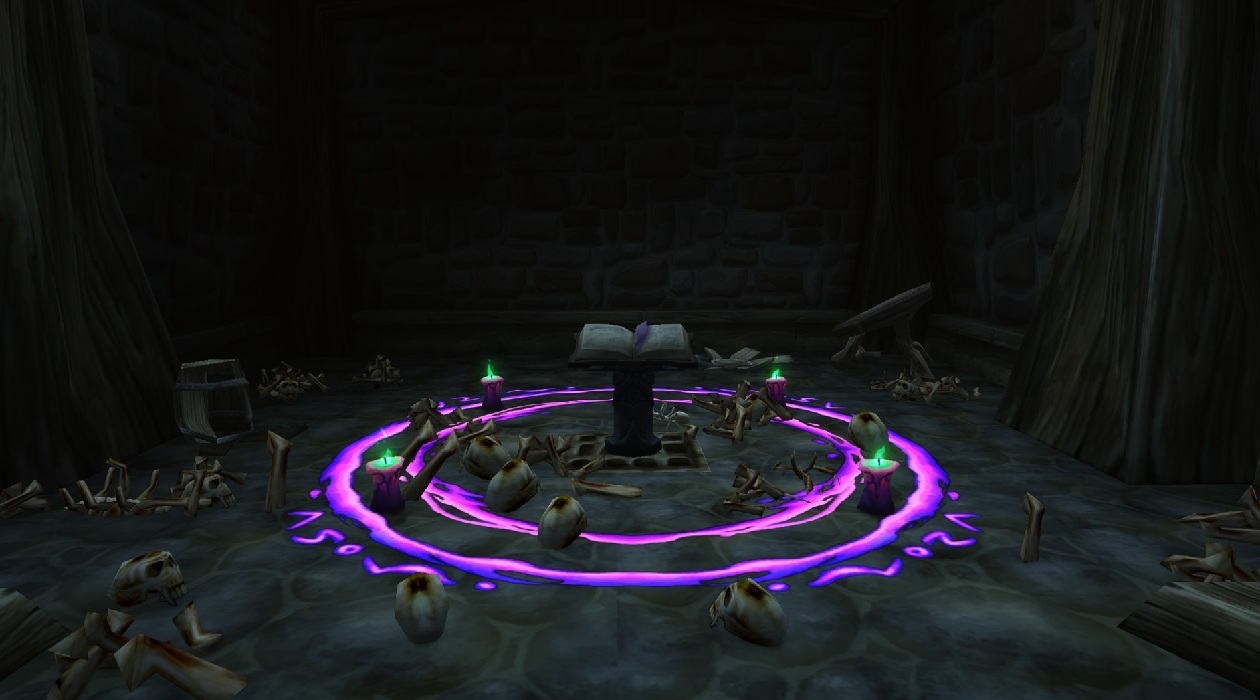
Stand on the grate and use Eva’s Journal. You will channel and a purple summoning circle will appear. After the channel completes, you should receive the achievement Memory of Scholomance. This achievement unlocks old Scholomance access for your entire account.
With old Scholomance unlocked, you can move on to unlocking old Naxxramas.
Enter old Scholomance by clicking the book in the middle of the summoning circle where you performed the ritual. You don’t need to kill every boss. Your immediate goal is to reach Rattlegore’s room, which sits beneath the Great Ossuary.
In the southwest corner of that room, look for a small item sitting on a bone pile: Cracked Argent Dawn Commission. Loot it.
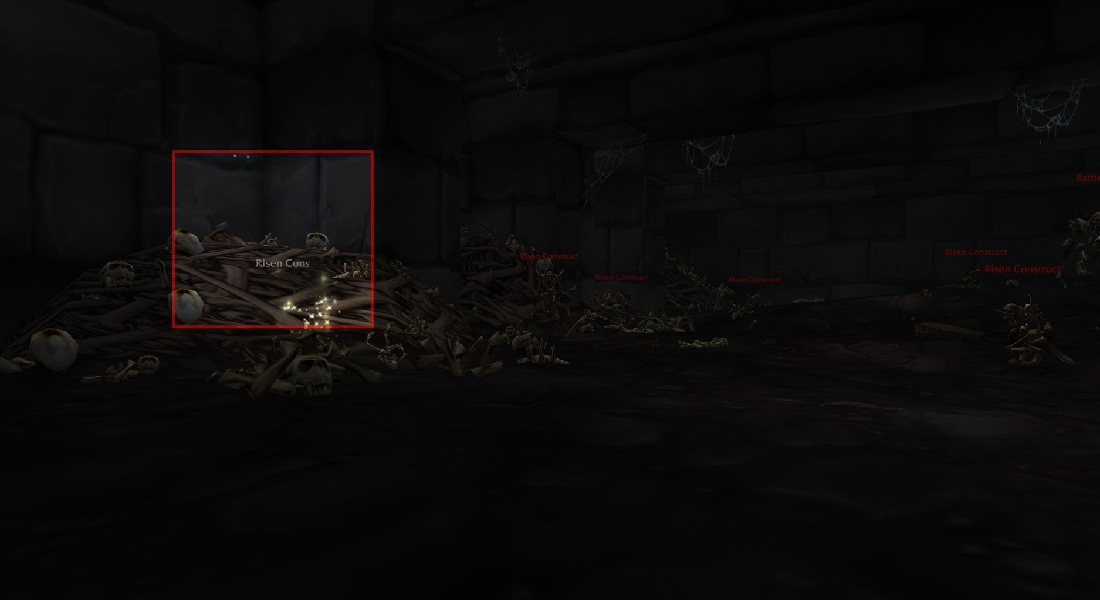
Cracked Argent Dawn Commission
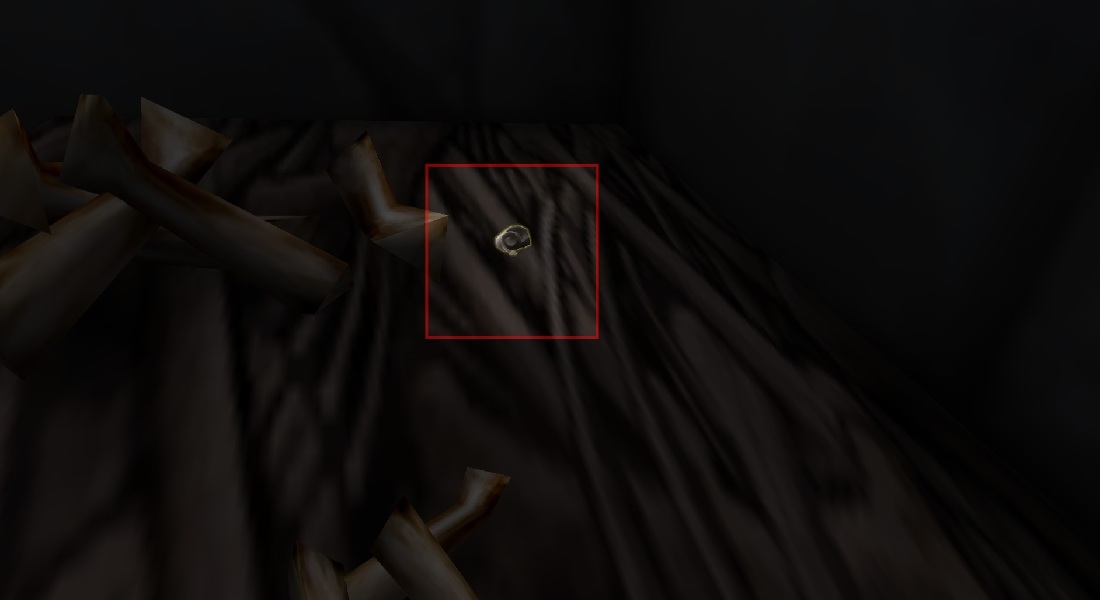
Cracked Argent Dawn Commission
If you bought the suggested materials (1 Righteous Orb and 4 Truesilver Bars), right-click the cracked commission to repair it. Then equip your repaired commission trinket and complete old Scholomance normally, finishing with Darkmaster Gandling.
With the trinket equipped, Gandling should drop Darkmaster's Scourgestone, which starts the quest Darkmaster's Scourgestone. Turn it in to Duke Nicholas Zverenhoff at Light’s Hope Chapel. This grants you the ability to obtain Scourgestones.
The next steps send you back to Stratholme again. Enter through the main gate as you did earlier and reset the instance if you are on the same character. Keep your Commission trinket equipped at all times.
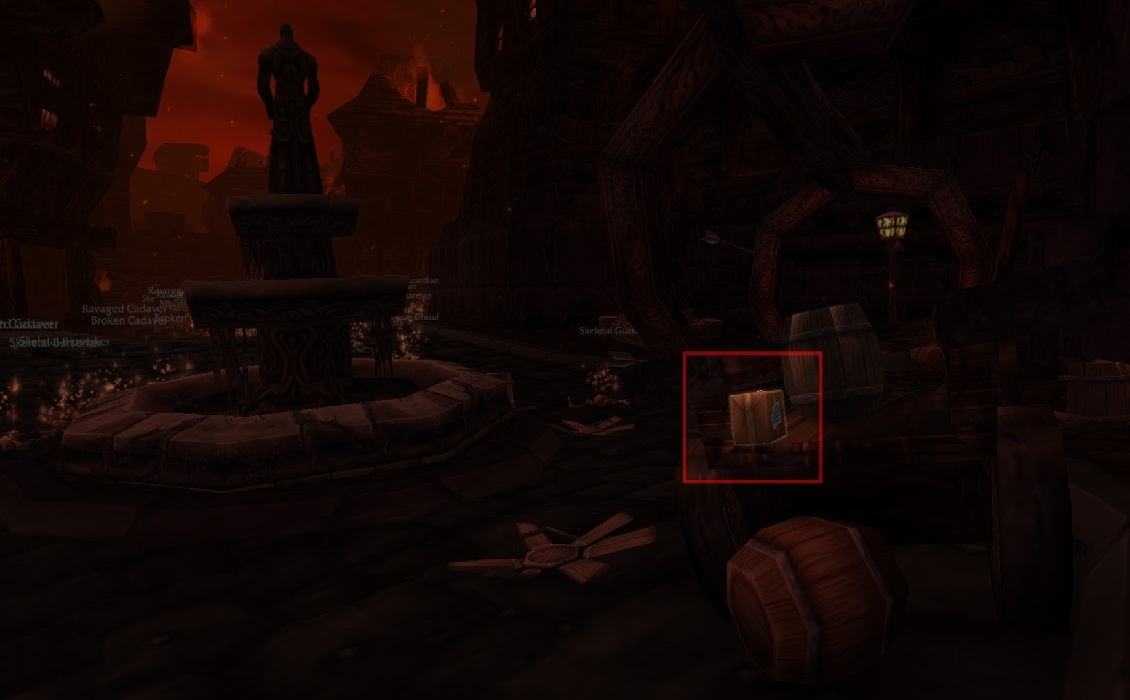
First, loot supply crates inside Stratholme to collect Stratholme Holy Water. You should find crates close to the entrance. Make sure you gather at least 3 total: one for this step, and two for later.
Next, search for Eye of Naxxramas. These mobs are invisible, so they can be annoying to locate. Kill them until you loot a Ward of Naxxramas.
Once you have both the ward and holy water, go to Crusader’s Square. Don’t enter the cathedral - instead, turn left and locate a vortex named Dread Ward of Naxxramas.

Throw Stratholme Holy Water at the Dread Ward. If done correctly, you will see a zone-wide yell: "Hand of Naxxramas yells: The living? Here?!" and you will gain a debuff: Sleight of Hand.
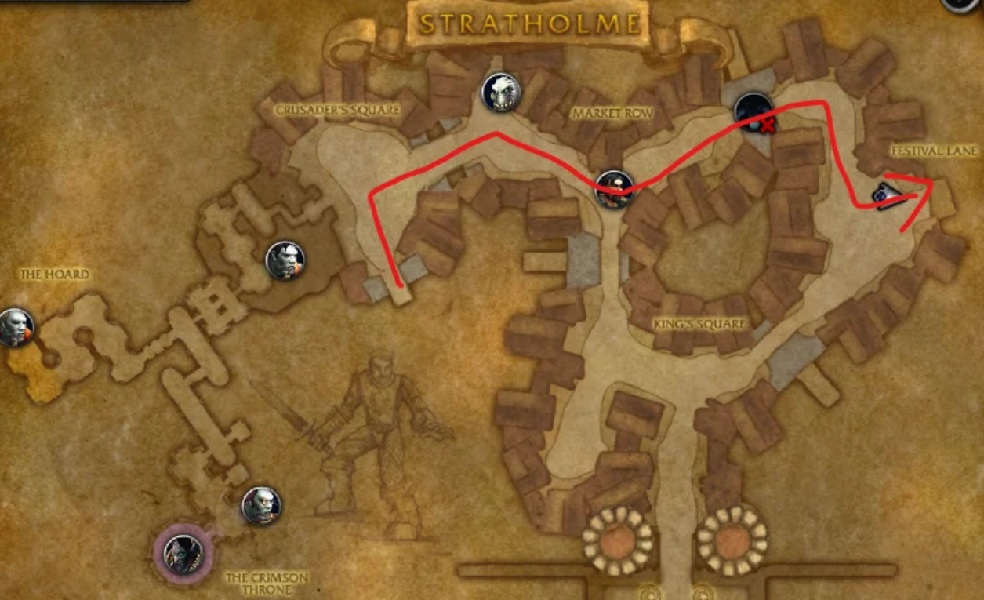
Once the debuff is active, you have 5 minutes to reach the undead side of Stratholme and complete the required objective. Use the route below through Festival Lane gate.
Your goal is to kill Lord Aurius Rivendare, but several kills are required first. You must defeat: Nerub’enkan, Baroness Anastari, and Maleki the Pallid. After each, go behind them into the pyramids they guard and kill the Thuzadin Acolytes as well.
Then go to Slaughter Square, clear the abominations, and kill Ramstein the Gorger. After that, two waves of mobs spawn near a gate on the left. Kill the waves, return to Ramstein’s area, and defeat the Black Guard Sentry. This opens the path to Rivendare.
Make sure to loot Rivendare for a chance at another iconic mount: Rivendare's Deathcharger.
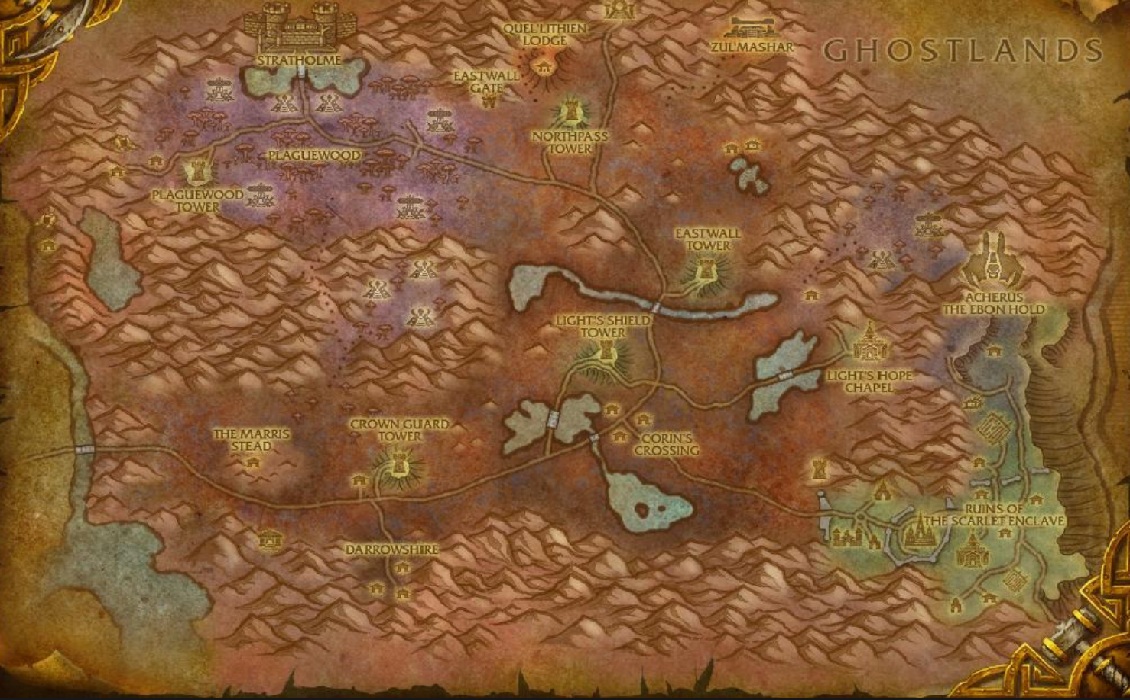
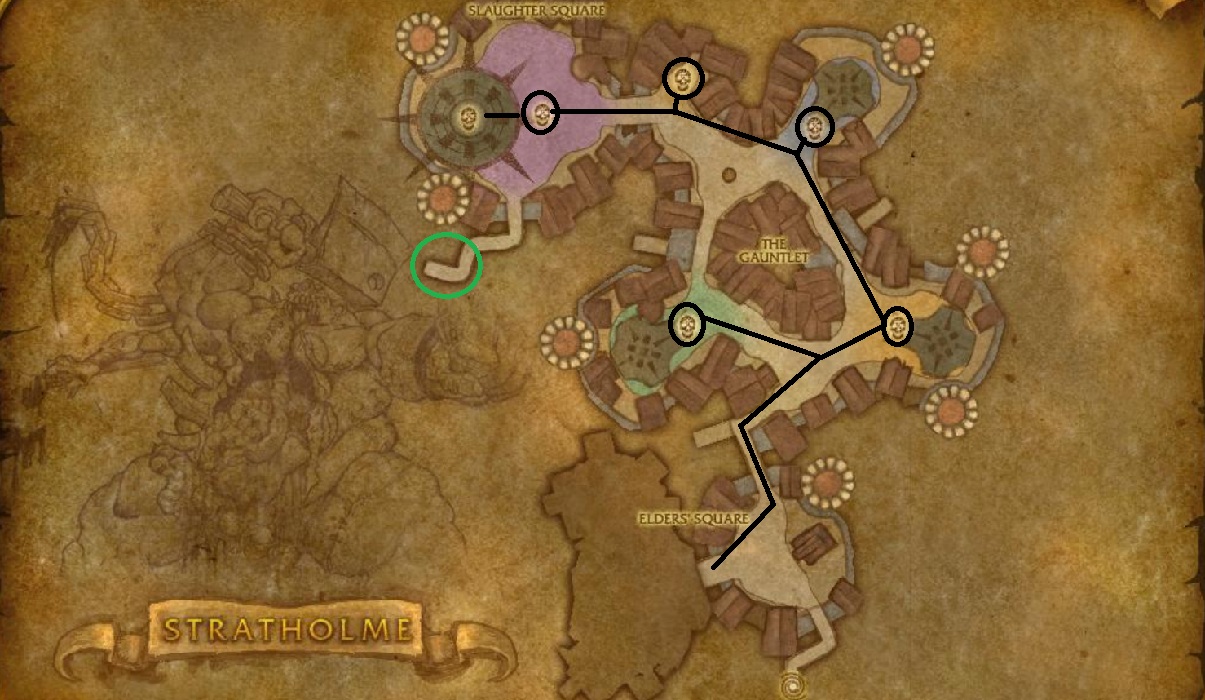
The path below shows the overall route. Killing Barthilas is optional. The green circled area marks where you’ll find the Hand of Naxxramas.
After Rivendare is dead, go back outside the way you came, then turn left near the area where the mini-waves spawned earlier. If you completed everything within the 5-minute limit, the Hand of Naxxramas NPC will appear. Use your Argent Dawn Commission to burn it with To Dust.
You will then see a chat message indicating the escalation: "As the Hand of Naxxramas burns into a pile of ash, it is clear that recent events have escalated such that someone should be made aware of them."
Leave Stratholme and travel to Tyr’s Hand in the southeastern part of Eastern Plaguelands to speak with
Archmage Angela Dosantos.
If she is not there, check Light’s Hope Chapel.
/way #23 72.6 74.8 Archmage Angela Dosantos
She will offer the quest chain to unlock the old version of Naxxramas. The materials required depend on your reputation with the Argent Dawn. You must be Honored or higher to complete the quest.
Completing this grants the achievement
Wards of the Dread Citadel,
which unlocks account-wide access to old Naxxramas.
You can enter via a portal crystal in eastern Plaguewood:
/way #23 35.7 23.1 Crystal portal to Old Naxxramas
Next, you must unlock the old Naxxramas vendor Zackett Skullsmash and gain access to the Makeshift Grappling Hook. This requires completing objectives inside old Naxxramas and collecting specific items needed to craft the hook.
To craft the Makeshift Grappling Hook, you must collect the following components inside old Naxxramas:

Once you have all three, combine them to create the grappling hook. After using it once, grapple points will become visible in specific areas across Naxxramas.
With the hook ready, your next goal is reaching the vendor in the rafters above Thaddius’ room. Thaddius is the final boss of the Construct Quarter. Defeat Stalagg and Feugen, then kill Thaddius. Afterward, the grapple points for the climb become usable.
The exact path is much easier to follow visually than to describe step-by-step in text. Use the video below and mirror the movements until you reach Zackett.
When you reach Zackett Skullsmash, throw Stratholme Holy Water on him to wake him up. He will offer the quest Inconvenience Fee, which requires collecting:
After collecting everything, return to Zackett via the same route, wake him with holy water again, and turn in the quest. He will move to the central ring of Naxxramas and begin trading Scourgestones for Death's Bargaining Chip:
This is the final stretch - once you complete the steps below, you will loot your mount item.
First, buy Rotten Delicious from Zackett Skullsmash for 30 Death's Bargaining Chip.
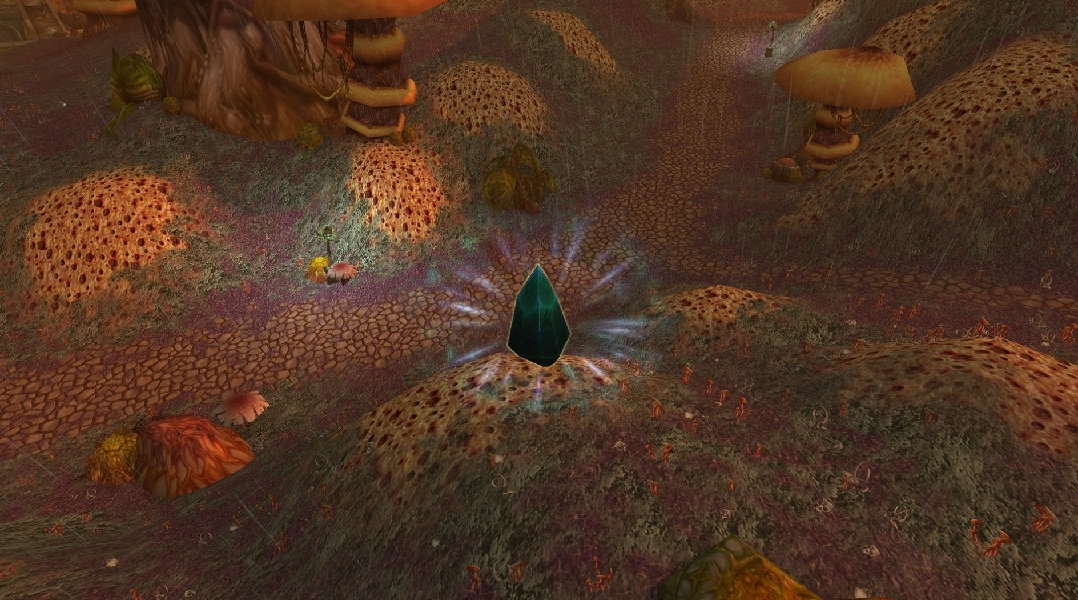
Head to the Instructor Razuvious area in the Military Quarter. Go to the stables where you will see horsemen patrolling. In the back area, roughly around the middle stall, you should find Valiance. Walk up and feed the horse the Rotten Delicious. It may kick you back a few times before the feed interaction succeeds.
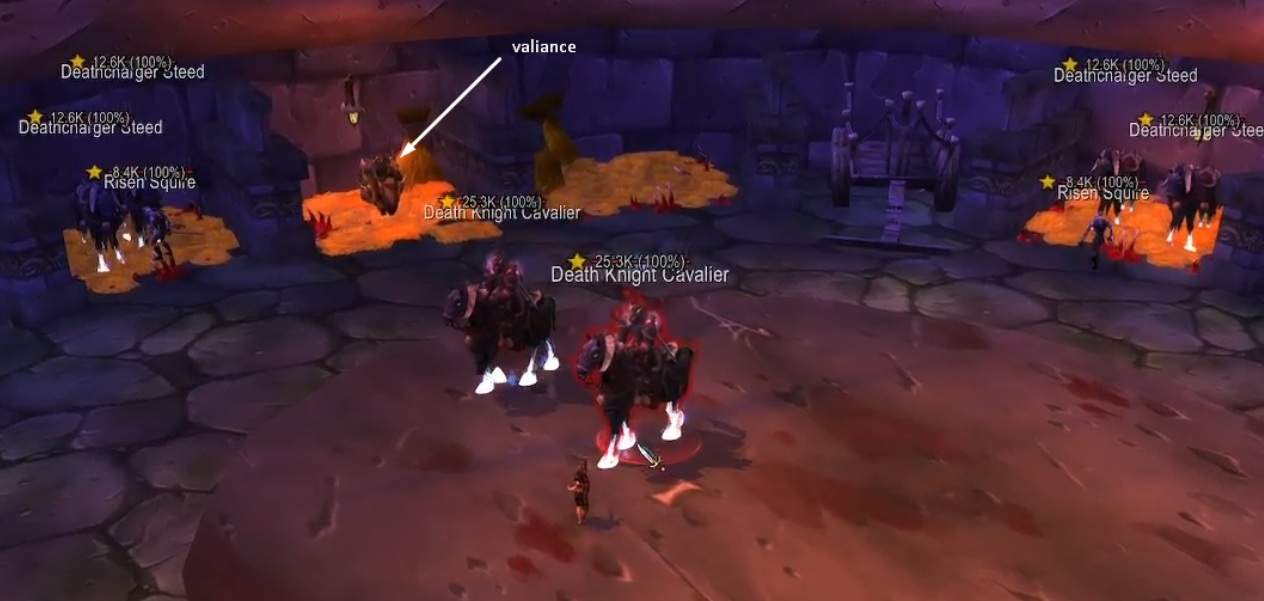
After feeding Valiance, go to the main Razuvious combat area. Near the stairs you will see two glowing purple Obedience Crystals. Click one to mind control a Death Knight Understudy.
Valiance

glowing purple Obedience Crystals
While controlling the Understudy, ride back to Valiance. The Understudy can mount the horse. Ride Valiance to Razuvious’ arena, then break the mind control by dismissing it via the portrait (returning you to your body). The Understudy should remain on top of Valiance.
Now defeat Instructor Razuvious and kill both Understudies. You should then be able to loot Reins of Valiance from the corpses. Congratulations!
Valiance is a legacy-style secret chain, so the best addons are the ones that help with navigation, tracking objectives, and avoiding wasted resets. You don’t need modern raid combat addons here - you need speed and clarity.
If you’re doing the timed Stratholme segment on a slower class, even small navigation delays matter. Addons like TomTom and quality-of-life tools can easily save you multiple attempts.
Our operational expertise covers a diverse portfolio of games, but our flagship service is the acquisition of World of Warcraft's most exclusive assets. We specialize in navigating the complex probabilities and time-intensive challenges associated with the game's rarest mounts, transforming what is often a frustrating pursuit into a predictable and successful outcome for our clients.
Whether your goal is to complete a collection of high-status symbols or to secure that one specific prize that has always eluded you, our team is equipped to deliver. We provide the focused skill and strategic approach necessary to bypass the grind. You define the objective, and we apply our professional methodology to ensure it's met with efficiency and style.