Temple of Sethraliss is one of three legacy dungeons pulled into the Midnight Season 2 Mythic+ rotation, and it asks for four bosses inside a 32-minute keystone timer. The layout is a straight line. Adderis and Aspix hold the Vestibule of the Faithless at the door, the Echoing Warrens lead down to Merektha in the Clutch of the Great Mother, and Galvazzt waits below in the Galvanized Grotto — then the Bazaar of Watchful Eyes opens onto the Atrium of Sethraliss.
The payout is unusually broad. Time it once at +10 and Path of the Sacred Temple sits in your spellbook permanently, dropping you at the door from anywhere on an eight-hour cooldown. The last boss hands over a housing decor piece for the Warband, and Merektha carries the dungeon's battle pet. Short on time for keys? A Mythic+ boost handles the runs.
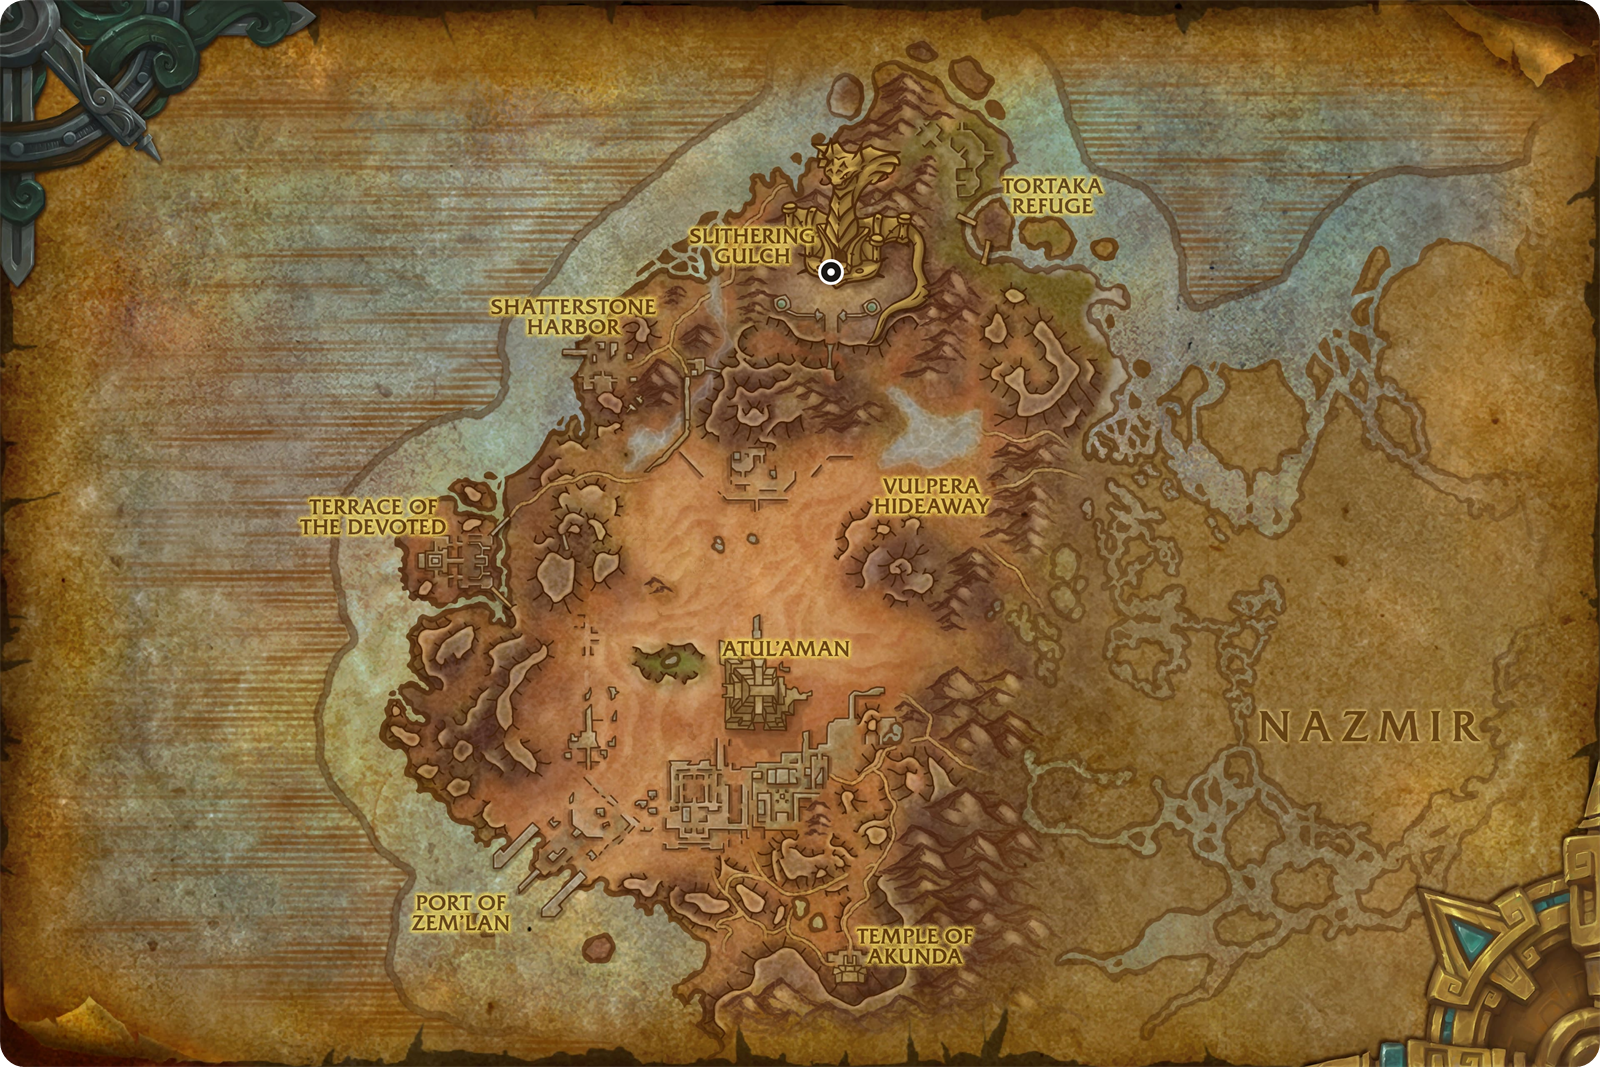
The temple sits in northern Vol'dun, at 51.9, 25.5 on the zone map above, where the serpent statue rises out of Slithering Gulch. Skip the desert ride entirely: take the Timeways portal room in Silvermoon City at 42.4, 58.3, where the Temple of Sethraliss portal stands on the rightmost side.
| Quick Facts | Detail |
|---|---|
| Location | Vol'dun, 51.9, 25.5 |
| Required level | 90 |
| Bosses | 4 |
| Max-level difficulties | Heroic, Mythic, Mythic+ |
| Keystone timer | 32:00 for +1, 25:36 for +2, 19:12 for +3 |
The four encounters run in a fixed order, and each one hangs on a single decision the group either makes or fails.
| Order | Boss | Where | What decides the pull |
|---|---|---|---|
| 1 | Adderis and Aspix | Vestibule of the Faithless | Swap targets the moment Storm Blessed moves, and collapse into melee for Thunder and Lightning as soon as Gale Force has thrown you apart |
| 2 | Merektha | Clutch of the Great Mother | Stack up so one area stun frees both victims of A Knot of Snakes, then clear whatever she Hatches while she is away on Burrow |
| 3 | Galvazzt | The Galvanized Grotto | Put a non-tank between him and every Lightning Spire; taking Galvanized hurts, and letting him reach 100 energy for Consume Charge ends the run |
| 4 | Avatar of Sethraliss | Atrium of Sethraliss | Kill the Essence Defilers to lift Defiling Taint, then soak the Corrupted Lifeforce orbs while the healer stays ahead of Shadowlash |
Thirty-four pieces of gear drop here. They spread across all four bosses and cover every armor type, seven weapon and shield rows, two rings and three trinkets, and item levels scale with keystone difficulty. Each row carries the item's secondary stat pair — the part that decides whether a same-slot drop is actually an upgrade.
| Slot | Item | Secondaries | Boss |
|---|---|---|---|
| 2H Staff | Staff of the Lightning Serpent | Haste / Mastery | Adderis and Aspix |
| 2H Polearm | Twin-Strike Polearm | Crit / Haste | Adderis and Aspix |
| Cloth Wrist | Bindings of the Slithering Current | Crit / Versatility | Adderis and Aspix |
| Cloth Feet | Sandswept Sandals | Crit / Haste | Adderis and Aspix |
| Leather Waist | Whirling Dervish Sash | Haste / Mastery | Adderis and Aspix |
| Leather Legs | Leggings of the Galeforce Viper | Versatility / Mastery | Adderis and Aspix |
| Mail Wrist | Arc-Glass Bindings | Crit / Haste | Adderis and Aspix |
| Mail Feet | Sabatons of Coruscating Energy | Crit / Mastery | Adderis and Aspix |
| Plate Wrist | Shard-Tipped Vambraces | Haste / Versatility | Adderis and Aspix |
| Plate Legs | Legplates of Charged Duality | Crit / Versatility | Adderis and Aspix |
| Ring | Jade Ophidian Band | Versatility / Mastery | Merektha |
| Leather Feet | Sand-Shined Snakeskin Sandals | Crit / Mastery | Merektha |
| Cloth Waist | Ouroborial Sash | Versatility / Mastery | Merektha |
| Plate Hands | Fangproof Gauntlets | Haste / Mastery | Merektha |
| Trinket | Merektha's Fang | Primary only | Merektha |
| Mail Legs | Legguards of the Awakening Brood | Crit / Haste | Merektha |
| 1H Sword | Swarm's Edge | Versatility / Mastery | Merektha |
| Bow | Snakebite Recurve | Crit / Haste | Merektha |
| Ring | Charged Sandstone Band | Crit / Mastery | Galvazzt |
| Trinket | Tiny Electromental in a Jar | Primary only | Galvazzt |
| Cloth Hands | Handwraps of Oscillating Polarity | Crit / Haste | Galvazzt |
| Plate Waist | Sand-Scoured Greatbelt | Versatility / Mastery | Galvazzt |
| 1H Mace | Galvanized Stormcrusher | Haste / Versatility | Galvazzt |
| Shield | Bulwark of Brimming Potential | Crit / Versatility | Galvazzt |
| Trinket | Sethraliss' Defiled Relic | Primary only | Avatar |
| 1H Sword | Resonating Crystal Scimitar | Crit / Haste | Avatar |
| Cloth Chest | Robes of the Reborn Serpent | Crit / Mastery | Avatar |
| Cloth Shoulder | Brood Cleanser's Amice | Crit / Haste | Avatar |
| Leather Head | Hood of the Slithering Loa | Crit / Haste | Avatar |
| Leather Hands | Grips of Electrified Defense | Versatility / Mastery | Avatar |
| Mail Head | Sethraliss' Fanged Helm | Crit / Mastery | Avatar |
| Mail Chest | Corrupted Hexxer's Vestments | Versatility / Mastery | Avatar |
| Plate Chest | Desert Guardian's Breastplate | Crit / Mastery | Avatar |
| Plate Shoulder | C'thraxxi Binders Pauldrons | Crit / Haste | Avatar |
All three trinkets are damage buttons, and none of them helps a healer.
Only Merektha and Galvazzt publish drop rates, and they spread widely. The two rings are the friendliest pieces on either table at 9.68% and 9.50%, and the tail runs all the way down to 1.08% on the Snakebite Recurve — the rarest thing the pair of them holds.
Midnight Mythic+ Loot and Item LevelsBeyond gear the dungeon pays out three times: a housing decor piece, a battle pet and a permanent teleport, with a nine-entry achievement list on top. No mount drops here. Defeating the Avatar awards the Hatchery of Hissing Eggs, which binds to the Warband and goes into your housing decor collection. Merektha drops the Viable Cobra Egg on Mythic and above at well under one percent, and it hatches into the Spawn of Merektha three days later.
| Achievement | Requirement |
|---|---|
| The Temple of Sethraliss | Restore the Avatar of Sethraliss. |
| Heroic: The Temple of Sethraliss | Restore the Avatar on Heroic difficulty or higher. |
| Mythic: The Temple of Sethraliss | Restore her on Mythic difficulty. |
| Keystone Hero: Temple of Sethraliss | Complete the dungeon at Mythic Level 10 or higher within the timer. Rewards the teleport. |
| Mythic: The Temple of Sethraliss Guild Run | Restore her on Mythic while in a guild group. |
| Snake Eyes | On Mythic, activate both eyes to exit the Bazaar within 10 seconds. |
| Snake Eater | On Mythic, hatch the Solid Egg during Merektha, then kill the Solid Snake. |
| Good Night, Sweet Prince | On Mythic, restore the Avatar with the Prince active. |
| Keystone Victor: Temple of Sethraliss | Land a region-best keystone completion here. |
The three Mythic challenges are best taken on a dedicated Mythic 0 run rather than inside a key. Snake Eyes in particular wants a clean pull before the Bazaar — ten seconds is no time at all to reach two eyes with adds still breathing down your neck.