Torment's Rise is where Midnight Season 1 stops pretending Delves are casual side content and turns the whole format into a real skill check. There is no route puzzle to solve, no trash maze to pad the run, and no long list of side objectives to hide behind. The focus is Nullaeus, and that makes every part of the encounter matter more: your interrupts, your movement, your companion setup, your defensive timing, and your ability to stay calm once the fight starts layering pressure instead of giving you room to reset.
That is what makes this Delve different from the rest of the lineup. Torment's Rise is not about farming easy completions until gear carries the run on its own; it is about showing that your character is actually built well enough and played cleanly enough to survive a boss designed to punish hesitation. Unlock requirements, Tier 8 and Tier 11 access, group vs solo differences, companion choices, rewards, achievements, and the fight itself all matter here, because one weak link turns a promising pull into a fast wipe.
Torment's Rise is the Season 1 Nemesis Delve in World of Warcraft Midnight. Unlike the standard Delve rotation, this one is built as a focused end-of-season style challenge rather than a repeatable farm stop. This encounter is VERY difficult and punishing. It exists to push execution, punish sloppy play, and test whether your character build, companion setup, and mechanical discipline are actually ready for higher-pressure content.
The Delve is set in Voidstorm and centers on Nullaeus, a Void-themed boss encounter with very little tolerance for missed kicks, late movement, or wasted defensive cooldowns. Torment's Rise can be entered solo or with a group, but the structure stays punishing either way:
| Feature | Details |
|---|---|
| Delve Type | Nemesis Delve exclusive to Season 1. This is not part of the normal Delve loop and is meant to function as a capstone challenge for players who want a harder seasonal encounter. |
| Zone | Voidstorm, part of the Midnight expansion. The setting matches the encounter well, with a Void-heavy visual theme and a much more hostile atmosphere than standard Delves. |
| Boss | Nullaeus, a Void entity tied directly to the Nemesis encounter. The fight is the entire point of the Delve, so the run is built around boss execution rather than route complexity. |
| Difficulty Tiers | Tier 8 unlocks after clearing Tier 7, while Tier 11 unlocks after clearing Tier 10. The second difficulty is the real wall for most players and demands much cleaner play. |
| Group Size | Playable solo or with up to 5 players. The core mechanics remain the same, but solo runs leave almost no room for recovery when you miss an interrupt, mishandle movement, or fall behind on defensive timing. |
| Companion | Valeera. A healer-oriented setup is often the safest Tier 11 default, especially for melee DPS and tanks, though some healers and ranged specs get better results with Valeera in DPS. |
| Minimum ilvl (Tier 8) | 255 average item level, based on Blizzard's recommendation. That is the suggested floor, not a comfort point, so weaker specs or lower-control setups may still want more gear before pushing in. |
| Season Availability | Available during Season 1 only. With the launch of Season 2, the related rewards become unobtainable, which puts a hard deadline on clears, cosmetics, and achievement progress. |
| Trash Affixes (T4+) | Pactsworn-prefixed enemies can appear across Delves from Tier 4 onward. Killing them upgrades the Nemesis Strongbox. |
Not everyone learns a boss fight the same way. Some players prefer written breakdowns they can scan between pulls, while others get far more value from seeing the full encounter play out in real time. A video format makes positioning, movement, timing, and mistake recovery much easier to understand, especially in a challenge fight where small details matter.
This section is where we will collect class-specific video guides for the Nullaeus. As more runs are added, you will be able to watch the boss from each class perspective, see how different toolkits handle the same mechanics, and compare approaches before jumping into the encounter yourself.
Nullaeus can be challenged on two separate difficulty levels, and each one has its own unlock condition. Both requirements are tied to your Delve progression during Midnight Season 1, so you need to prove you can clear higher-tier content cleanly before the fight opens up:
If you are looking for Nullaeus, you need to head to Torment's Rise, the Season 1 Nemesis Delve found in Voidstorm.
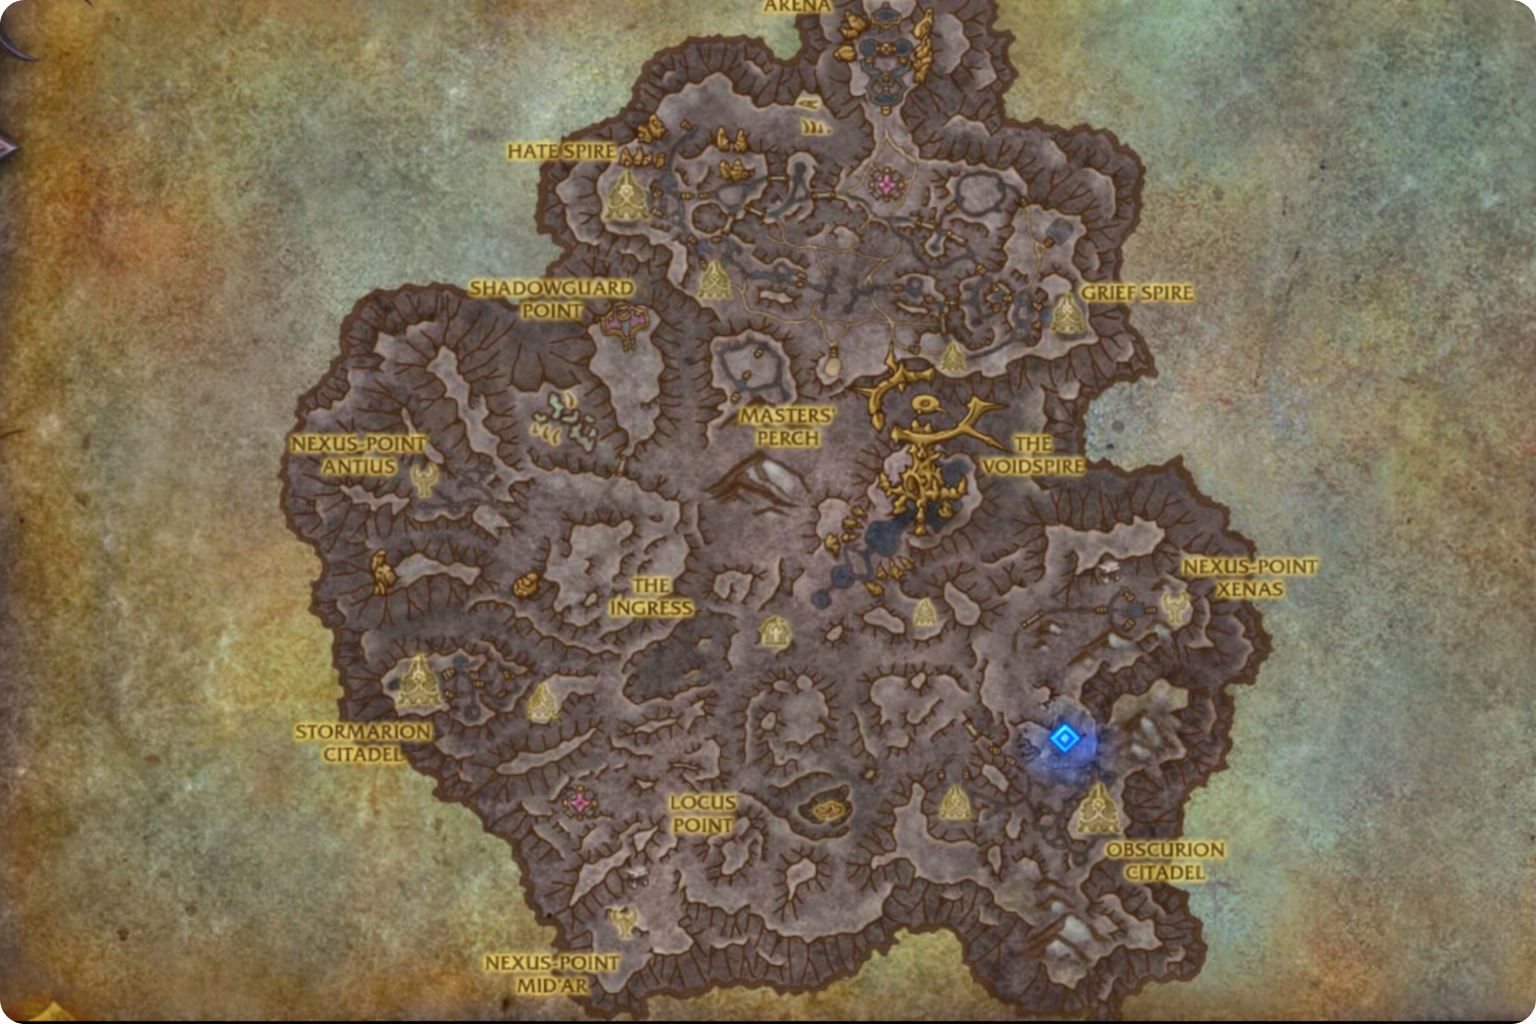
The quickest way to reach it is to use /way #2405 61.17 71.37. That marker leads you straight to the Torment's Rise entrance, where the encounter begins.

Your best Valeera role depends on what your class is bringing into the Nullaeus fight. The point is to cover the mechanics your spec handles poorly and let Valeera take over the part of the encounter that creates the most pressure.
For melee DPS and tanks, the safest setup is usually Healer. In that role, Valeera can dispel Devouring Essence, which removes one of the more annoying mechanics from your side of the fight. She can also clear the bleed from the Razorshell Ravagers, which lowers incoming pressure during the encounter. The tradeoff is that you still need to interrupt Emptiness of the Void yourself, so that cast cannot be ignored.
If you are playing Healer, shifting Valeera to DPS is usually the cleaner choice. That setup gives you reliable help with every cast of Emptiness of the Void, which takes a major execution check off your shoulders. The downside is that Devouring Essence becomes your job, so your dispel timing needs to stay sharp throughout the fight.
For ranged DPS, the best option depends more on your toolkit than on the role itself. If your interrupt is awkward, too long, or unreliable in practice, setting Valeera to DPS usually makes the fight smoother because she can cover Emptiness of the Void for you. Some ranged specs may get more value from using her as Tank, while pet-based classes can often lean more comfortably on a Healer setup. Here the right answer depends on what your spec struggles with first.
Once the role is set, the next step is the Curio loadout. The strongest picks here are the ones that either raise your damage without adding extra friction or give you a real defensive cushion when the fight starts punishing mistakes. Against Nullaeus, consistency matters more than gimmicks.
For a Combat Curio, Porcelain Blade Tip is one of the best all-around choices because it directly increases your chance to critically strike and helps smooth out your damage. Another strong option is Sanctum's Edict. It takes longer to build value, but once fully stacked it grants a 30% health absorb shield, which can easily save a pull when the fight gets unstable.
For utility, Time Lost Edict is a very solid pick. It creates a bubble that increases your Movement Speed, Cooldown Speed, and Cast Speed, which all matter in a fight built around movement control and clean timing. The cooldown reduction is especially valuable if your spec needs extra access to defensives, stops, or recovery tools.
Defeating Nullaeus in Midnight Season 1 unlocks several seasonal achievements and cosmetics. Some rewards only require a clear, while others are tied to Tier 11 difficulty, solo execution, or region-first style competition before the next Delve season begins:
Beyond the cosmetics and achievement rewards, Nullaeus also gives a more practical prize on your first clear. Defeating him for the first time awards 30 Hero Dawncrests, which gives the encounter real gearing value on top of its seasonal prestige. That makes Torment's Rise worth doing not just for achievements, titles, and cosmetics, but also for a meaningful one-time boost to your early upgrade path.
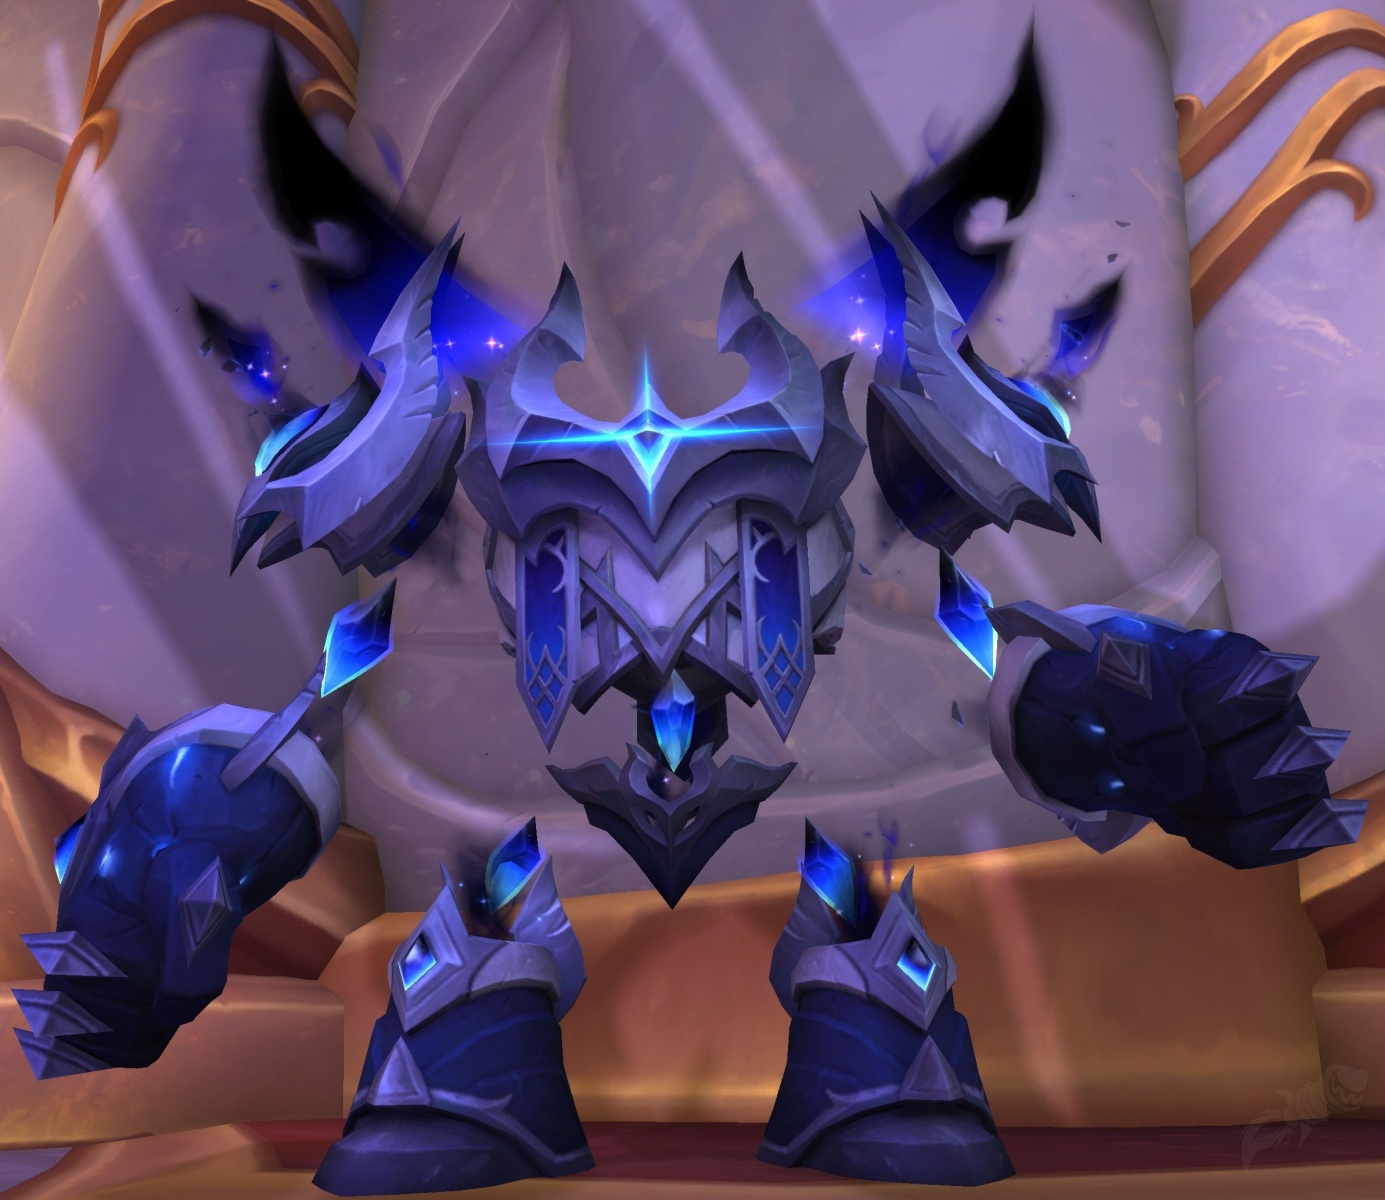
For players aiming at the Arcanovoid Construct, here is how the mount looks in game:

If you have already been running Tier 8 or higher Delves, there is a good chance you have seen Nullaeus before this encounter ever became the main event. He can appear as a random Nemesis-style threat in higher-tier Delves, and he can also be brought in through the Beacon of Hope. Torment's Rise turns that occasional pressure check into a full boss fight and gives every part of his kit more room to matter.
The encounter is built around repeated phase breaks. Nullaeus remains active until 75%, 50%, and 25% health, then drops out of the fight for an intermission while new hazards or adds take over the room. That structure matters because the mechanics do not reset cleanly. They stack up, overlap, and make each later phase harder to control than the last.
Whenever Nullaeus is targetable, he works from the same core ability set on roughly a 20-second cycle:
At 75% health, Nullaeus becomes untargetable and begins channeling into the first Void Orb. His regular rotation pauses for about 30 seconds, but the room does not get easier. Instead, two Razorshell Ravagers enter the fight and immediately become the priority target.
These adds do not have a long list of tools, but the two abilities they do use are enough to punish sloppy positioning:
Roughly 15 seconds into the intermission, the first Void Orb starts claiming part of the arena and covers around a third of the room in a Void zone. That patch later disappears and then reappears elsewhere, but the mechanic keeps cycling for the rest of the fight, which means room space gets tighter and movement planning matters more from this point onward.
When Nullaeus returns, he comes back with the same base mechanics as before. Any Ravagers you failed to finish stay active, so a slow intermission turns the next phase into a three-target problem instead of a clean reset.
At 50%, the second intermission begins. Nullaeus becomes untargetable again, channels into another Void Orb, and this time summons 7 Spitting Ticks. Each one is simple on paper, but the volume is what makes them dangerous.
About 15 seconds after the adds appear, the second Void Orb releases a small Black Hole that bounces around the room. It drags players inward, and the pull gets stronger the closer you stand to it. The effect does not seem to be about direct damage as much as positional sabotage. Left unchecked, it pulls you into danger zones, interrupts clean movement, and makes every other mechanic harder to answer on time.
Once the boss rejoins the fight, both orb mechanics remain active. You are now dealing with the rotating Void zone from the first intermission and the roaming Black Hole from the second one at the same time. If several Ticks are still alive when this happens, the fight can spiral very quickly.
At 25% health, Nullaeus disappears for the final intermission and summons an Enslaved Voidcaster. This add has a much healthier stat line than the previous intermission enemies and comes with three separate abilities that need attention.
There is no third Void Orb added here, which is the only mercy this phase gives you. The intermission is still dangerous because the earlier arena mechanics remain in play while you deal with the Voidcaster. After roughly 30 seconds, Nullaeus returns and resumes his normal rotation, now on top of everything you failed to clean up previously.

The Tier 11 version is not a different encounter in terms of structure. The phase order, add waves, and room mechanics all stay the same. What changes is the punishment. Damage spikes hit much harder, mistakes stop being recoverable, and even one missed Emptiness of the Void cast is usually enough to end the pull. The Black Hole also appears to have a stronger pull on this difficulty, which makes movement errors more dangerous once the arena starts filling with overlapping mechanics.
The fight looks chaotic at first, but the priority system is actually pretty stable from pull to kill. While Emptiness of the Void must always be covered, Devouring Essence should be dispelled or avoided whenever your setup allows it. Everything else is built around surviving intermissions cleanly enough that the next boss phase does not become overloaded with leftover enemies or bad positioning.
When the first intermission starts at 75%, your goal is to remove the Razorshell Ravagers as quickly as possible. The fewer adds still standing when Nullaeus returns, the cleaner the next phase becomes. This is a good place to spend damage cooldowns if that helps you prevent overlap.
Once the first Void Orb starts placing its zone, begin thinking about where the room will still be playable later. A useful habit here is to keep Nullaeus near the edge of the active Void area whenever possible. When that zone later disappears, that section of the room becomes safe again for a while, and the orb does not immediately pick the same location twice in a row. From this point on, the Void zone remains part of the fight for the rest of the encounter.
At 50%, the fight shifts into the Spitting Tick phase. This is the point where crowd control and fast add damage matter most. The Ticks are dangerous less because of individual casts and more because several of them can connect in quick sequence and create lethal burst. AoE tools are valuable here, and defensives should not be held too greedily if multiple casts are going through.
The second layer of pressure is the Black Hole. It drifts through the room and pulls you toward it, which makes ordinary movement much more awkward. Save mobility for moments when it closes in, because the pull gets much harder to handle at short range. From this phase onward, you are no longer just dodging the Void zone; you are also managing the Black Hole at the same time.
At 25%, Nullaeus drops out for the last time and the Enslaved Voidcaster takes over the phase. The cleanest way to handle this window is to interrupt the first cast, then hold your interrupt instead of spending it again immediately. The reason is simple: Nullaeus returns soon after, and you do not want to be caught without an answer for the next Emptiness of the Void.
There is still a lot happening in the room during this intermission, so the job is not just about the add. Keep navigating around the existing Void zones and stay clear of the Black Hole while waiting for the boss to re-enter the fight. A panicked interrupt sequence here often causes more problems than it solves.
As soon as Nullaeus becomes targetable after the final intermission, the fight turns into a burn. This is the moment to commit your major cooldowns, including Heroism, Bloodlust, Drums, or a Potion if your character has access to them. The longer this phase drags on, the worse the overlap becomes, so the priority is to end the encounter before the room and enemy count overwhelm you.
The Enslaved Voidcaster is not a good damage target in this phase. It is immune to crowd control, and trying to fully pivot onto it usually wastes time you do not have. In most runs, the correct answer is to stay locked on Nullaeus and finish the boss before the encounter collapses under its own pressure.