
L'ura is a single-target fight where control, coordination, and long-form consistency matter more than raw damage. The encounter punishes small mistakes early and rarely gives the raid room to fully recover, so one bad assignment, weak positioning, or a late reaction can easily snowball into a much rougher pull a minute later. What makes the boss dangerous is not one isolated mechanic, but how many different responsibilities the raid has to manage at once while still keeping the room stable. As the fight progresses, that pressure only increases, with tighter overlaps, heavier damage, and less margin for error, which turns clean execution into the main requirement for a kill.
What gives Midnight Falls its pressure is how each phase adds a new coordination check without ever really releasing the room. You are lining up Galvanize beams into Void Cores, stabilizing movement inside Iris of Oblivion, and then carrying that setup into a final stretch where Torchbearer, constant Thunderous Well damage, and every Dawnlight Barrier for The Dark Archangel decide whether the pull is still salvageable. The fight gets tighter as it goes, and clean crystal usage is what keeps a controlled pull from turning into a late wipe.
L'ura is the final boss of March on Quel'Danas, and the fight feels exactly like an endboss should: layered, demanding, and constantly ready to punish a raid that stops thinking for even a few seconds. It is a single-target encounter on paper, but the real check is whether your group can stay organized once movement, memory, positioning, and phase-specific assignments all start stacking on top of each other. The fight does not really ask for anything gimmicky, but it does expect the raid to stay sharp for a long time, which is what makes every mistake feel more expensive as the pull goes on.
Fight Style: Single-target fight.
Recommended Setup: 2x Tanks / 4x Healers / 14x DPS.
Recommended Utility: CC interrupts.
This is a fast, high-pressure fight from start to finish, and that is a big part of why it works so well. The encounter keeps feeding the raid one coordination check after another, but the ideas stay readable enough that wipes usually feel deserved. If your group handles assignments cleanly, reacts on time, and does not lose control of space, the fight feels intense in a good way rather than messy for no reason.
A lot of that comes from how the encounter mixes familiar raid concepts with tighter execution. There is movement pressure, safe-zone management, and structured handling throughout the fight, but the standout mechanic is the memory sequence, which instantly gives the boss its own identity. It is a genuinely unusual idea for a raid encounter, and even if it clearly pushes players toward external tracking tools, it still makes the fight feel different from a standard endboss script.
The result is an encounter that feels polished and appropriately demanding without relying on cheap chaos to create difficulty. As the phases progress, the room gets less forgiving, overlaps get sharper, and recovery gets harder, so the raid has to keep playing clean instead of just surviving until the end. That makes L'ura a strong closer for the tier: hectic, memorable, and punishing in ways that still feel mostly fair.
By the way, don't forget to check out the March on Quel'Danas Raid Overview:
March on Quel'Danas Raid Overview
The mechanics on L'ura are split cleanly by phase, but the fight only really makes sense once you view them as one connected sequence. Early on, the encounter tests memory, movement, and crystal handling, then shifts into stricter positional control in Phase 2 before turning those same responsibilities into a much harsher endphase check.
Most wipes do not come from one mechanic being hard on its own. They usually happen because the raid loses control of space, mishandles crystals, or lets one mistake create a worse overlap a few seconds later. That is why each mechanic below matters not just by itself, but by how it affects the next part of the fight.
This is the void well in the center of the room, and it stays lethal for the entire encounter. There is no real handling trick here: touching it just kills you, so every movement pattern in the fight has to respect that center space.
A rotating laser fires out from The Darkwell and sweeps around the room. Anyone clipped by it takes heavy damage, so this is mostly a movement check that keeps punishing players who stop paying attention between larger mechanics.
Spinning glaives burst out around the boss, then bounce through the room after the initial launch. They hit hard on contact, although the damage drops the longer they remain active, so the main job is to respect the spawn pattern first and then keep tracking their ricochets instead of forgetting about them once they leave the boss.
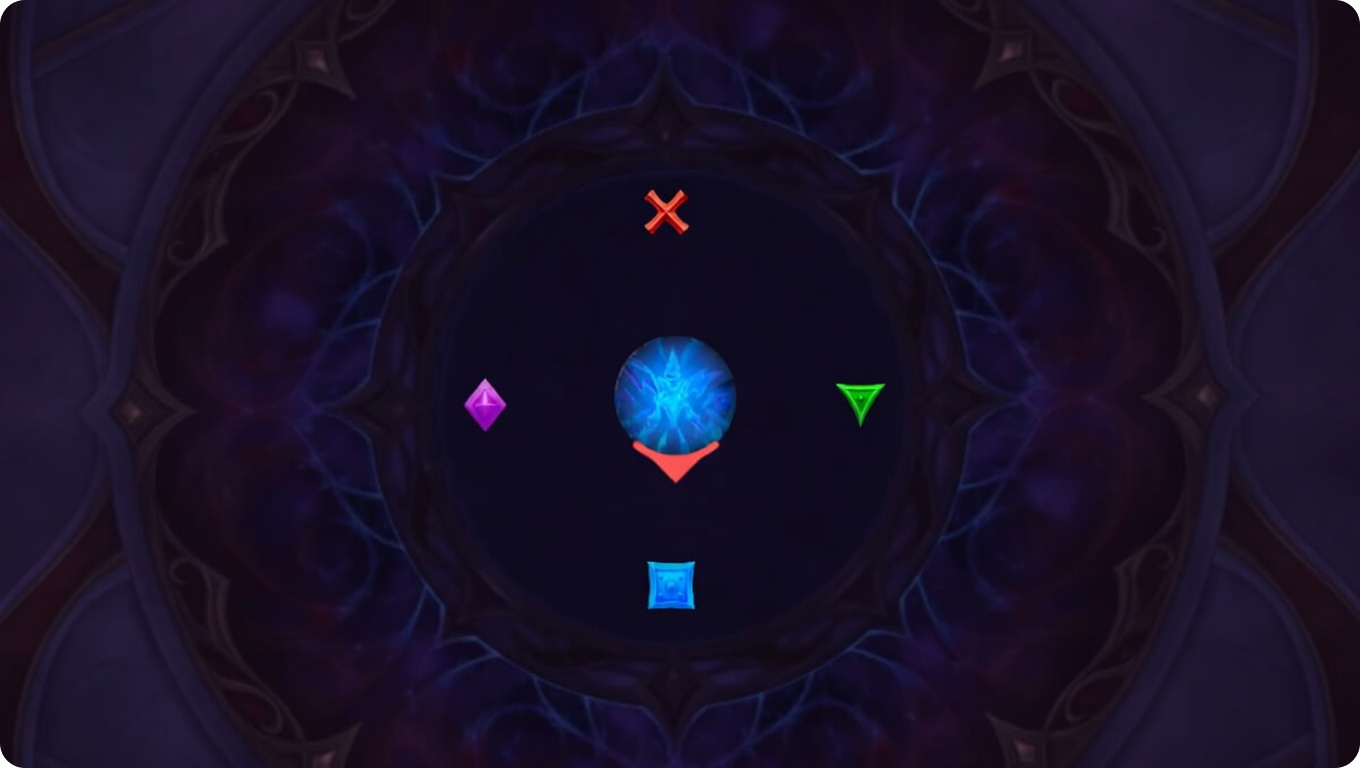
This is the fight's memory mechanic. Five players are marked with Dark Rune symbols in a random sequence, and those same players then need to be struck by the rotating laser in that exact order.
The beam starts from the current tank position and turns clockwise. Getting the sequence right triggers Resonance, which is manageable raid damage, while a mistake causes Dissonance, a much heavier hit that will usually end the pull.
L'ura shields herself for 20 seconds and takes 33% reduced damage while three rotating Matrices try to restore that protection through Safeguard. Those Matrices need to be interrupted or dispelled until their stacks are fully removed and the shield falls off.
Each destroyed Matrix creates two follow-up jobs at once. Midnight Crystals spawn and begin casting Cosmic Fracture, so they need to be grouped and killed quickly, while Dusk Crystals must be healed to full before they trigger that same cast on their own.
When Dusk Crystals are healed successfully, they turn into Dawn Crystals that players have to pick up. Holding one causes light damage over time to the carrier, so this becomes a small but constant responsibility check rather than a free pickup.
If a carrier is hit by a Cosmic effect, the crystal triggers Tears Of L'ura, creating two small soak circles that must be covered. Leaving them unsoaked causes Naaru's Lament, while dropping the crystal for more than three seconds triggers Glimmering until somebody picks it back up.
Each hit on the active tank adds a stack of Heaven's Lance. At five stacks, L'ura unloads a burst sequence and applies Impaled, which increases further Lance damage taken by 50% for 25 seconds, so tanks swap after every completed five-stack cycle.
This is a 25-second raid-wide damage event. It is simple on its own, but it becomes more dangerous because it overlaps with other movement and assignment mechanics instead of happening in isolation.
This intermission effect places a small absorb on every player for 30 seconds while steadily dragging the raid toward The Darkwell. The pull is not explosive, but it is constant enough that players have to keep fighting it the whole time or risk losing space and dying in the center.
Random players take a debuff that deals medium damage and then fires spikes in the direction they are facing. The spike only travels the visible beam length rather than crossing the whole arena, but getting hit still hurts enough that it needs to be aimed cleanly and sidestepped on purpose.
Dawn Crystal carriers need to be extra careful here. If they keep their crystal through the hit, they can trigger Tears Of L'ura, so the clean play is to drop it briefly, resolve the spikes, and pick it back up before floor time becomes a problem.
This is a smaller center pull that still threatens the raid because The Darkwell remains lethal. Even though the pull is weaker than Total Eclipse, it still punishes players who drift carelessly near the middle.
This phase traps the raid inside a circular boundary, and leaving that ring is lethal. On top of that, the entire area is covered by Abyssal Pool, which keeps steady raid damage rolling for the full duration of the phase.
These rotating cores are the main objects you interact with in Phase 2, and they are charged by directing Galvanize beams into them. They are not just passive targets either, because once activated they shape the rest of the phase.
During Core Harvest, active cores get pulled inward and hit hard enough to kill players caught in their path. If any core is still active when Dark Meltdown goes off at 100 energy, it triggers Decay and wipes the raid.
L'ura fires beams at four random players, damaging anyone inside them. If a beam connects with a Void Cores, that core becomes charged and is later consumed during Core Harvest.
Every cast also triggers Overkill Current, a heavy raid-wide hit whose damage is reduced by the number of players that soaked the beams. That is why this mechanic is both a positioning check and a raid-soak check at the same time.
Whenever a core is hit, it creates a pull toward that core's position. Those pulls are the reason beams need to be spread across different sides of the room instead of all being sent one direction.
If the raid only charges cores on one side, the pull can drag players out of Iris of Oblivion, which is lethal. Hitting opposite sides lets the pulls counterbalance each other and keeps the raid inside the ring.
This is the constant background damage of the final phase, ticking raid-wide every two seconds. It does not create special handling by itself, but it raises the cost of every later mistake because the raid never gets a calm reset point.
This cast wipes the raid unless players are standing inside Dawnlight Barrier, which is created by consuming a Dawn Crystal with the extra action button. That turns crystal management into the defining resource check of the phase, because each cast needs its own barrier.
Once the cast finishes, L'ura follows with Black Tide, a massive frontal that has to be dodged cleanly. It is not just about living the hit either, because bad movement afterward can also leave the room in a worse state for the next sequence.
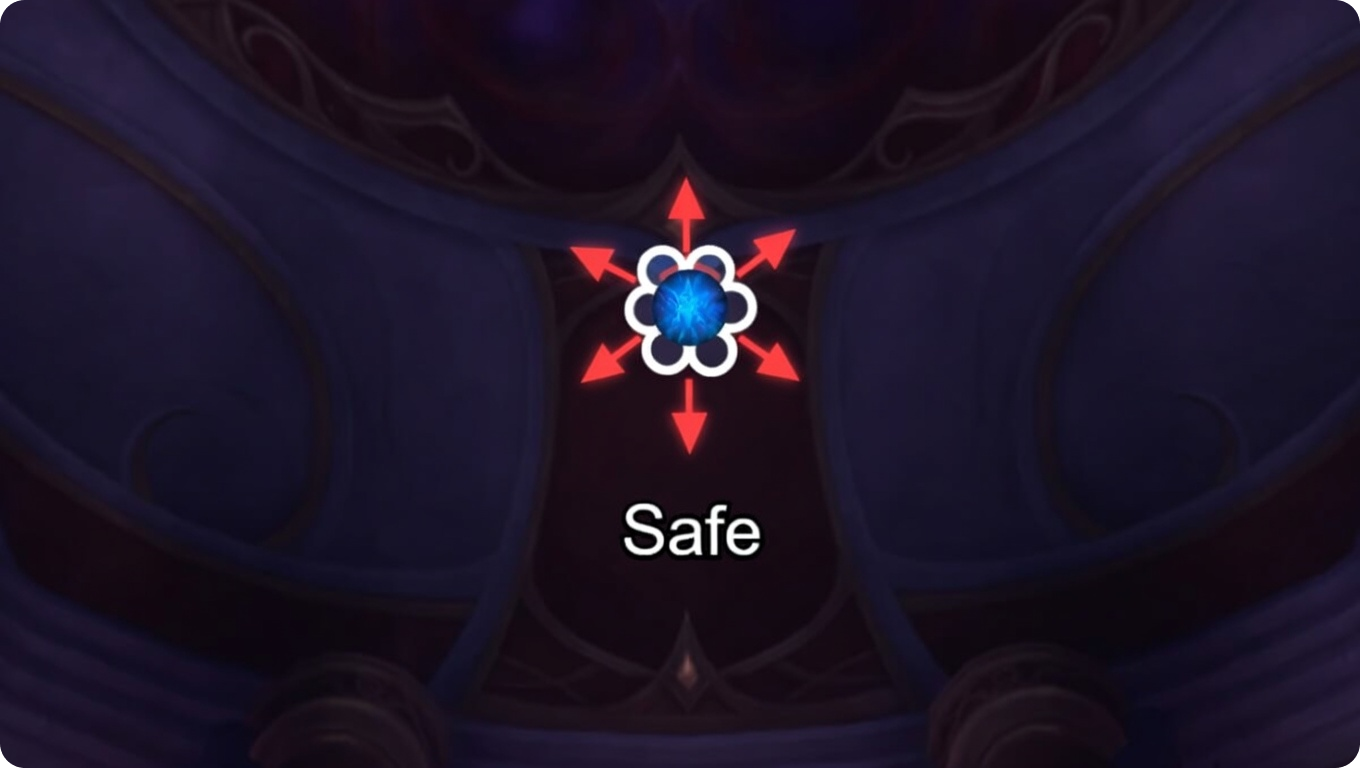
Players carrying Dawn Crystals emit a 12-yard aura that creates the phase's safe zone. Anyone outside that light takes increasing damage every second from Midnight and is also slowed by 30%, so the raid has to keep movement disciplined around crystal holders instead of scattering freely.
Small stars appear and deal heavy damage if you get clipped when they spawn. After that, they begin forming beams between each other that blink in and out, so the mechanic becomes a combined spawn-dodge and beam-dodge pattern rather than a single one-time hit.
Two small soak zones appear and must be fully covered within 22 seconds. Failing that triggers Stellar Implosion, so this is a hard-priority soak mechanic rather than something the raid can handle late.
This is another 25-second raid-wide damage event. In the final phase it becomes even more punishing because it stacks on top of permanent ambient damage, crystal positioning, and the rest of the room control checks.
L'ura is not a boss where one mechanic alone kills you most of the time. Wipes usually happen because one mistake makes the next overlap worse, so the cleanest way to approach Heroic is to treat every phase as a setup for the one after it.
One general rule: Do not step into The Darkwell. The center is a permanent death zone, so every movement pattern in the encounter has to respect that space from the very start to the final finish.
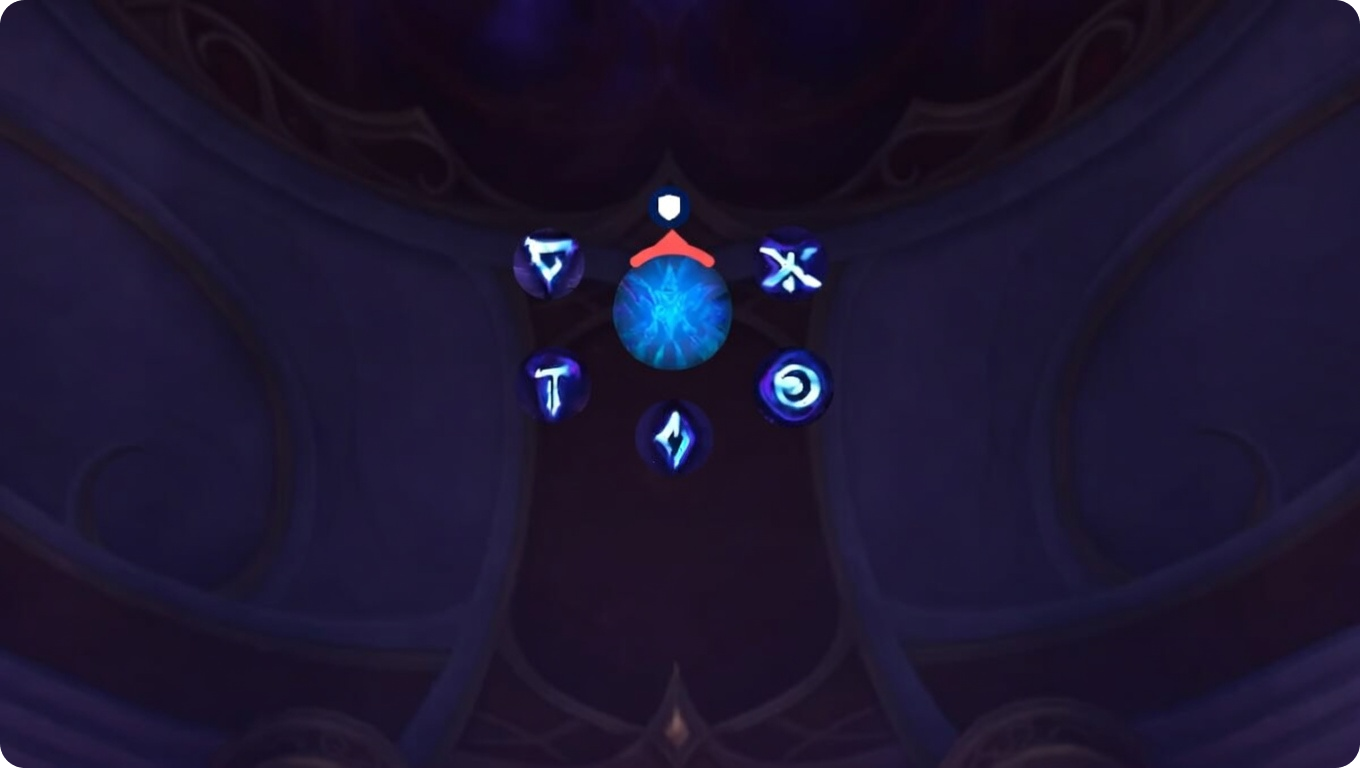
Death's Dirge is the core memory mechanic of Phase 1. Five players are marked, and those marked players need to be hit by the rotating laser in the exact same order the symbols were shown. This is one of the main execution checks early in the fight, because getting it right keeps the phase stable, while getting it wrong usually creates damage the raid does not recover from cleanly.
If the order is correct, the raid triggers Resonance and only takes manageable damage. If the order is wrong, it causes Dissonance, which is much more punishing and will usually turn the pull into a wipe.
You also need to keep dodging Heaven's Glaives throughout the phase. They do not stop being relevant after the initial cast, because they continue ricocheting around the room and remain one of the easiest sources of avoidable deaths if players lose track of them during other mechanics.
The rotating Dark Quasar beam coming from The Darkwell needs to be dodged at all times as well. On its own it is a fairly readable movement check, but in practice it becomes dangerous because it overlaps with everything else happening in Phase 1 and punishes anyone who stops respecting positioning for even a moment.
During Safeguard Prism, the boss takes 33% reduced damage. While that shield is active, the rotating Safeguard Matrices need to be interrupted or dispelled quickly so the shield stacks stop getting refreshed and the raid can move the phase forward.
When the Matrices break, the fight splits into several jobs at once:
Crystal handling has its own rules, and those rules matter for the rest of the encounter because sloppy crystal play tends to create unnecessary raid damage and bad overlaps later on.
Tanks should swap after Heaven's Lance reaches 5 stacks and the follow-up tank debuff has been applied. That is the standard swap point in this phase, and keeping it consistent helps prevent the tank mechanic from becoming messy during more dangerous overlaps.
Healers also need to be ready for Shattered Sky. It is sustained raid-wide damage rather than a single burst, and it becomes noticeably more dangerous when it lines up with movement checks, crystal handling, or mistakes elsewhere in the phase.
Total Eclipse repeatedly applies a small absorb while constantly pulling the raid toward The Darkwell. The pull is the real danger here, because even if the damage is manageable, drifting too close to the center quickly turns the intermission into a wipe. Everyone needs to keep resisting that movement instead of treating it like background pressure.
You also need to keep dodging the faster Dark Quasar sweeps. The mechanic is already familiar from Phase 1, but the intermission version is less forgiving because the room feels tighter and players have less freedom to recover once they fall behind on movement.
Starsplinter needs to be handled cleanly by aiming the spikes away from the raid and then sidestepping once they fire. This is mostly a directional awareness check, but it becomes much more dangerous if players panic, face the wrong way, or force extra movement into the group during other intermission pressure.
If you are carrying a crystal, drop it for Starsplinter and then pick it back up quickly afterward. That keeps you from triggering unnecessary crystal effects during the spike sequence while still making sure the crystal is not left on the floor long enough to create a separate problem.
Phase 2 takes place inside Iris Of Oblivion, and the first rule is simple: do not leave the circle. Crossing that boundary is instantly fatal, so the entire phase is built around managing beams, pulls, and movement without ever getting forced outside the ring.
The phase is much easier to control if the raid is already split into 4 marker groups before each cycle begins. Pre-assigned positions make the beam handling cleaner, reduce panic movement, and give the raid a more reliable way to react once the room starts pulling in different directions.
Galvanize marks 4 players with beams, and those beams need to be aimed into the rotating Void Cores. This is the central mechanic of the phase, because proper beam placement is what powers the cores and drives the rest of the sequence forward.
Players who are not directly assigned to a beam should still help soak whenever possible. That reduces the raid damage from Overkill Current, which is one of the main reasons Phase 2 feels so punishing if the raid is too slow or too spread out during each cast.
Every time a core is hit, it creates a Cosmic Fission pull. Because of that, you do not want all beams charging cores from the same side of the room. Sending them into different sides helps counterbalance the movement and keeps the raid from getting dragged too hard in one direction, which is especially important inside such a strict arena boundary.
During Core Harvest, stay out of the marked paths entirely. The moving cores will one-shot anyone caught in their route, so this part is less about soaking or control and more about reading the lanes correctly and keeping your movement disciplined until the danger passes.
At 100 energy, Dark Meltdown transitions the raid into Phase 3. That transition only stays clean if the phase was handled properly beforehand. If any core is still active, Decay wipes the raid immediately, so the room has to be fully resolved before the cast completes. Right before the knockback, the raid should also stack together so everyone enters Phase 3 from one controlled position instead of starting the final phase scattered and already behind.
Thunderous Well deals constant raid damage for the entire phase, which means healing pressure never really falls off. There is no calm reset point in Phase 3, so every other mechanic becomes more punishing simply because the raid is already under steady damage the whole time.
You need to stay inside the Torchbearer light created by crystal holders. Drifting out of that safe area quickly becomes dangerous, since the damage ramps up and the attached slow makes it much harder to get back into position cleanly. This is one of the main reasons Phase 3 falls apart so fast when movement gets sloppy.
The Dark Archangel is the defining mechanic of the phase. It wipes the raid unless a player consumes a crystal to create Dawnlight Barrier, so crystal usage has to stay deliberate from start to finish. Each cast needs its own barrier, which means wasting crystals earlier in the fight usually comes back to punish the raid here.
After that, you need to dodge Black Tide and make sure the follow-up ground effects are not left in bad positions. The mechanic itself is readable, but it becomes much more dangerous when poor placement starts cutting off movement around the safe zone and makes the room harder to play in for the rest of the phase.
Dark Constellation also has to be dodged cleanly, both on the initial spawns and on the beams that form afterward. This is mostly a room-control mechanic, but it scales badly once players panic, overmove, or start crowding the safe area without paying attention to where the stars are forming.
Light Siphon must be fully soaked within 22 seconds. If that does not happen, Stellar Implosion wipes the raid, so this is not a mechanic you can afford to handle late or casually. The raid needs to respond to it as a hard priority every time it appears.
From there, the Phase 3 sequence simply repeats until the boss dies or the raid runs out of crystals. That is what ultimately defines the end of the fight: not just surviving each individual mechanic, but managing the crystal resource well enough that the raid still has the tools to cover every later The Dark Archangel cast.