
The The Hivemind is one of the most famous secret mounts in World of Warcraft and still one of the most unusual ever added to the game. It is not just a hidden collectible - it is a full multi-step secret chain with puzzles scattered across older zones, dungeons, and instances, ending in a cooperative five-player challenge. What makes it even more special is that this is the first true 5-player mount in WoW, with a unique rule: only the four players from your most recent completed Hivemind ritual can ride with you.
Unlike most secret mounts, this one is not about a single hidden object or a short sequence of niche interactions. The Hivemind route is long, extremely specific, and includes multiple puzzle types - color matching, code logic, trade chains, coordinated monocle usage, group movement, and exact multi-player mechanics. Because of that, the mount remains one of the most satisfying secret rewards in the game even years after its discovery.
This guide follows the full intended route and keeps all important mechanics, exact numbers, and puzzle logic intact. Since several parts of the solution depend on correct quantities, precise step order, or exact interaction conditions, you should avoid improvising where the guide gives a fixed method.
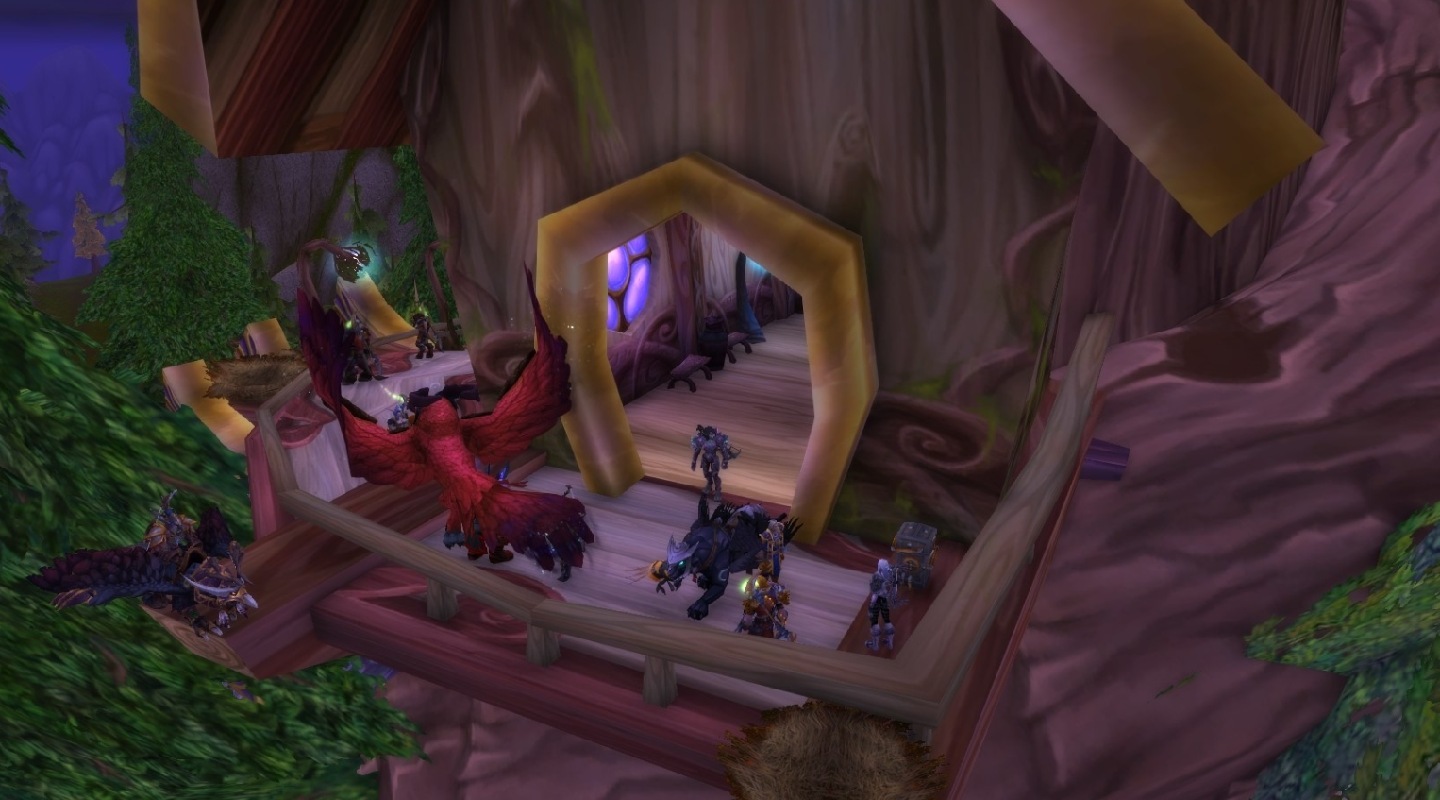
The The Hivemind is a secret mount that requires a long sequence of puzzles and interactions across multiple zones. The final stages cannot be completed solo. A group is required, and for the last major sections, you specifically need five players working together.
You are not required to collect all four monocles personally, but it is strongly recommended that you obtain at least one of them. In practice, having more monocles on your team makes the later parts of the secret much easier to coordinate. Ideally, your group should have access to all four monocles before moving into the Suramar beam section.
If you do not have any monocles at all, the only practical way to continue is to join a group of players who already have the required monocles and are ready to proceed from the later shared steps.
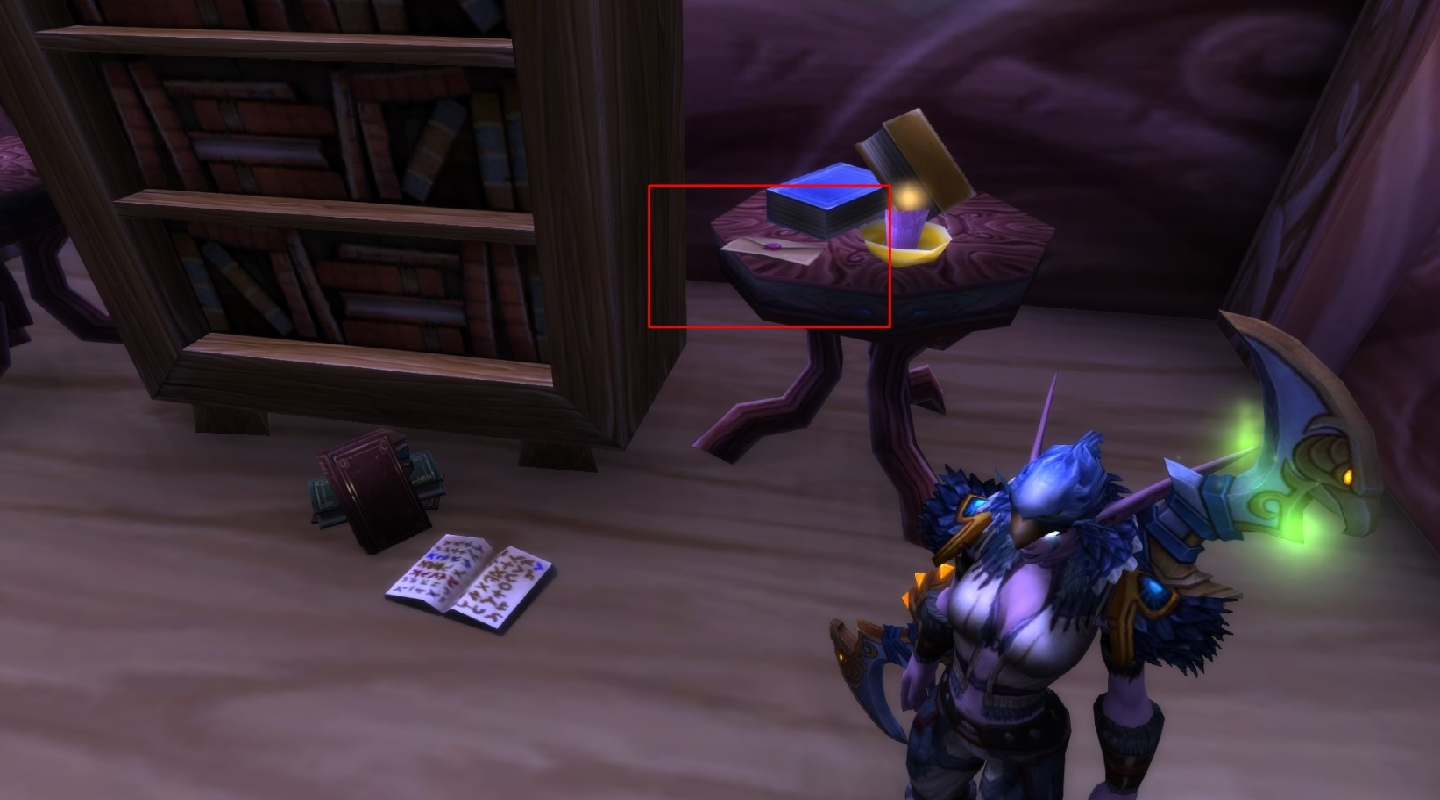
For every major step after the start of the secret chain, you must keep the Talisman of True Treasure Tracking equipped. This item is sold by Griftah in Shattrath City.
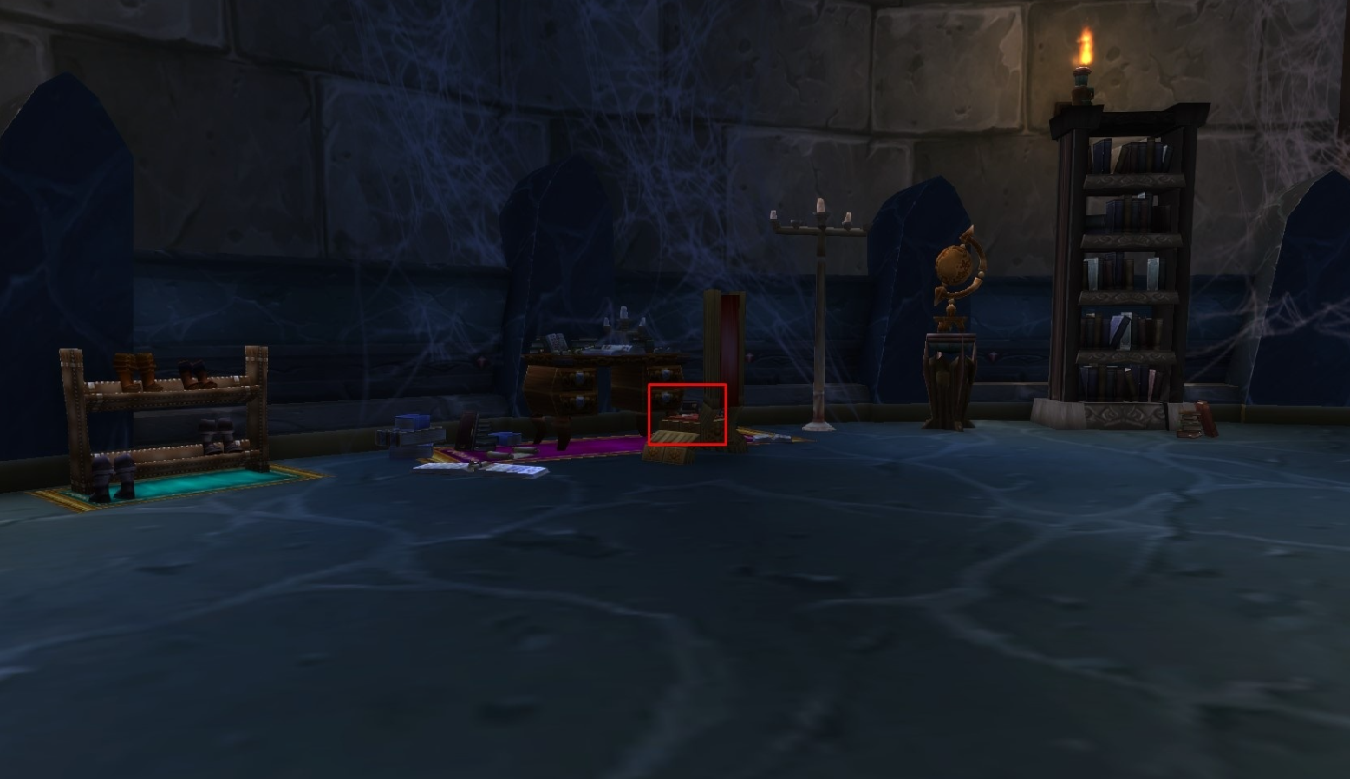
After you buy and equip the Talisman of True Treasure Tracking from Griftah, several items behind him begin to glow. Only one of those objects is directly interactable at the start - the letter on the table. The other glowing items are not used immediately, but they act as hints for the four opening puzzle branches.
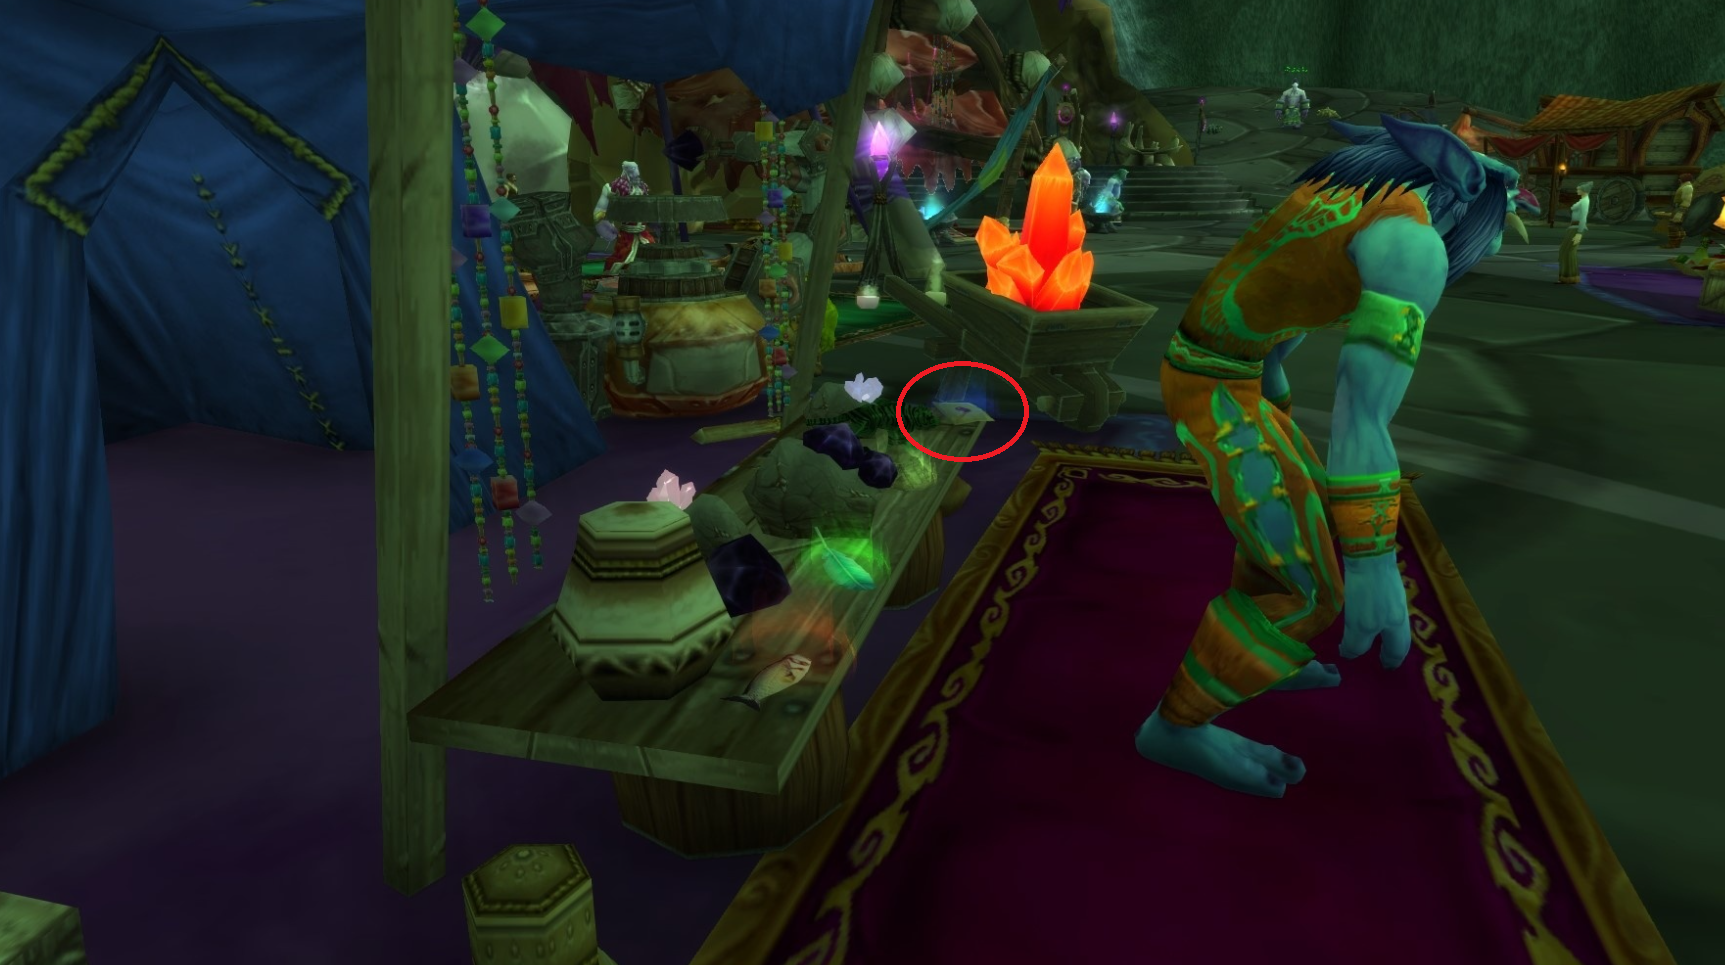
The red fish points toward Vashj'ir. The yellow pyramid points toward Halls of Origination. The green feather points toward Skyreach. The blue letter begins the letter-based puzzle chain.
Each of these branches leads to a different puzzle, and each completed branch rewards one monocle:
The monocles can be collected in any order as long as you follow each puzzle correctly. The route below keeps them separated into clear sections.
The Red Crystal Monocle is obtained through a long underwater trade chain in Vashj'ir. While wearing the Talisman of True Treasure Tracking, several fish vendors become interactable across the three Vashj'ir subzones.
These vendors are spread between Kelp'thar Forest, Shimmering Expanse, and Abyssal Depths.
The interactable fish vendors are:
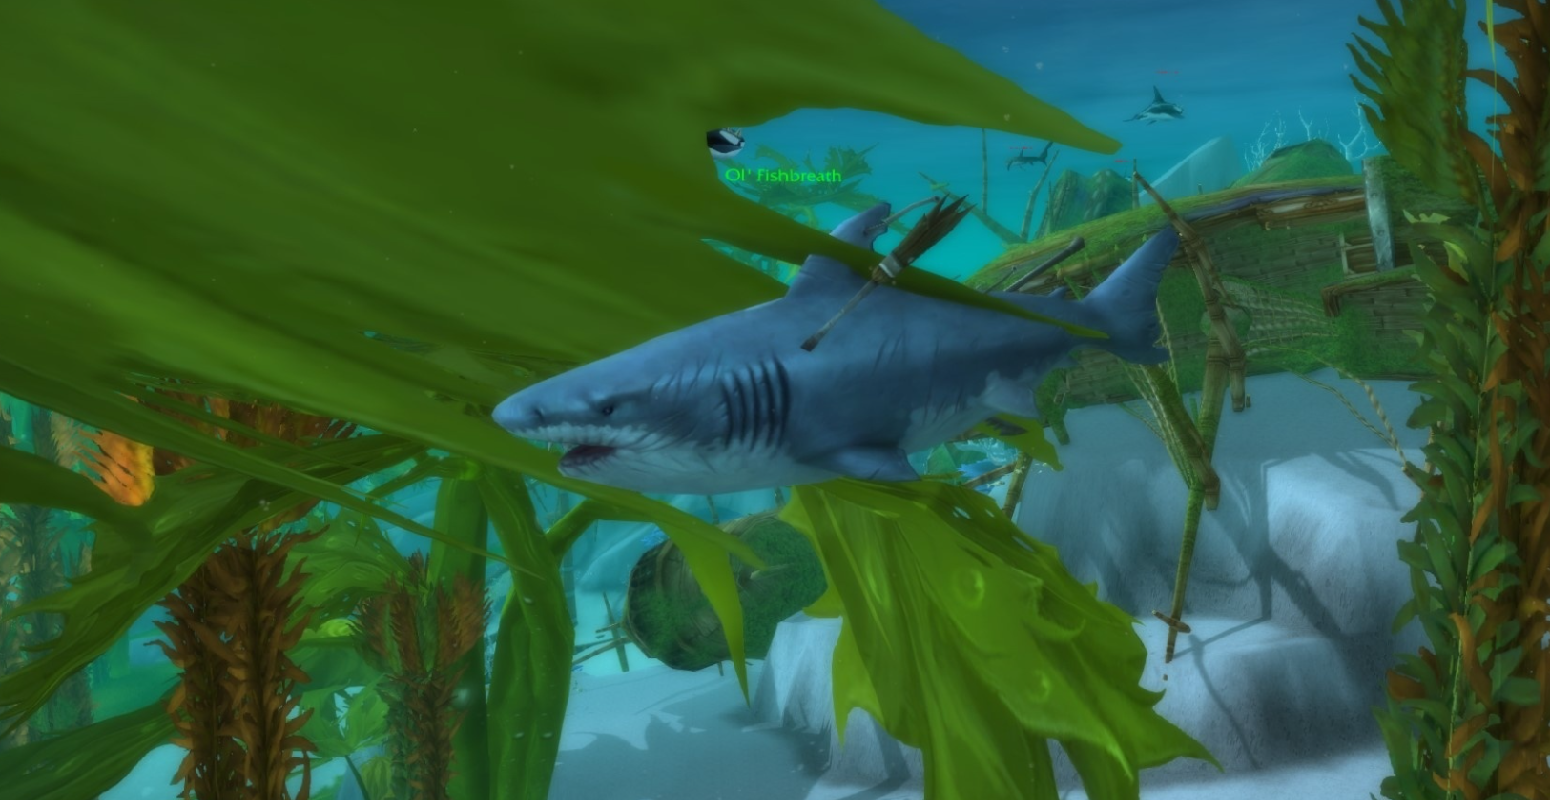
Ol' Fishbreath
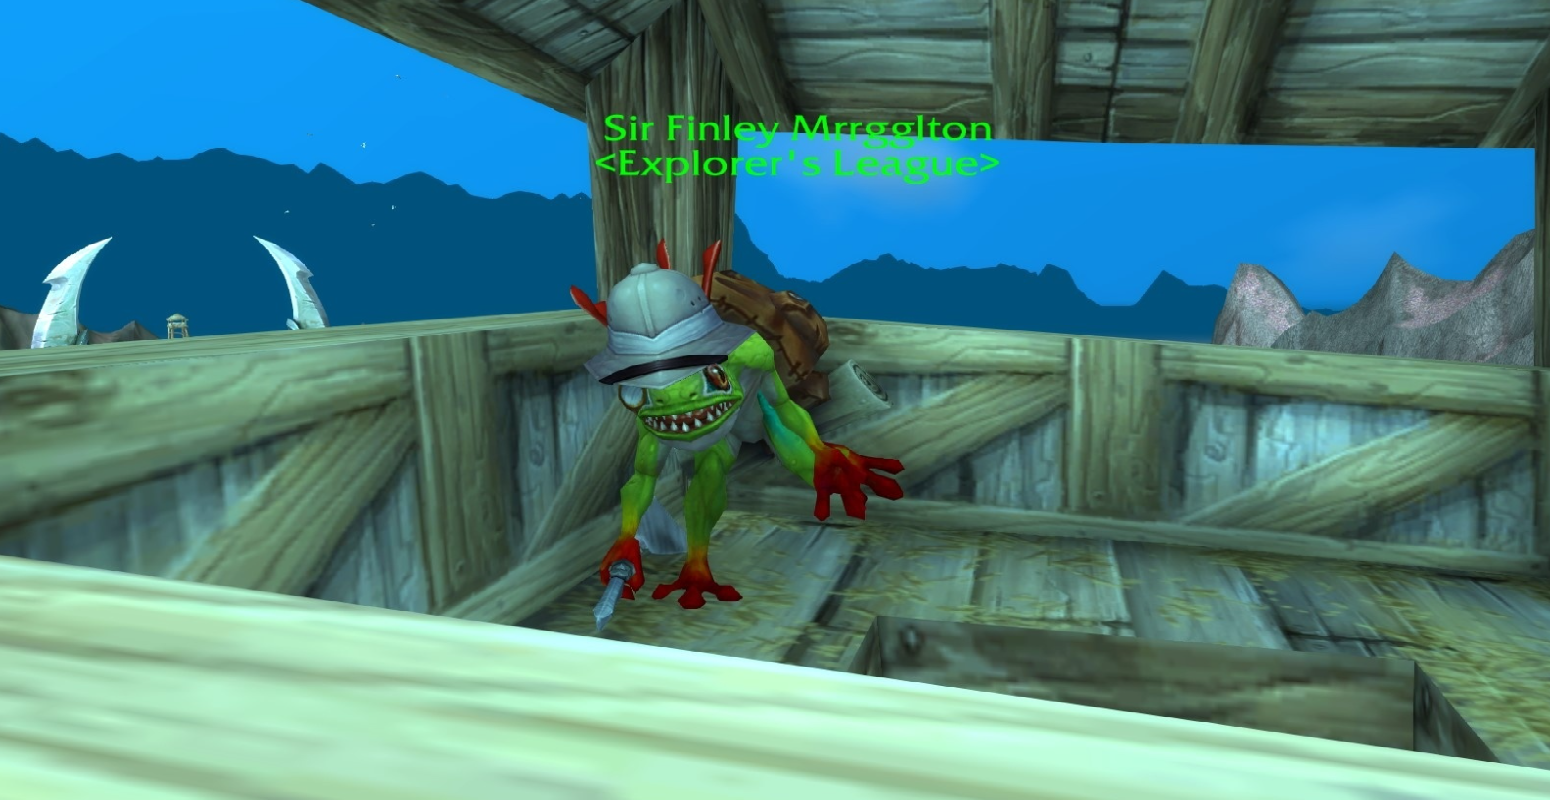
Sir Finley Mrrgglton
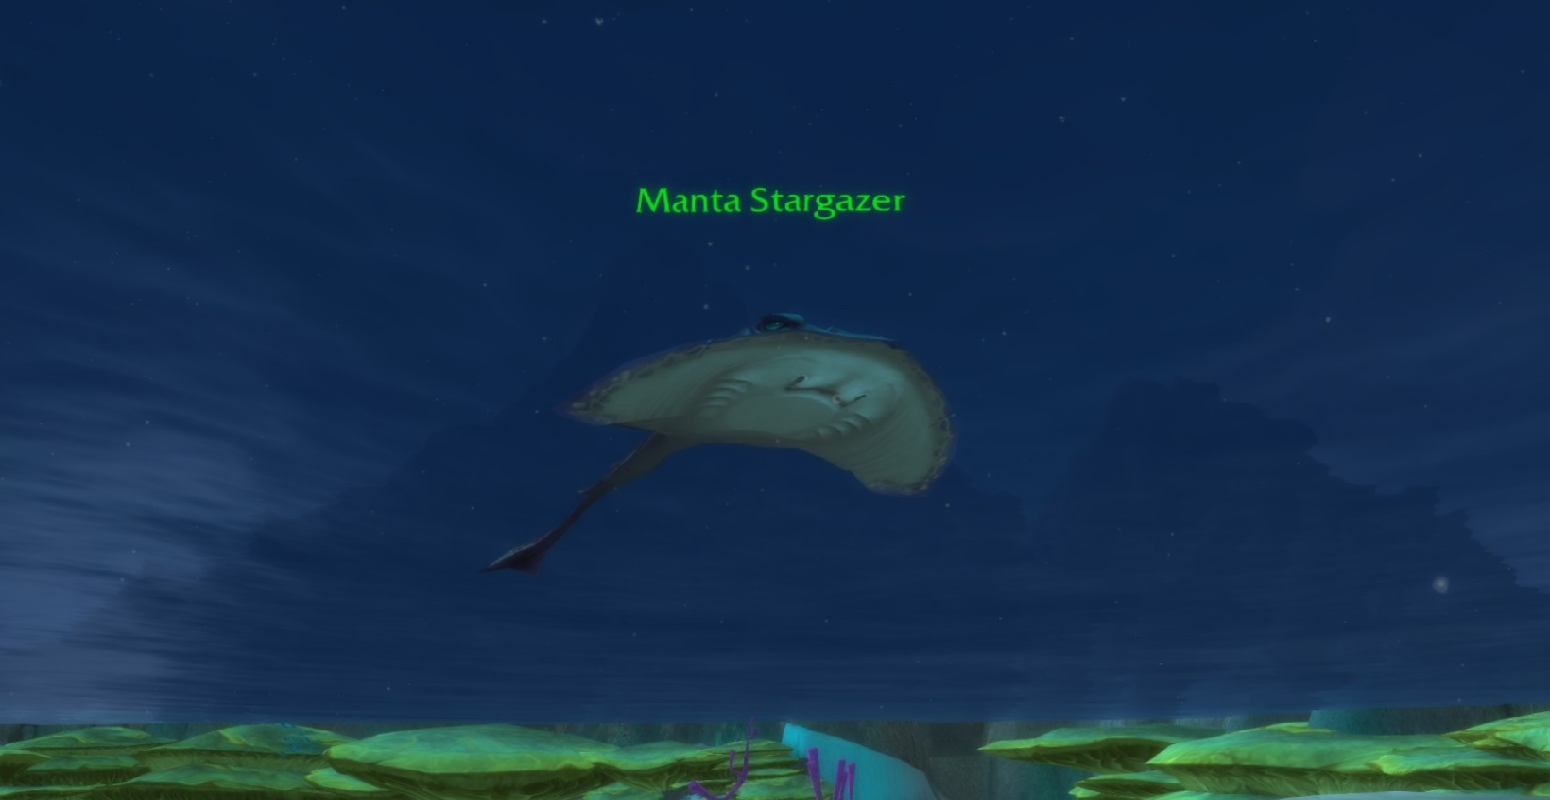
Manta Stargazer
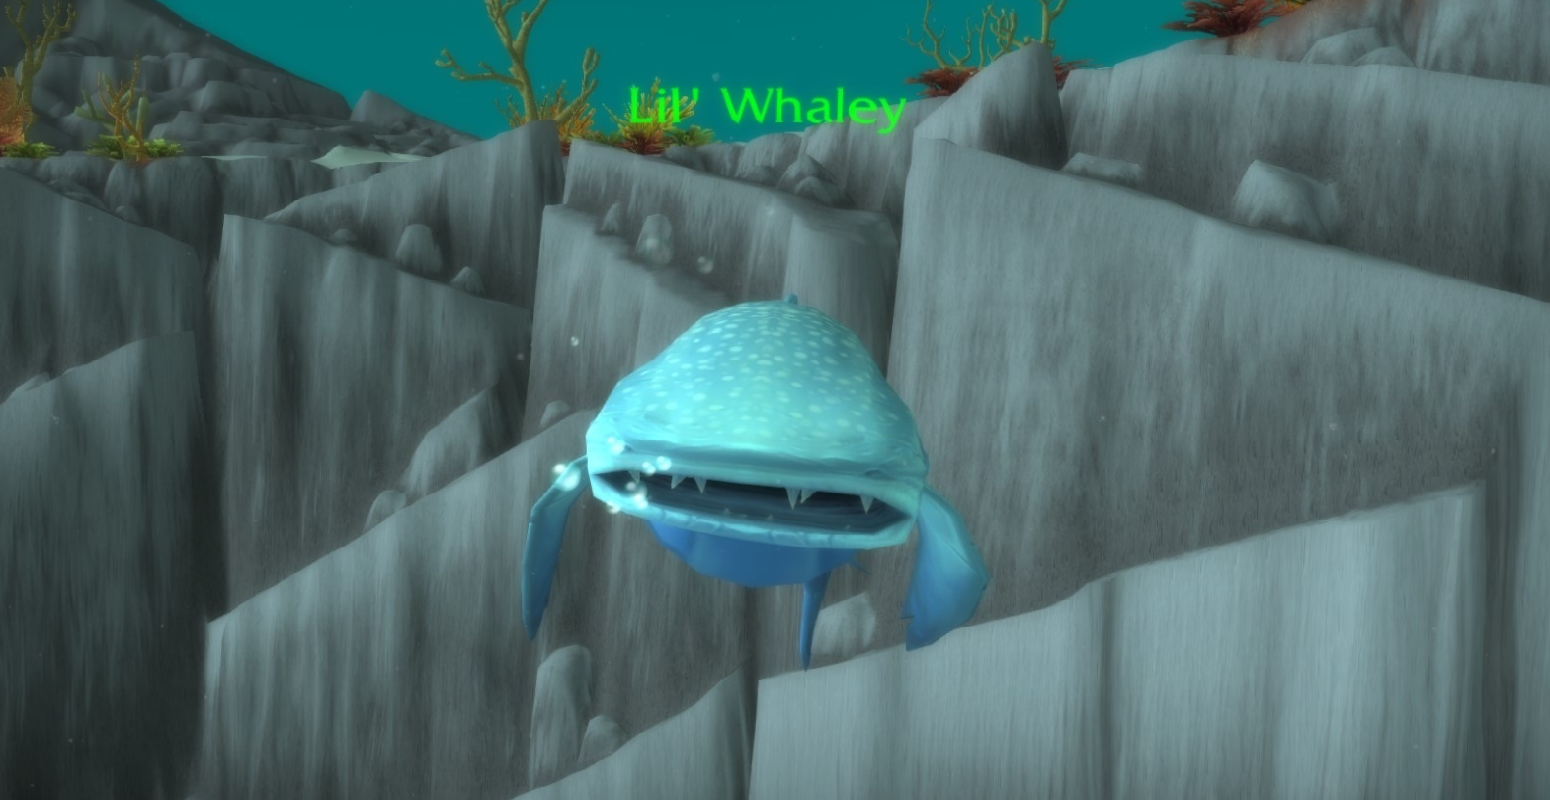
Lil' Whaley
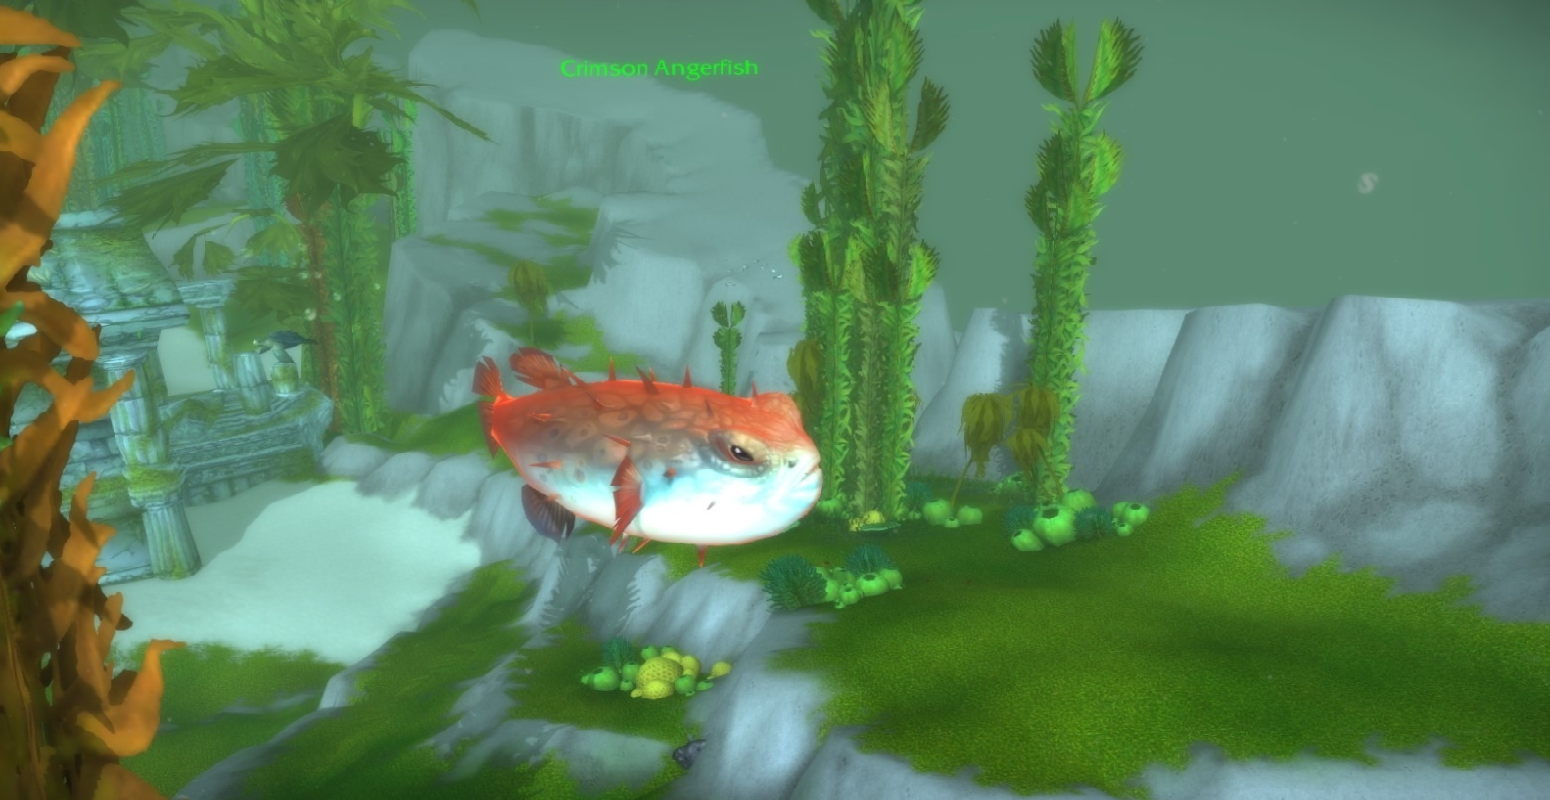
Crimson Angerfish
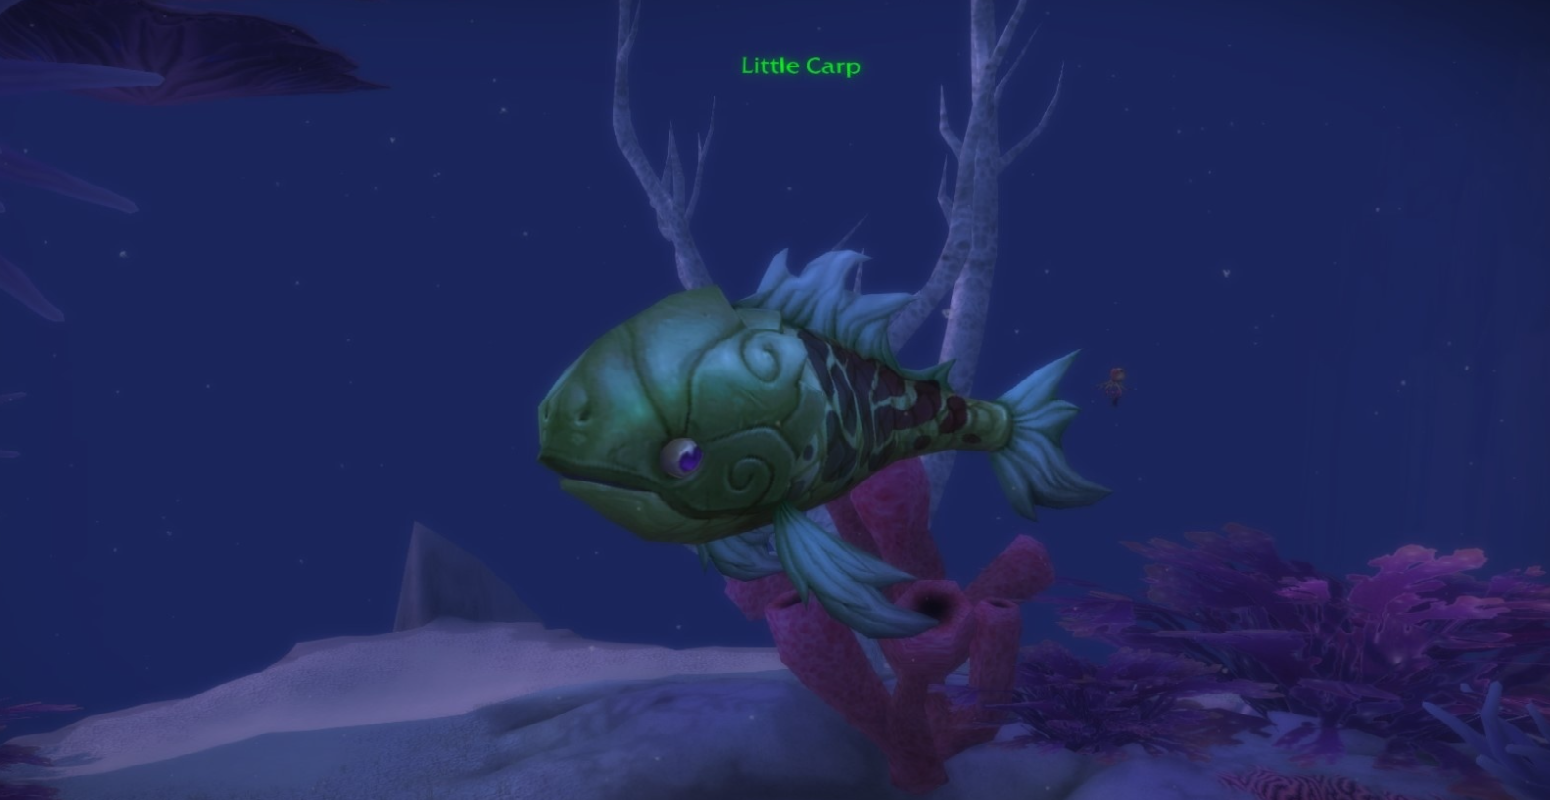
Little Carp
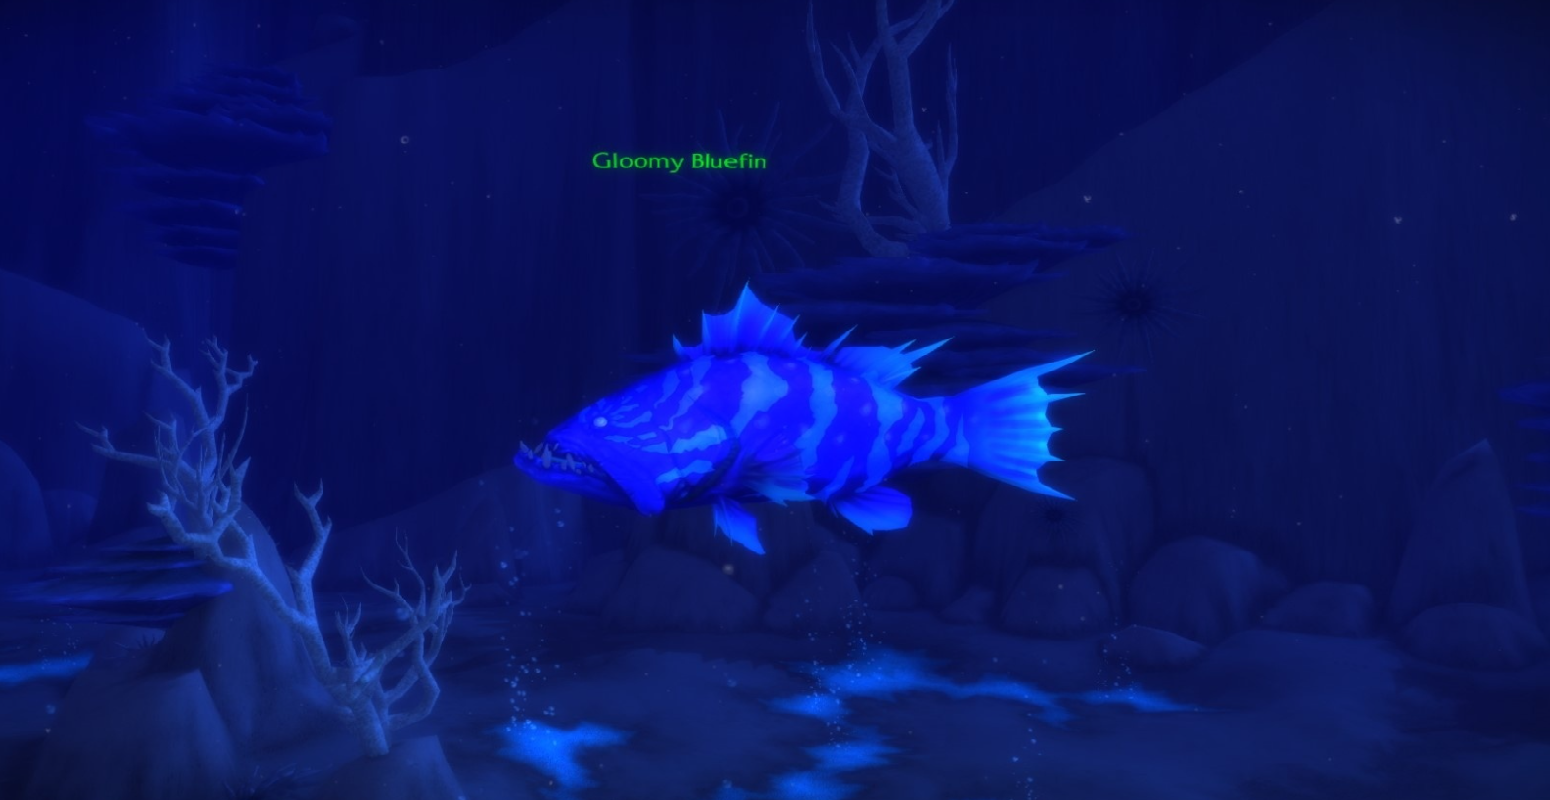
Gloomy Bluefin

Volatile Violetscale
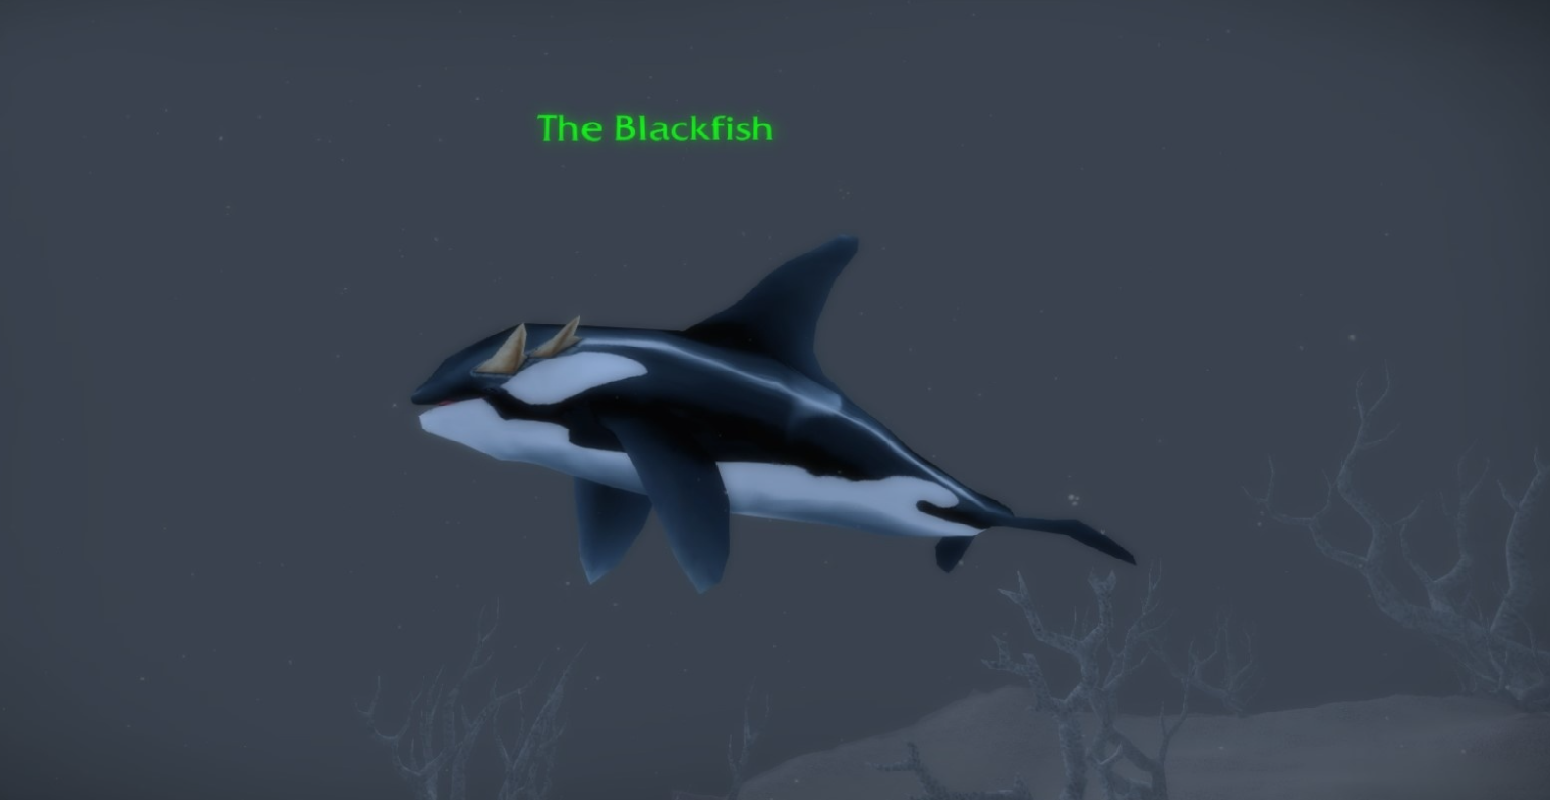
The Blackfish
Each fish vendor trades in temporary sea-themed currencies. The different currency colors have different durations: blue currencies last 1 hour, green currencies last 30 minutes, and white currencies last only 5 minutes. Because of that, you should move through the chains with purpose and avoid unnecessary downtime.
Sir Finley Mrrgglton sells Seashell for gold and also sells the Red Crystal Monocle for a combination of traded items.
The Red Crystal Monocle costs:
The most practical order is to buy those items in the order listed above.
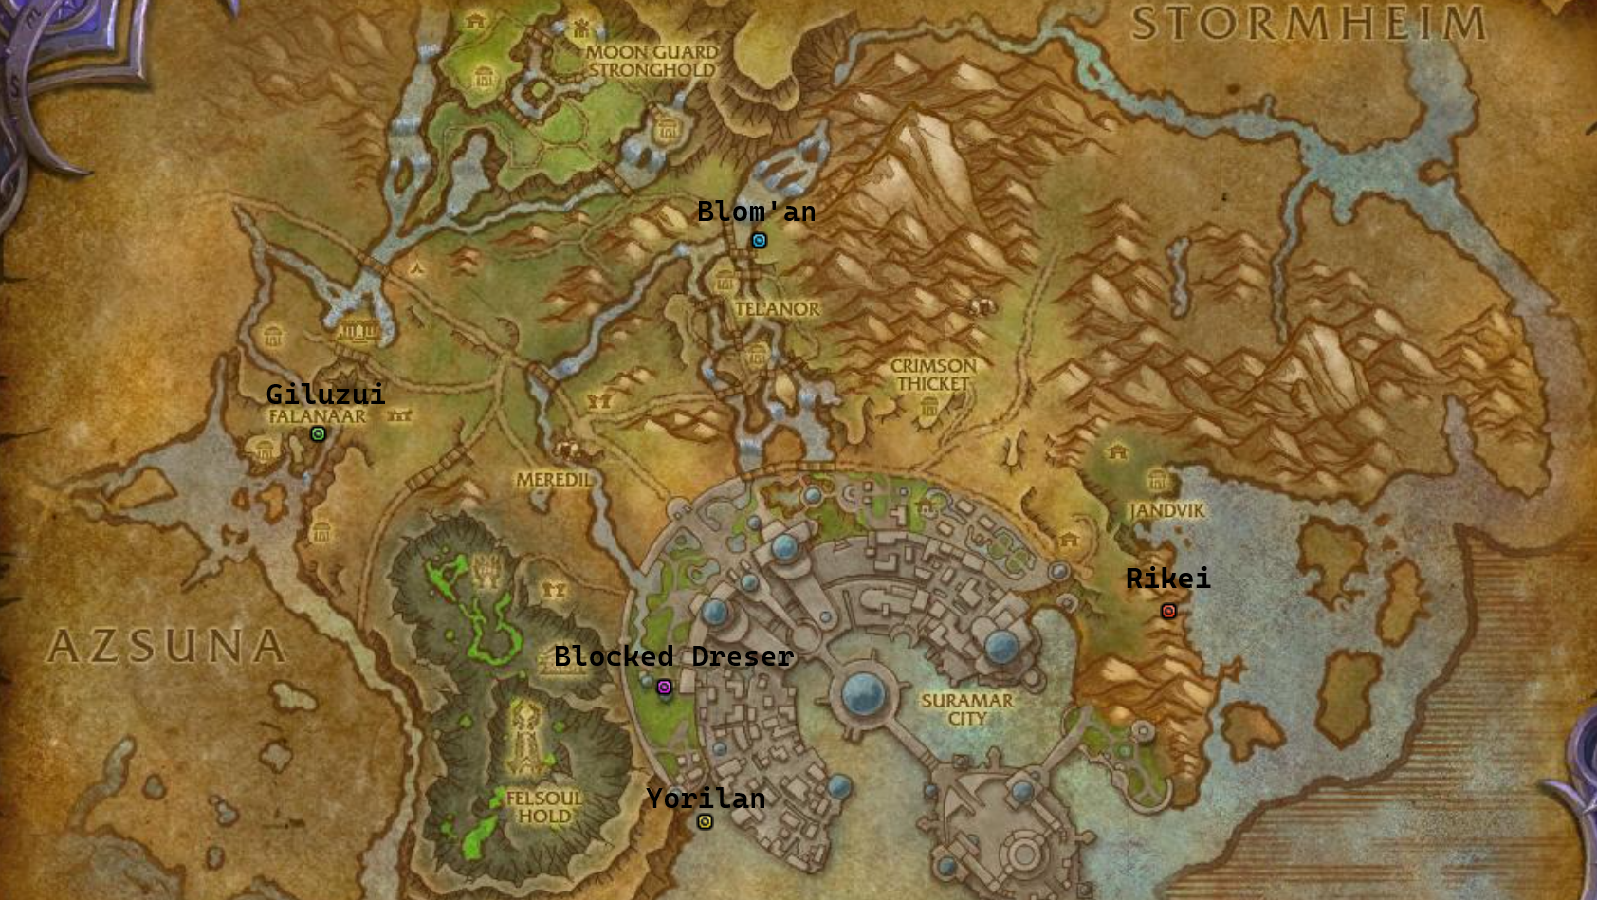
After obtaining the Red Monocle, wearing it near Rikei in Suramar will make that NPC hostile, which matters later in the group stage.
To buy the 5 Scintillating Murloc Skin Lotion, you need 50 Glittergill Glitter and 40 Symbiotic Plankton.
To obtain the Glittergill Glitter, you need to do the following:
/way #205 44 20 Seashells/Sir Finley (500)
/way #204 38 77 Volatile Violetscale/Cavity-Free Tooth (100)
/way #205 53 22 Manta Stargazer/Razoreel Larva (50)
/way #205 69 47 Lil' Whaley/Well Fed Doctor Fish (250)
/way #204 65 42 Gloomy Bluefin/Freshly Molted Crab Skin (10)
/way #201 60 59 Ol' Fishbreath/Glitter Gill (50)
To obtain the Symbiotic Plankton:
/way #205 44 20 Seashells/Sir Finley (80)
/way #204 65 42 Gloomy Bluefin/Giant Giant Toenail (2)
/way #204 45 17 Little Carp/Makrura Eye (4)
/way #204 38 77 Volatile Violetscale/Accidentally Severed Seahorse (1)
/way #205 53 88 Crimson Angerfish/Shiny Sea Serpent Scale (2)
/way #205 53 22 Manta Stargazer/Symbiotic Plankton (40)
After obtaining both items, return to Sir Finley Mrrgglton and exchange the glitters and the plankton for 5 Scintillating Murloc Skin Lotion.
To obtain the 5 Potent Gastropod Gloop, you need to do the following:
/way #205 44 20 Seashells/Sir Finley (300)
/way #201 60 59 Ol' Fishbreath/Vantus Black Ink (30)
/way #204 15 82 The Blackfish/Super Slick Eel Slime (30)
/way #204 38 77 Volatile Violetscale/Rock Encrusted Whelk Shell (3)
/way #204 45 17 Little Carp/Gastropod Gloop (5)
To obtain the 5 Captured Cavitation Bubble, you need to do the following:
/way #205 44 20 Seashells/Sir Finley (1500)
/way #205 69 47 Lil' Whaley/Very Pretty Coral (300)
/way #201 60 59 Ol' Fishbreath/Iridescent Shimmerray Skin (100)
/way #205 53 88 Crimson Anglerfish/Luxurious Luxscale Scale (20)
/way #204 15 82 The Blackfish/Captured Bubbles (5)
The Yellow Crystal Monocle is hidden inside Halls of Origination. After the first boss, you will reach the large room with the elevator. While wearing the Talisman of True Treasure Tracking, you can interact with the Stellar Refraction Device there.
To actually access the puzzle room, head north from the elevator and take the open staircase downward to the lower level.
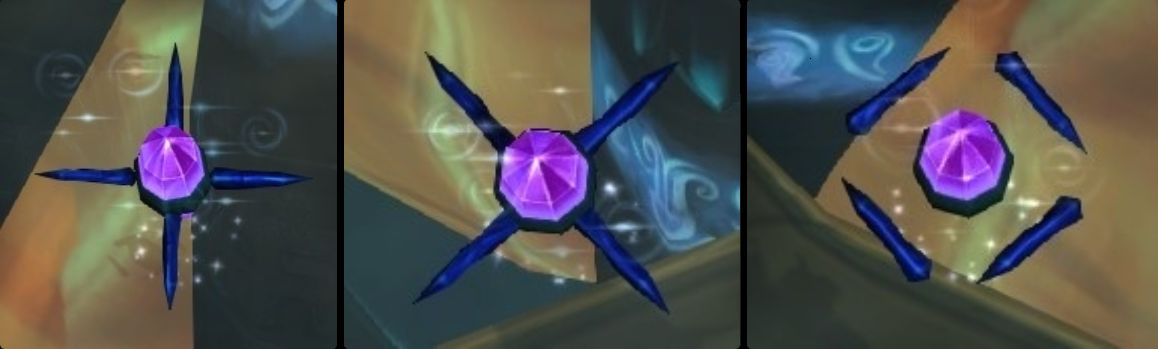
This puzzle uses constellations and three refractor types. Your goal is to change all active constellations to the same color.
The three refractors work like this:
The colors always cycle in this order:
Some constellations are static and cannot be changed. Instead of trying to move everything randomly, identify the fixed color and work outward from those stars until all adjustable constellations match them.
Once all constellations have been aligned to the same color, a chest appears on top of the Stellar Refraction Device containing the Yellow Crystal Monocle. Be careful while looting - if you click the Refraction Device again by mistake, the puzzle resets and the chest despawns.
Wearing the Yellow Monocle near Yorilan in Suramar will make that NPC hostile later.
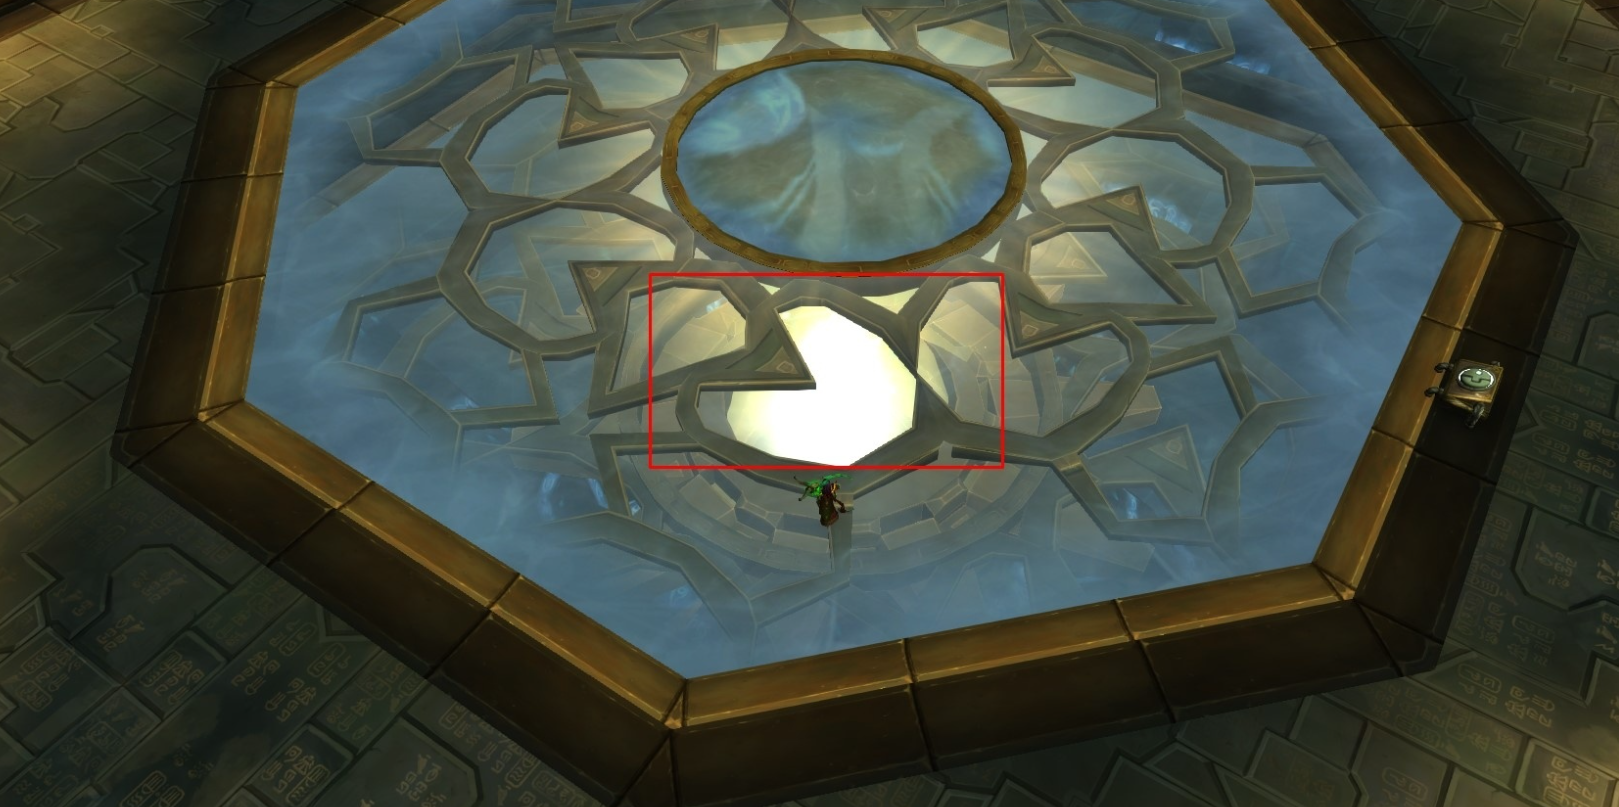
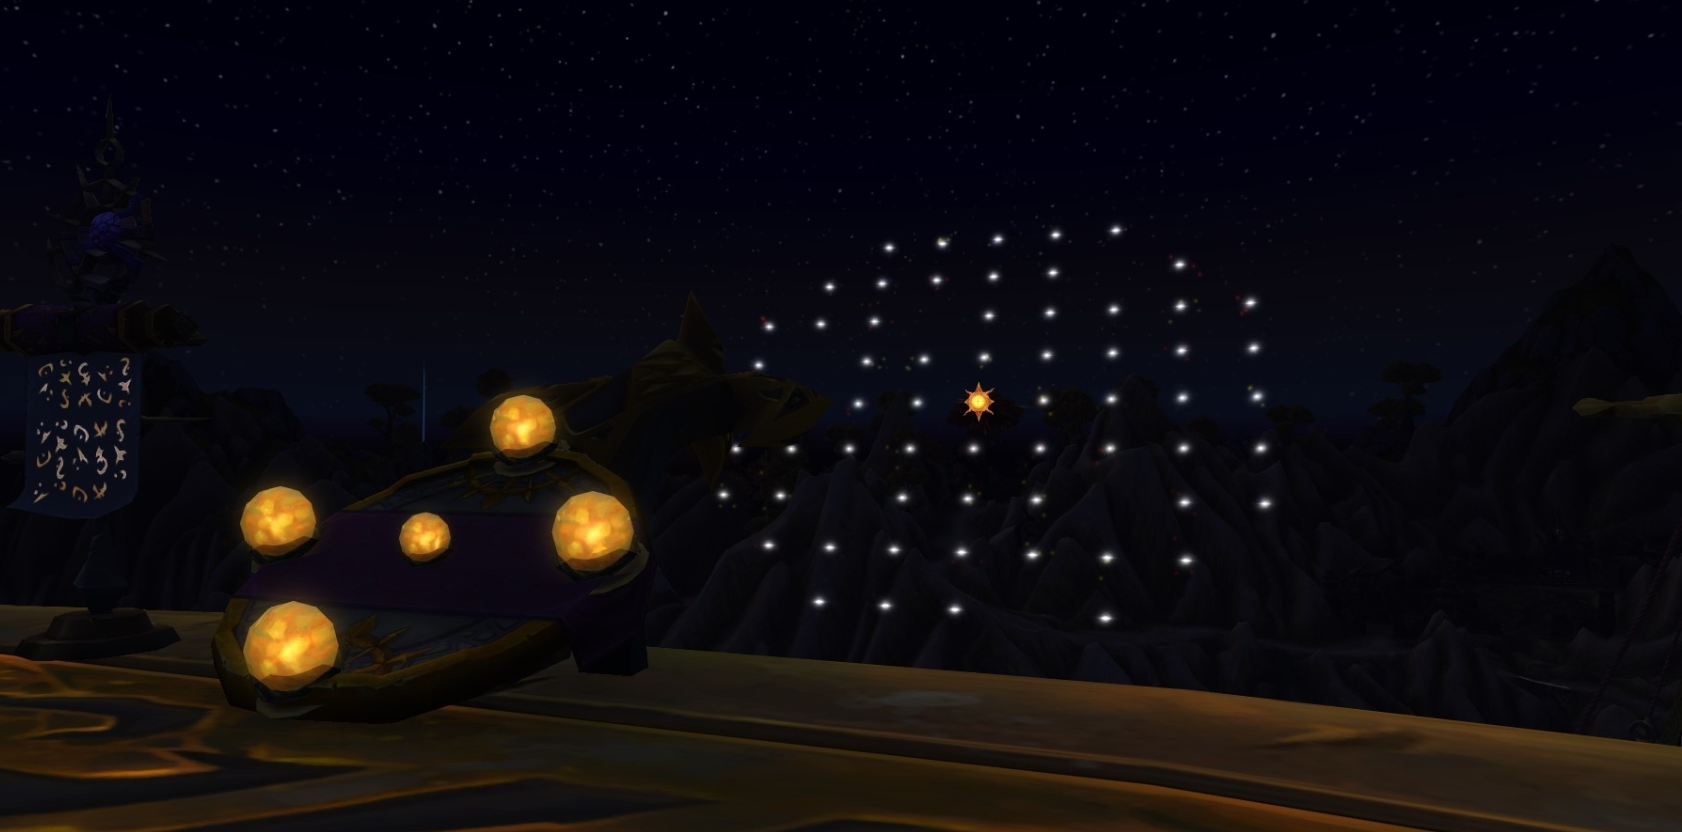
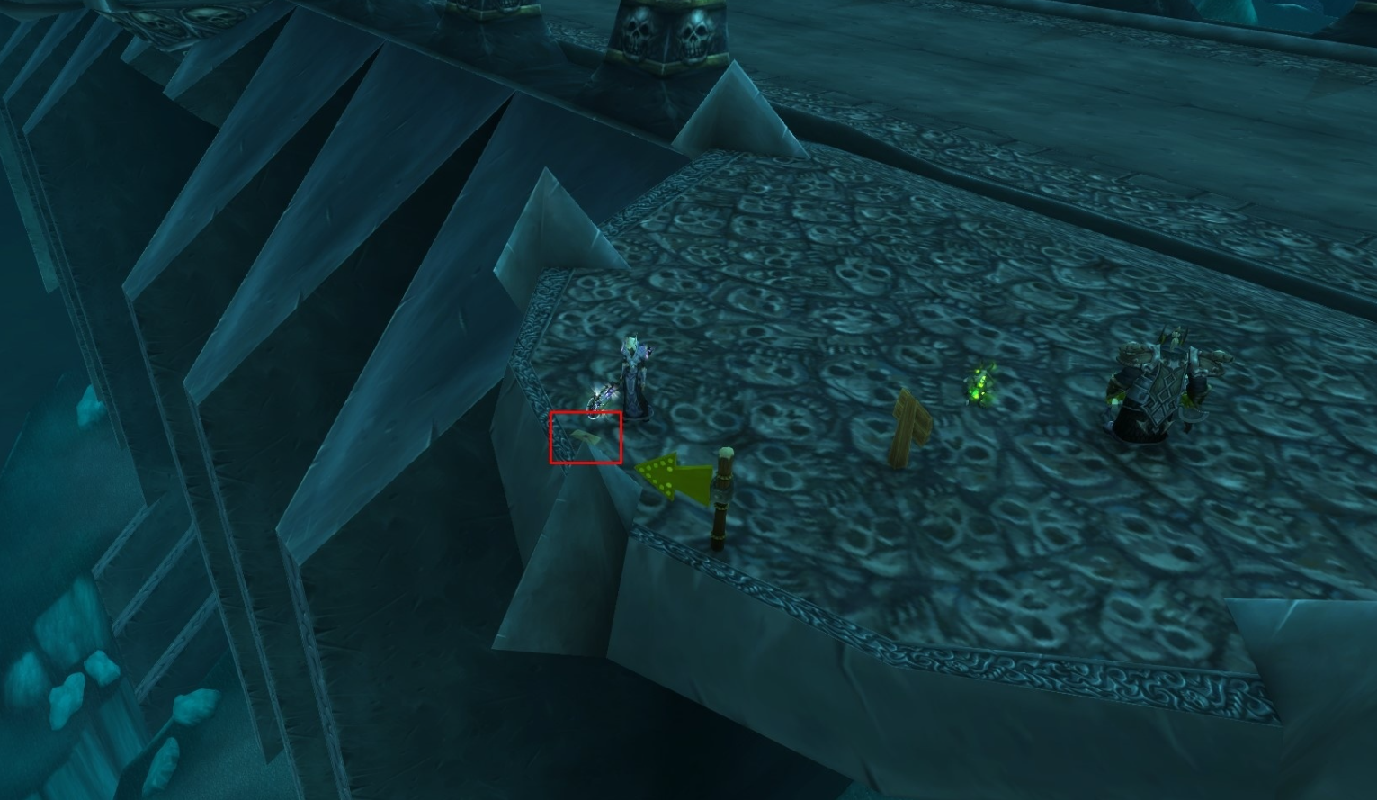
The Green Crystal Monocle is hidden in Skyreach, the dungeon in Spires of Arak. After defeating High Sage Viryx, equip the Talisman of True Treasure Tracking and interact with the console behind the boss.
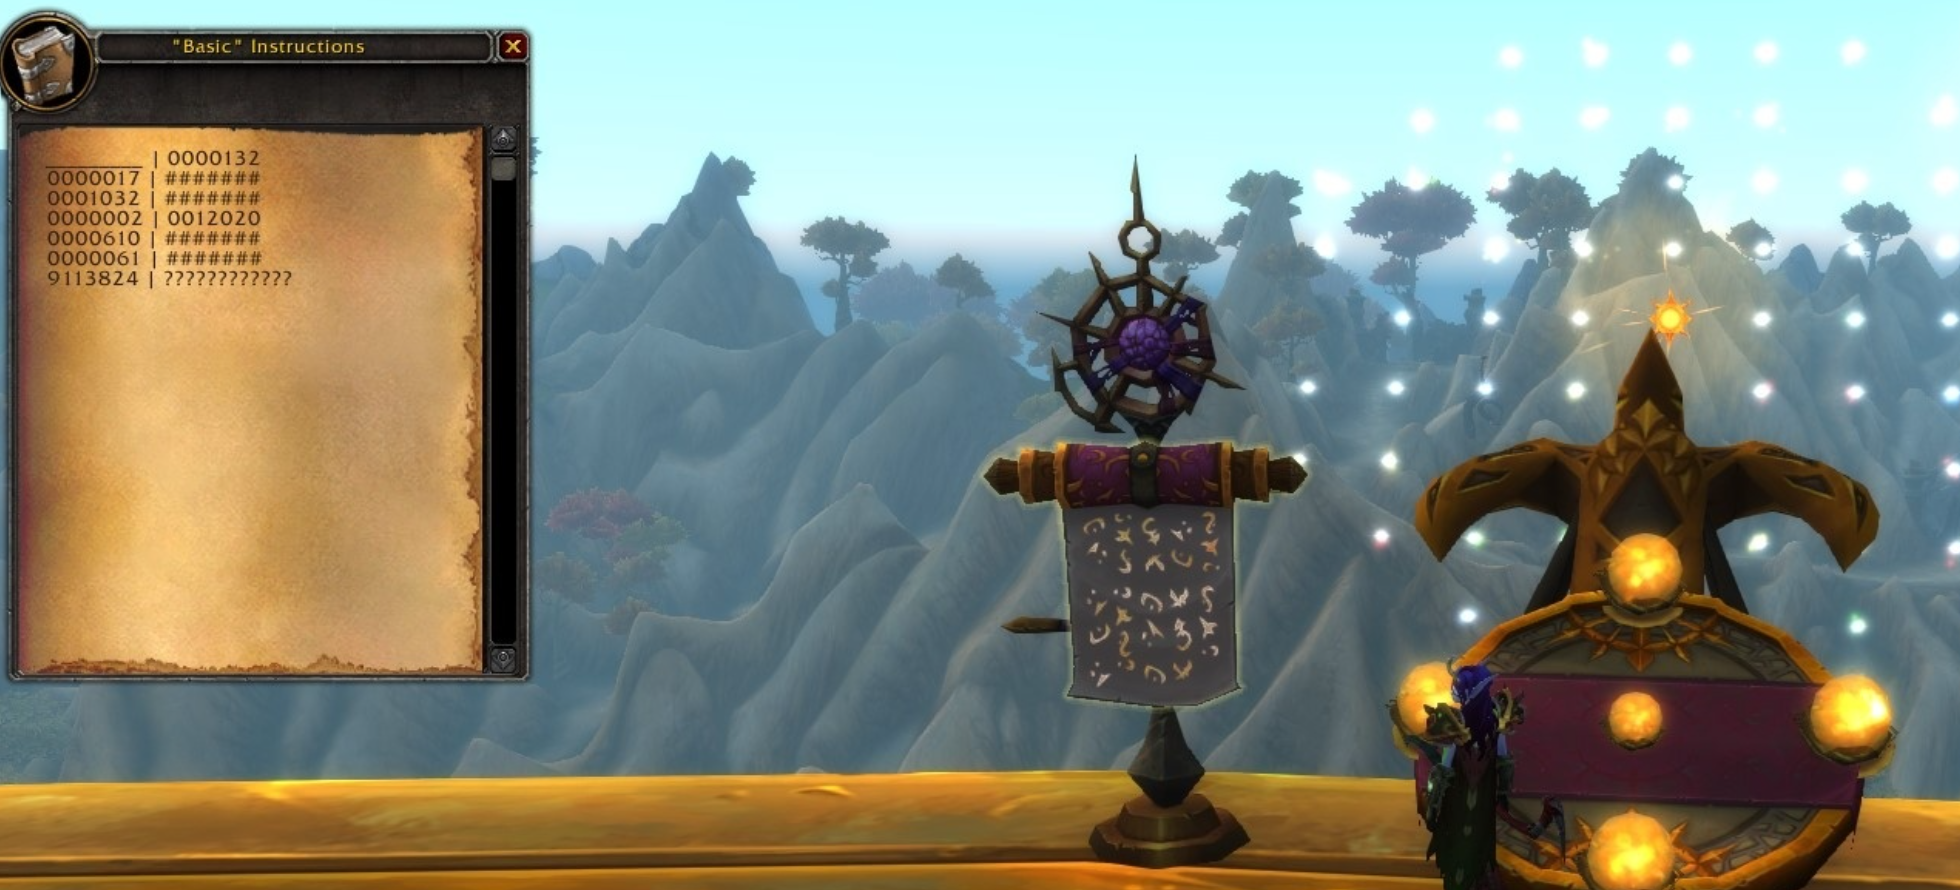
Interacting with the "Basic" Instructions shows a number table hint:
The console itself shows an octagonal light board with a brighter sun-like node. By clicking the glowing directional controls, you move the sun across the board. Empty spaces also exist between some nodes, which matters while navigating the pattern.
The original underlying logic of the puzzle comes from what the secret-finding community described as BaseMin. In practice, however, you do not need to recalculate the entire math if you already know the solved movement string.
The solved digit sequence is:
Each number corresponds to a direction:
So the movement order becomes:
Once you complete the sequence correctly, you can loot the Green Crystal Monocle.
The Blue Crystal Monocle is obtained through one of the longest parts of the secret: a letter hunt across multiple expansions and zones. The letters must be clicked in the correct order. If you miss steps or lose track, use the following script in-game to see which letters your character has already completed:
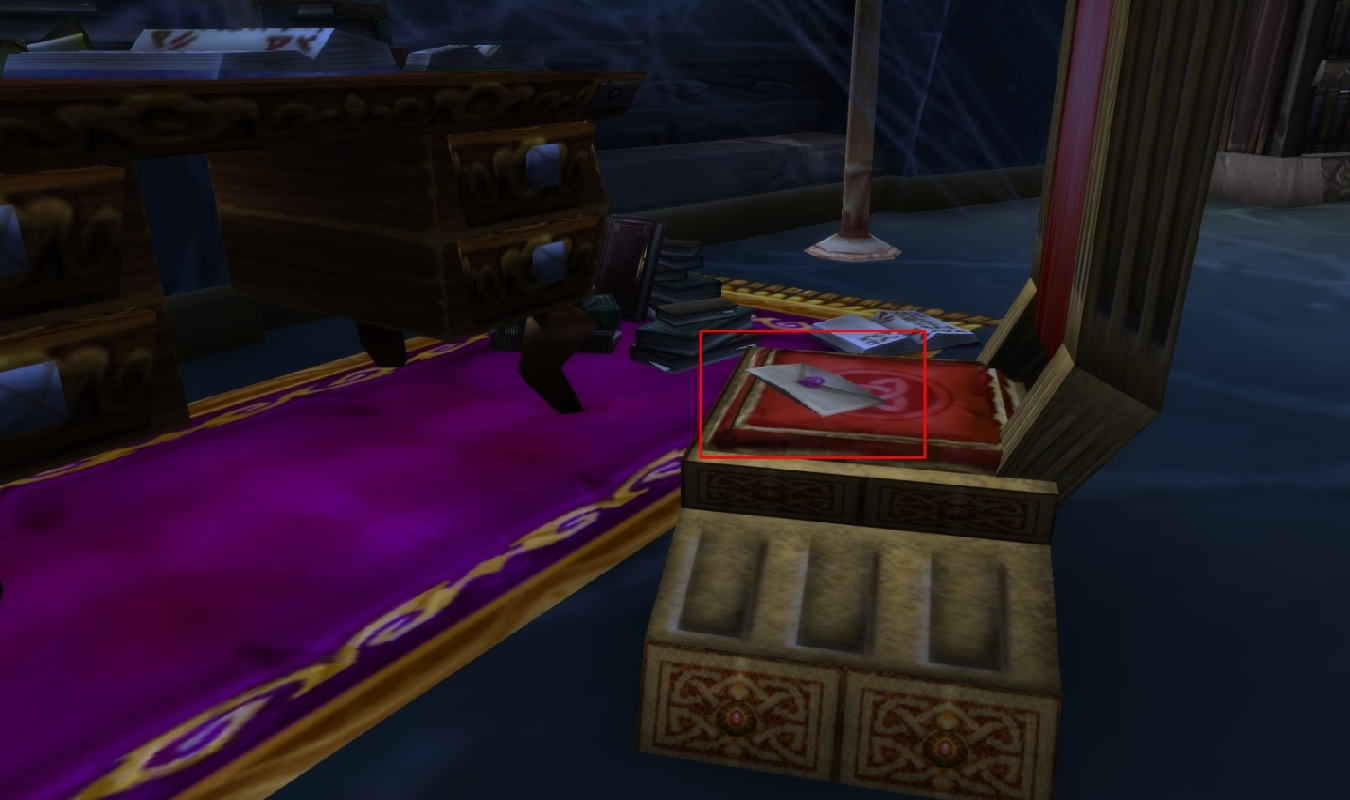
The first letter is the Letter from Ms. Graham behind Griftah - the same blue-glowing letter that starts the entire blue branch.
The capitalized words in the first letter form the anagram Anticipators of Deathwing, which points to the Prepfoot in Highmountain.
The second Letter from Ms. Graham is found at:
The capitalized words in the previous letter form the anagram Seat of the Guardian, which points to old Karazhan, specifically Medivh’s seat area after the Chess Event.
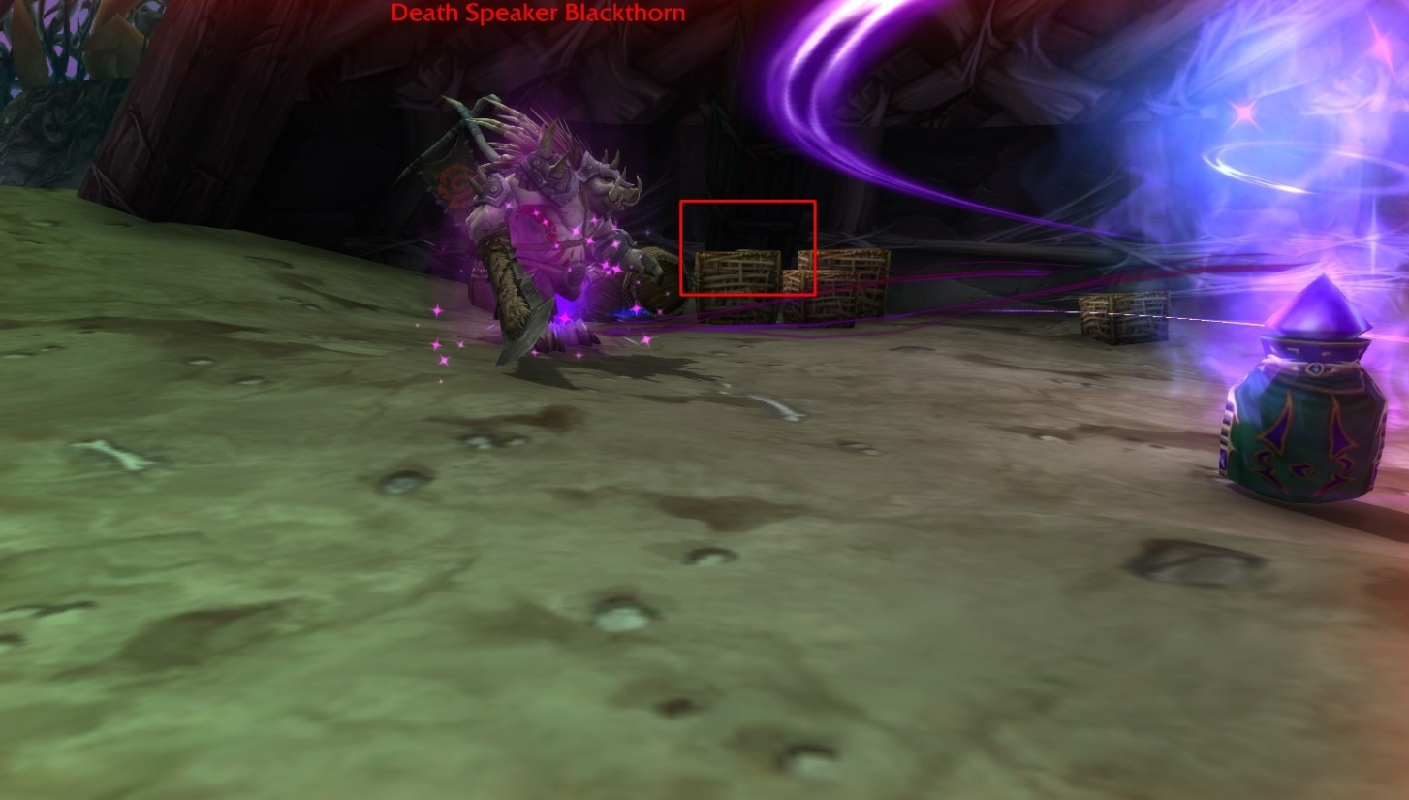
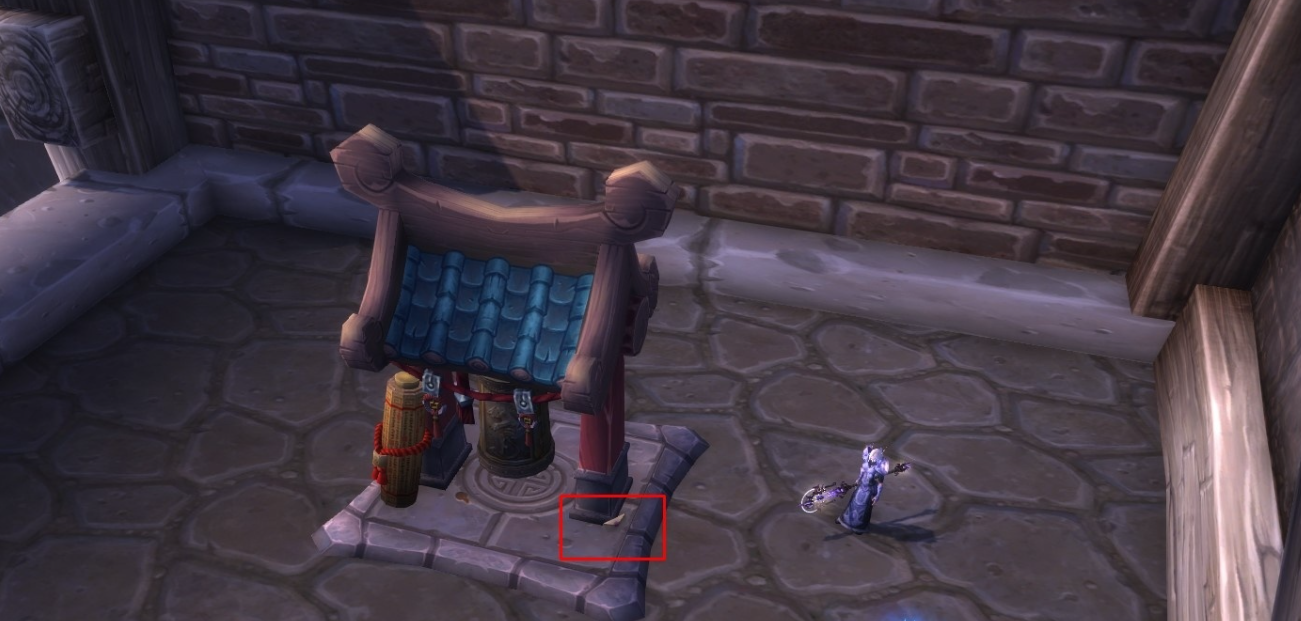
The next anagram points toward Razorfen Downs. The entrance is in Thousand Needles.
The letter is found behind Death Speaker Blackthorn.
The next anagram resolves to Mistress of the Nest, which points toward Aviana’s shrine in Mount Hyjal.
The next letter clue resolves to The Derelict Flow, which points to the abandoned Ironwall Dam between Icecrown and Crystalsong Forest.
The next clue resolves to Ox Residence, leading to Niuzao Temple in Townlong Steppes.
The final anagram resolves to The pinnacle of magic, which leads to Coldarra in Borean Tundra. The final gift is placed atop the highest Nexus ring.
The reward here is the Blue Crystal Monocle.
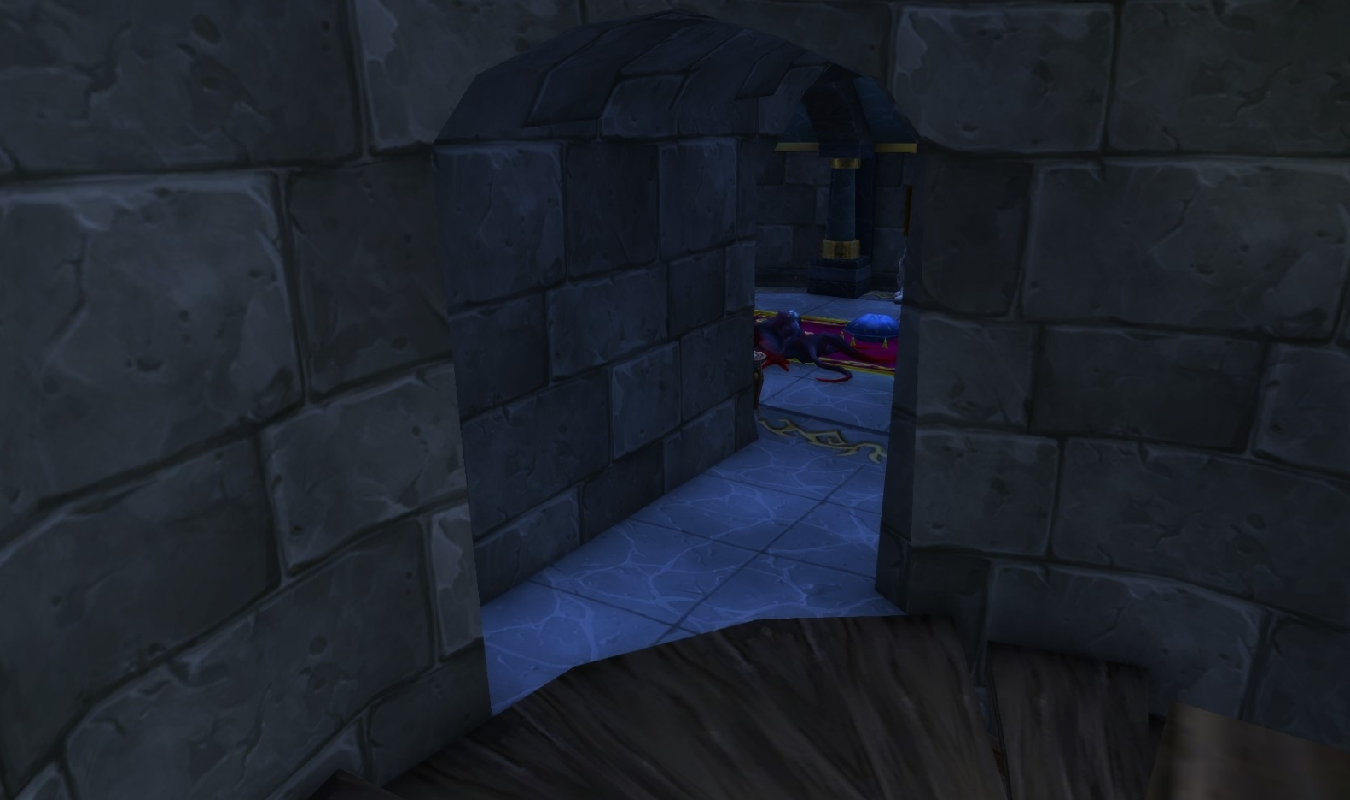
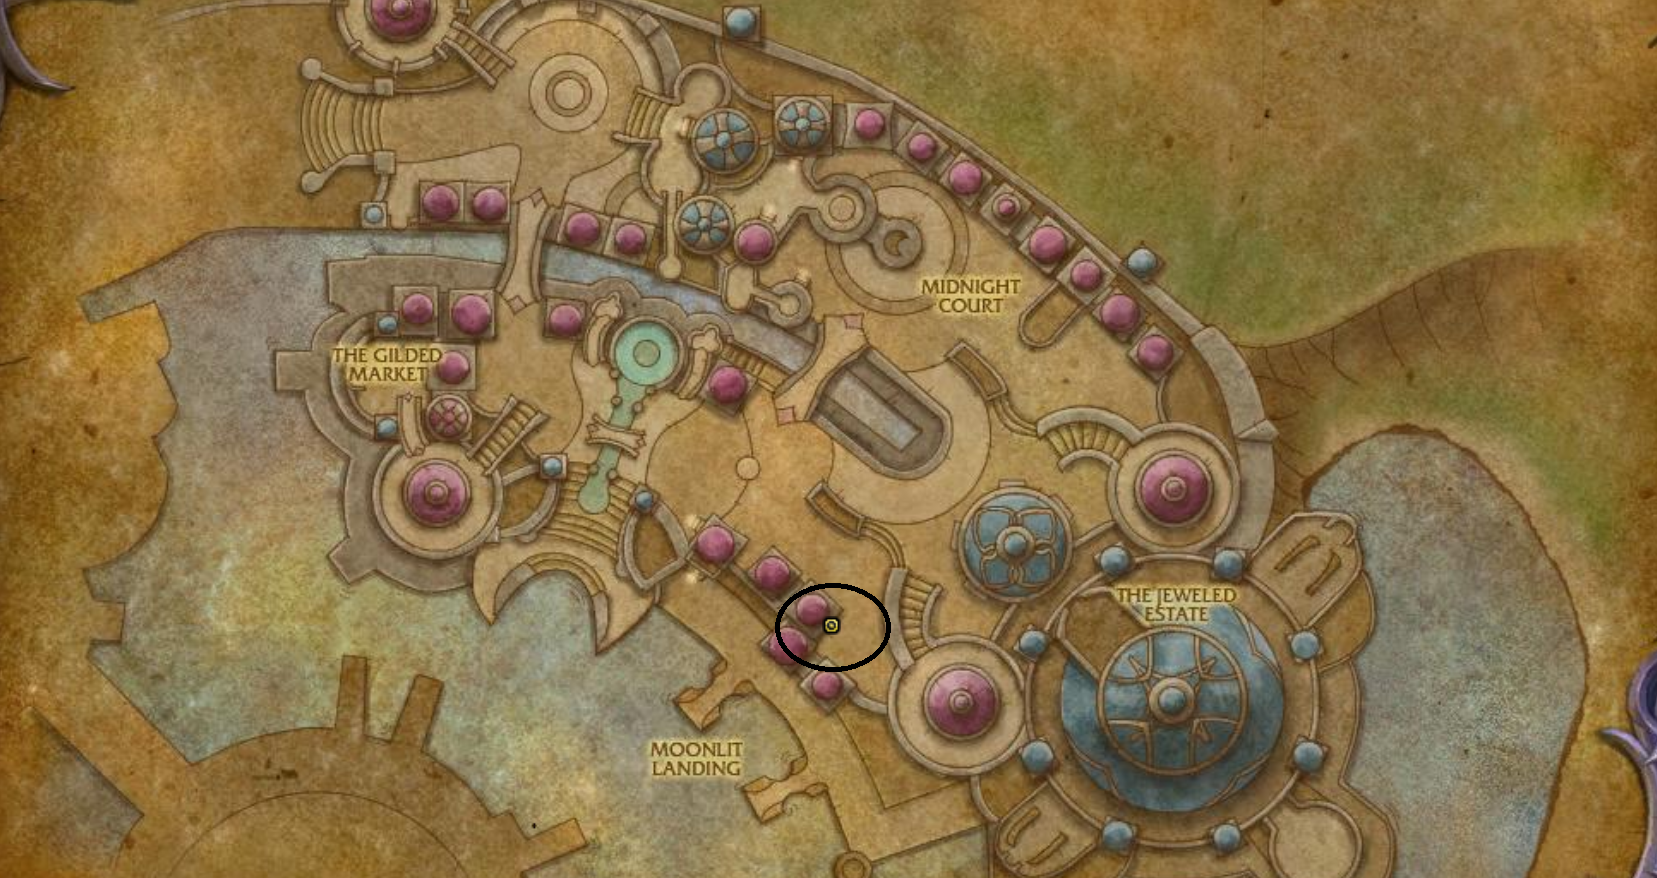
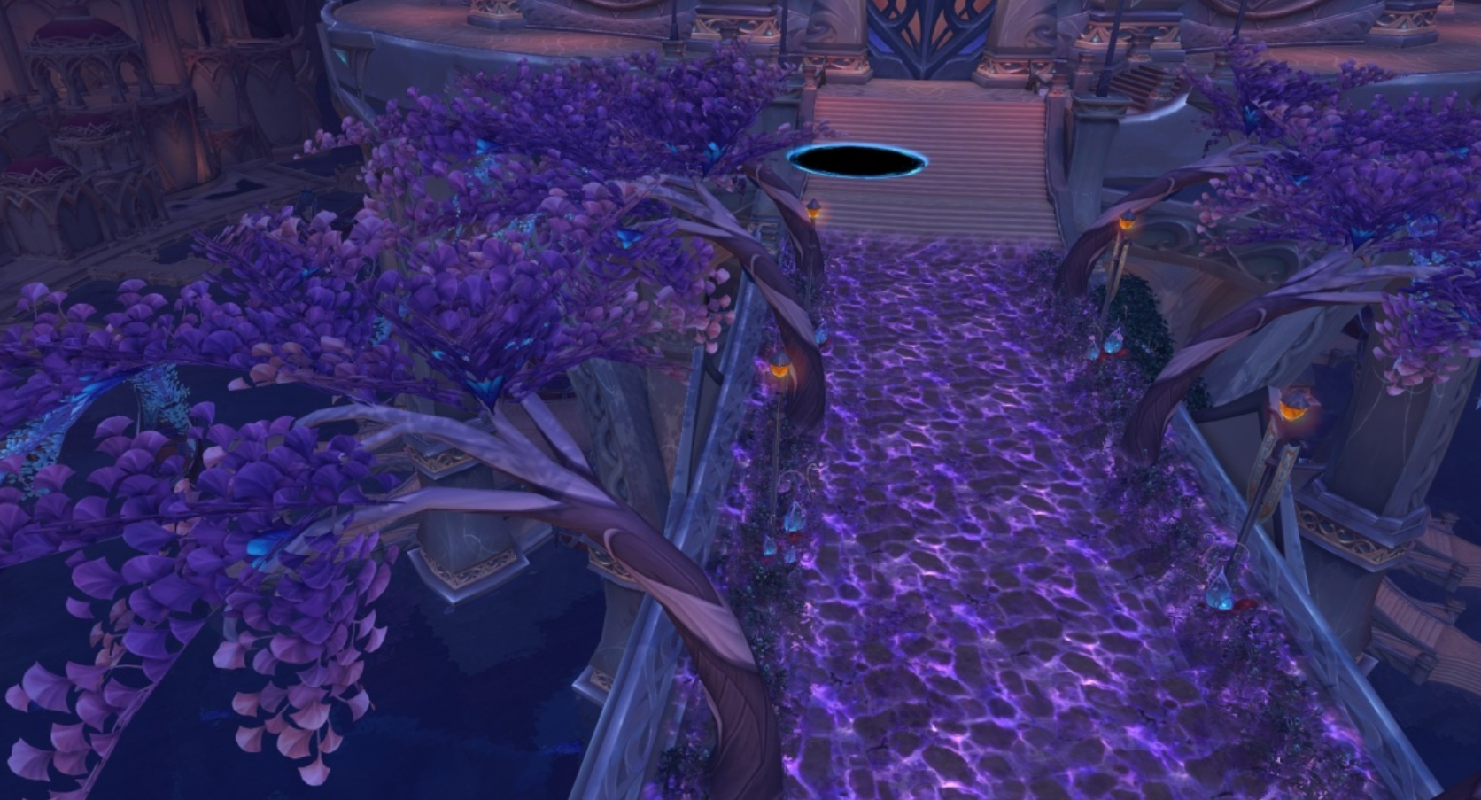
In a building inside Suramar, located at /way #680 41.0 69.5, on the second floor, there is a doorway to a dresser blocked by 4 beams of light. According to the description of Lost Cat Toy and Lady Chaton's dialogue about Shadow, one of her cats, this drawer might be one of the places where Shadow lost his toy.
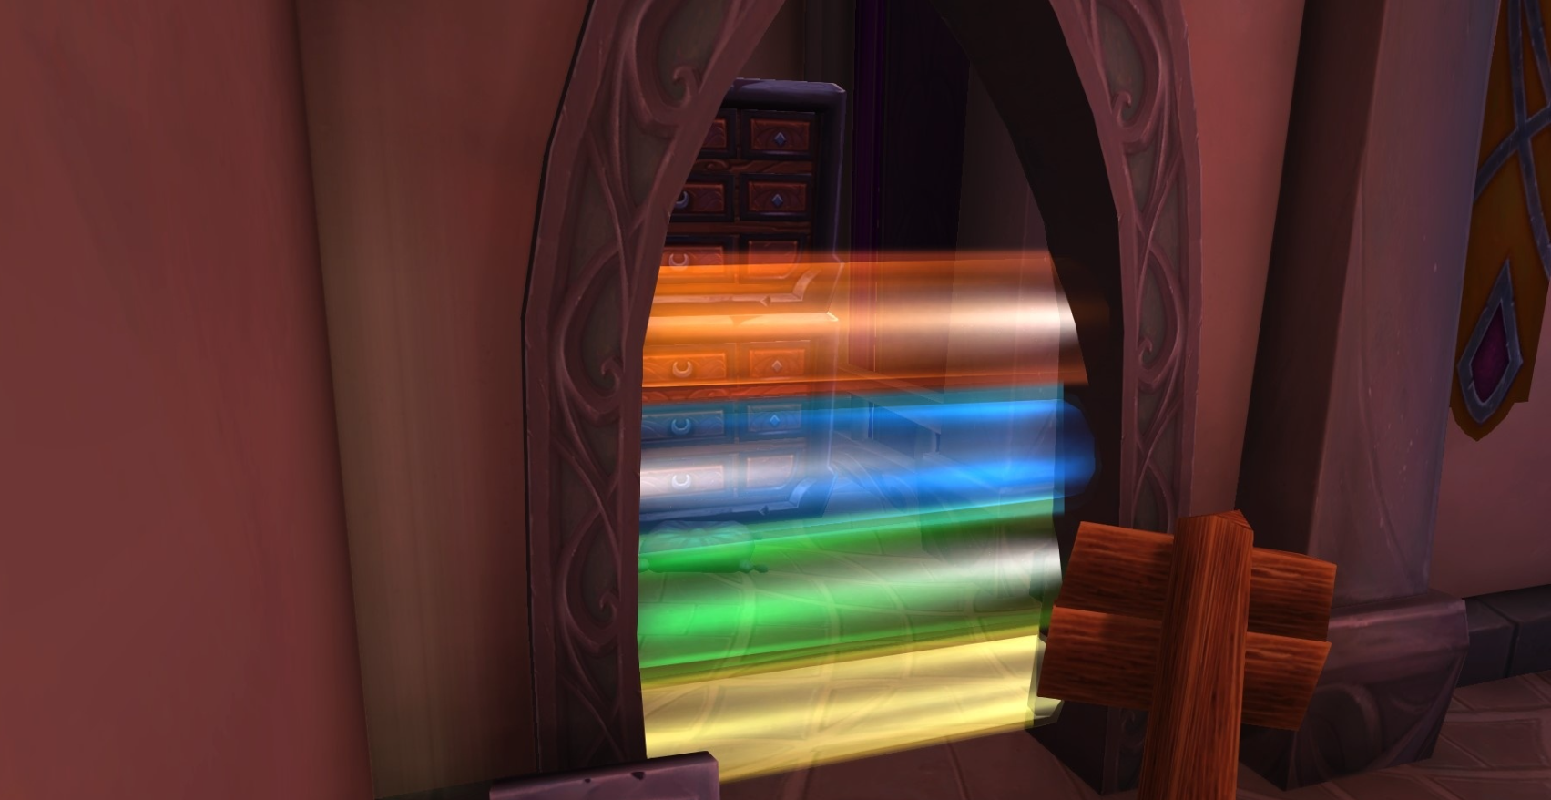
The flavor text on each of the colored monocles points toward the solution to the colored beams. There is a different string of letters said to be inscribed on each of the monocles. Red is inscribed with P O T Y A B U V F X, blue is inscribed with Q P C X K B Z H A G, green is inscribed with N R V Q Z J S M G Y, and yellow is inscribed with S K M C U F L N J O.
Writing out the alphabet twice, and then removing the letters that are inscribed onto the colored monocles, leaves you with E E I I D D H L R T W W as the remaining letters. These letters can be rearranged to spell out WILD WITHERED, which is the key clue for this stage of the secret. That phrase points toward a set of special Withered Nightborne hidden around Suramar.
Four special Withered NPCs - Rikei, Blom'an, Giluzui, and Yorilan - were added around Suramar when Patch 8.1 was released. Although they have NPC IDs very close to those of Lady Chaton and her kittens, they were not visible until the patch. What makes these Withered special is that their eyes glow in different colors - the same colors as the beams blocking the dresser.
Curiously, their names also line up with the beam colors by initials:
A colored beam will only disappear when the relevant Withered is drawing power. A Withered becomes hostile only when a player wears the corresponding eye-colored monocle near it. Once that Withered has been damaged to nearly 0 HP, it begins casting Draw Energy, and while that cast is active, the matching colored beam at the dresser disappears.
This is the core idea of the entire step: each monocle is linked to one specific Withered, and each Withered controls one specific beam. Because the beams must all be removed at once, your group needs multiple players handling the matching Withered simultaneously.
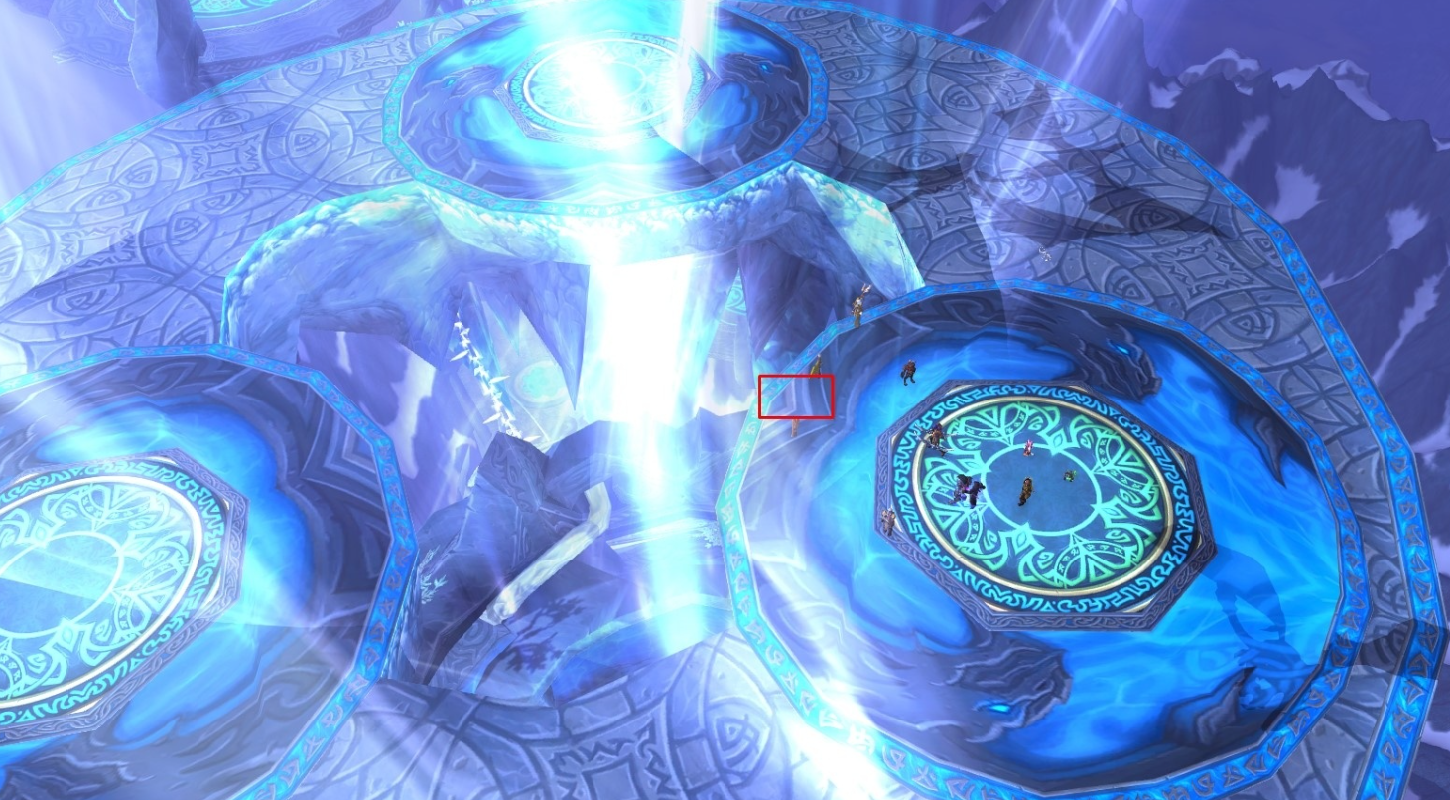
Because you can only wear one monocle at a time, this step requires multiple players to disable all the colored beams at once. You must be partied with the other players, and be in the same Warmode setting. Have one player at each of the Withered's locations while also wearing the matching colored monocle. The fifth person should be stationed right by the colored beam barrier, ready to run in once the beams have been disabled.
In practical terms, the setup should look like this:
When all four monocle players engage their matching Withered and bring them low enough to trigger Draw Energy, all four beams will drop for a brief moment. That short opening is the only time when the fifth player can run into the room and access the next object. If one player is too slow, attacks the wrong NPC, wears the wrong monocle, or is not in the same party or War Mode state as the others, the step can fail and you will need to try again.
So although the mechanic itself is simple once understood, this stage is really a coordination check. The hardest part is not killing the Withered - it is making sure the entire group is synchronized well enough that all four beams vanish at the same time and the player at the dresser is already in position to capitalize on the opening.
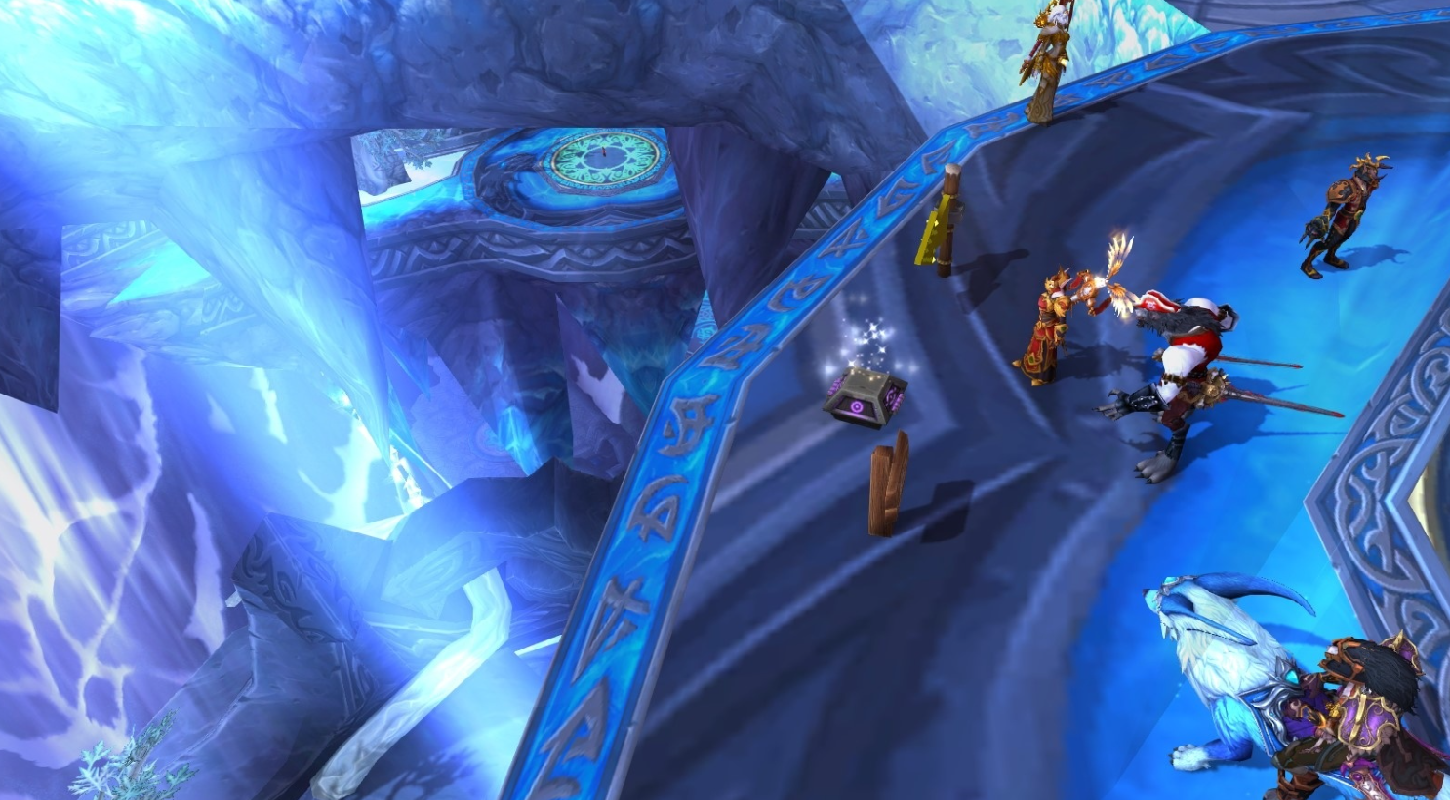
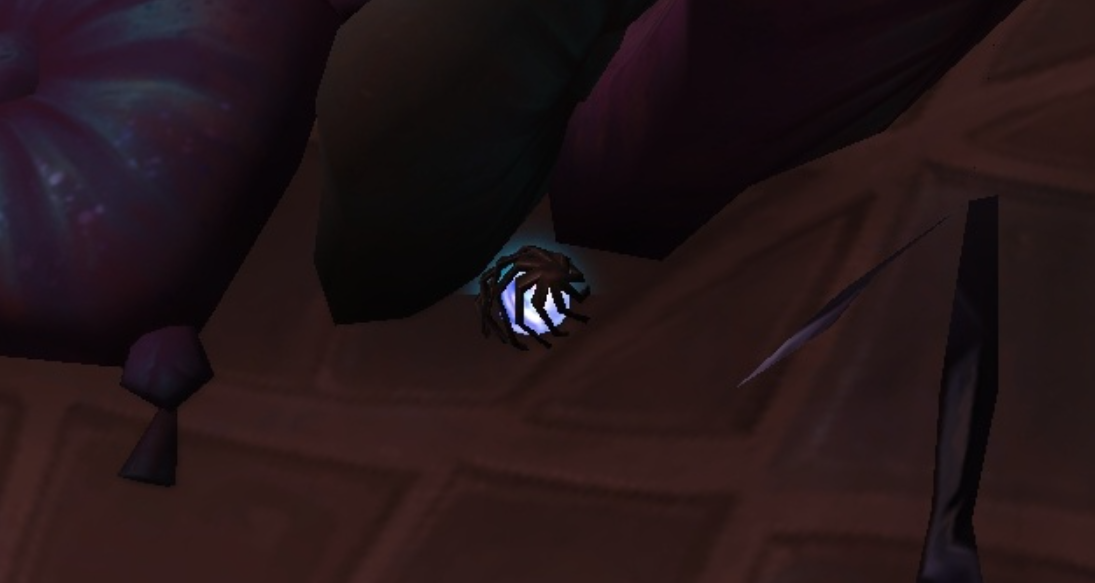
Once the beams have been disabled and the room is accessible, there will be a Lost Cat Toy inside. This object can only be interacted with while wearing the Talisman of True Treasure Tracking. Only one player from your group - the one who was stationed at the blocked drawer and not assigned to any of the Withered - should be inside the room for this step. The toy is fairly small and can be easy to overlook if you do not already know where to search, since it is tucked beside some pillows inside the room.
When the toy is clicked, it teleports that player out of the room and deals a chunk of damage. This damage value is not just incidental - it becomes your group’s code for the next puzzle. That means this moment must be handled carefully, because if the number is recorded incorrectly, the following kitten step will fail even if all the petting is done perfectly.
The amount of damage you take is a randomly generated number, and you must include all absorbed damage and overkill damage in the total. If you ignore either of those values, your group’s code will be wrong. For example, if you take 12345 damage and 11111 overkill damage, your real code is 23456, not 12345.
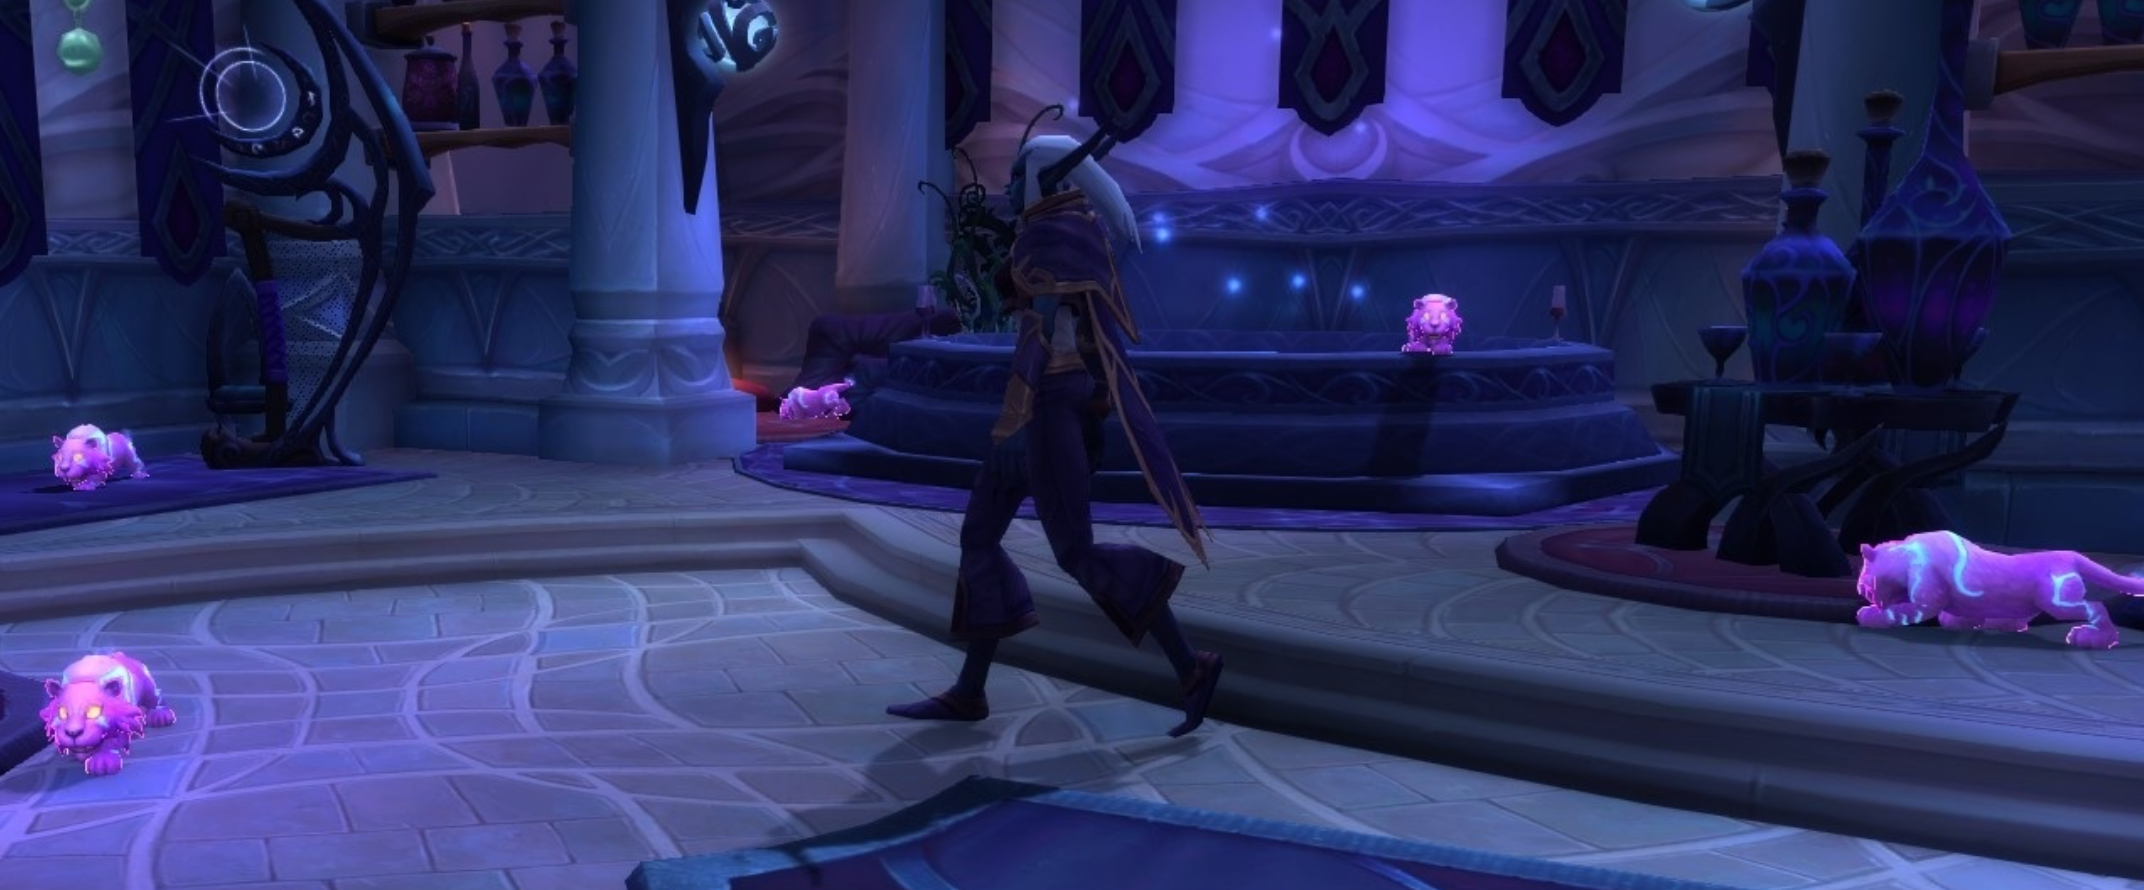
This code is then used to determine the number of times your group must pet the Manasaber Kittens near Lady Chaton in the Court of Stars. The location is:
Your group must use the damage code as a five-digit petting assignment. Each digit corresponds to one specific kitten, and the value of that digit is the number of times that kitten must be petted.
The order of kittens is:
You do NOT need to pet the cats in the order listed above. The order is only used to determine how many pets belong to each kitten. In other words, the first digit belongs to Mrs. Fluffymuffins, the second to Shadow, the third to Mew, the fourth to Ash, and the fifth to Bella.
For example, if your code is 12345, then:
If your damage value contains fewer than five digits, you must pad it with leading zeroes until it becomes a full five-digit code. So if the damage is 1234, the code becomes 01234. In that case, you do not pet Mrs. Fluffymuffins at all, because the first digit is zero.
If you have a 0 in any position, that kitten is skipped. That does not mean the order changes - it simply means that the corresponding cat receives no pets.
Each time a player pets a kitten, that kitten gains one stack of the buff Purring. The tricky part is that every kitten must have the correct number of stacks at the same time in order for the puzzle to progress. So if the code is 12345, then all of the following must be true simultaneously:
This is what makes the step a group coordination check rather than a simple counting puzzle. The buff duration is only 15 seconds, so if your group pets the kittens too slowly, the earliest stacks will expire before the others are finished.
The easiest way to handle this is to assign each player responsibility for one kitten, then have the whole group begin petting in a coordinated way so that all required stacks are completed at nearly the same time. A player assigned to a cat with a higher number simply starts slightly earlier or pets more quickly, depending on the code.
If you let the buff fall off, or if you try to pet a kitten once it already has too many stacks, that cat will pounce on you and apply Manascratch. This indicates that something in the petting sequence was wrong - either the kitten was not petted enough, was petted too much, or the timing between cats did not line up correctly.
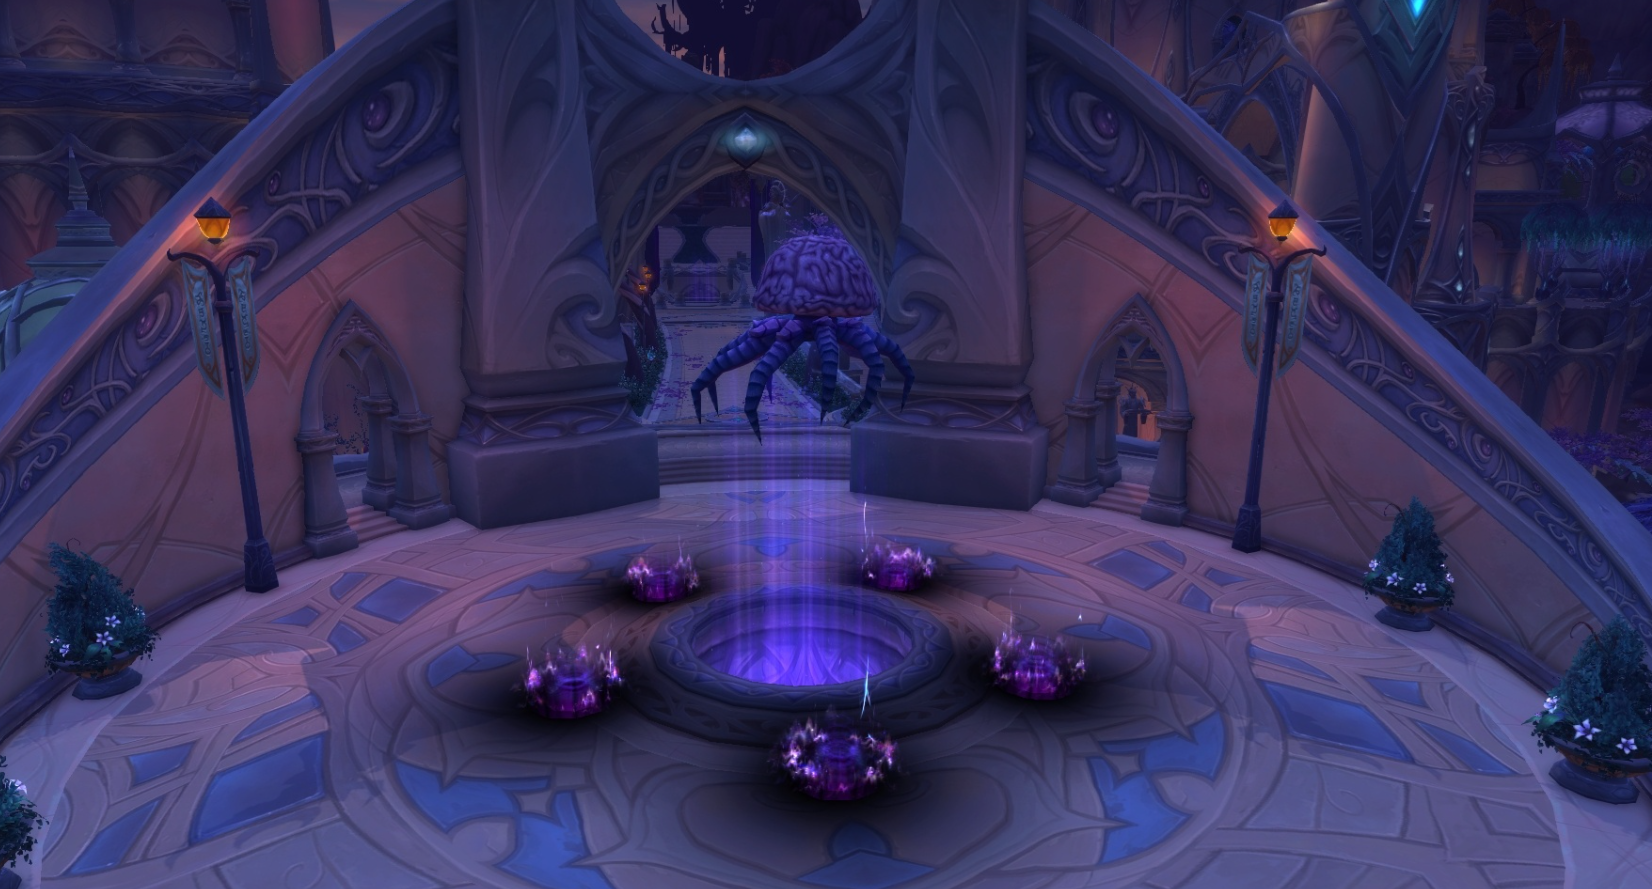
When the kittens are petted correctly, they run to the back of the room and summon an Ominous Orb. You still need to be wearing the Talisman of True Treasure Tracking to see the orb.
Clicking the orb teleports your group to the next stage of the secret, which takes place in the floating platform maze. So in practical terms, this entire kitten step acts as the password lock for the next room: first the toy generates the code, then the group reproduces that code through the correct number of pet interactions, and only then does the secret continue.
The next section is the floating platform maze. This is one of the most coordination-heavy stages in the whole Hivemind route. It begins with only one active platform, and each platform can activate different follow-up platforms. A platform remains active while a player is standing on it, but once they leave, it disappears unless another active connection is maintaining it. That means your whole group must move through the maze in a controlled order rather than simply rushing forward.
When all five players reach the far side, the door opens. The verified movement solution is:
Player 1 up
Player 2 up on the newly spawned platform near the middle platform
Player 1 up
Player 2 up
Player 3 up left
Player 2 left
Player 1 right right
Player 4 up up up
Player 2 left up
Player 5 up up
Player 3 up
Player 5 down left
Player 3 left left
Player 2 right
Player 5 reset, then up on the right platform
Player 1 right up
Player 4 right
Player 5 up
Player 4 up up left
Player 2 up
Player 4 up
Player 1 up
Player 4 right
Player 2 right
Player 5 reset, then up on the left platform, then up
Player 1 right
Player 5 up up right
Player 2 up left
Player 5 left up
Player 2 up
Player 4 right
Player 2 up
Player 4 up
Player 3 reset, then up on the right platform, then up up up up
Player 1 up left
Player 5 up
Player 1 up
Player 5 right right right
Player 4 left
Player 1 up
Player 5 up
Player 2 up left
Player 5 up
Player 4 up
Player 3 left
Player 1 right up
Player 2 left
Player 5 up
Player 4 right
Player 1 left
Player 4 up
Player 3 reset, then up on the left platform, then up up up up
Player 5 right
Player 3 up up
Player 2 up
Player 1 up
Player 3 up right up
All players leave vehicle
Once all five players are through, jump off the platforms, drop to the floor, and regroup near the door. All five players must be close to it for the door to open properly.
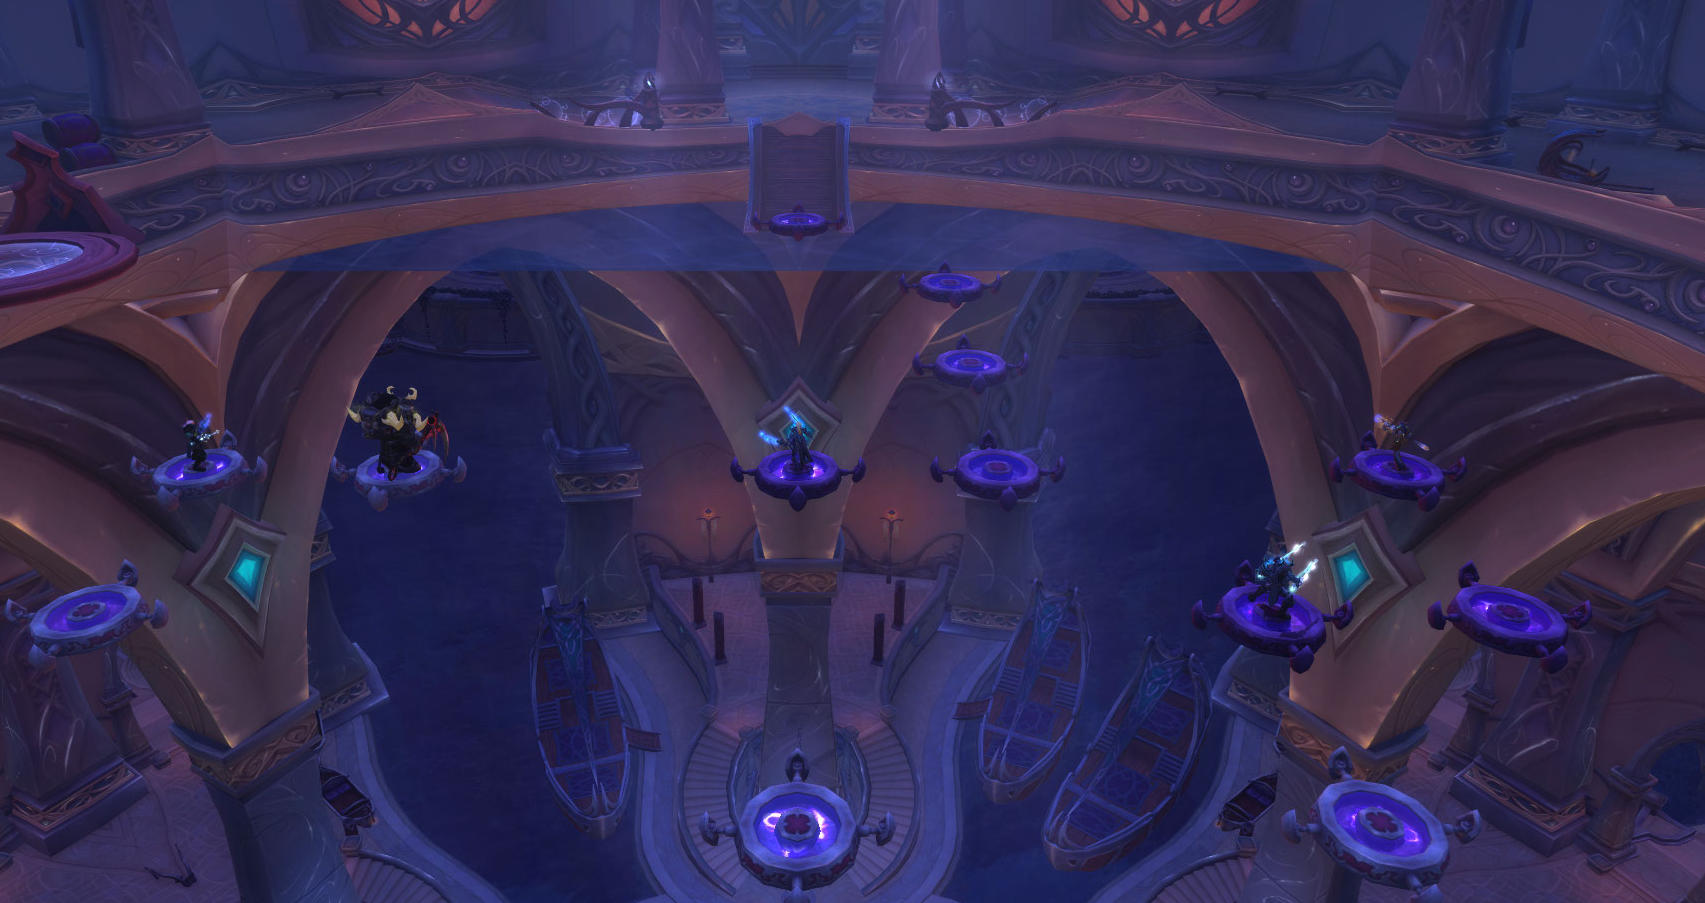
Once you cross the floating platform puzzle, your group will end up in front of a door. As all five players approach together, the door opens, revealing a pool of arcane lava. This is the final major coordination puzzle before the Hivemind ritual itself, and unlike the platform section, this step is less about pathing and more about correctly identifying which players are allowed to cross together.
The key object in this room is the black floating disc, Lightlock. This disc is the only way to cross the arcane lava safely. The important limitation is that not every combination of players can ride it across successfully. Because of that, the puzzle is really a group logic test: you must identify the correct crossing combinations and then move everyone across in the proper order.
One party member will act as the rider and will remain on the Lightlock for the entire puzzle. That player should not be swapped out midway through the sequence. Think of that person as the constant anchor for the whole crossing. Every successful move is built around that one rider being present.
However, the rider cannot simply ferry people one by one in any order. The disc only accepts certain valid player combinations. To solve the puzzle, your group first needs to determine which set of three players can cross together with the rider. Once that trio is known, the rest of the sequence becomes manageable and repeatable.
So the first goal is not “start moving everyone immediately.” The first goal is:
The logic usually looks like this:
In practical terms, you are trying to discover one special trio: A + B + C. Once that trio is identified, you can use it to shuttle the remaining players over in a controlled way.
That means there are really two separate sub-steps here:
The easiest way to think about the valid trio is this:
So the unknown piece is which of the remaining three players is the correct third member. That part requires a small amount of trial and error. Once you find the player who completes the successful trio, just label that player as Player C. After that, the other two remaining players are simply D and E, and their internal order no longer matters very much.
To make this easier on your group, do not test random full sequences immediately. First, calmly identify:
Once you have that information, use the following crossing order exactly:
1. Players A, B, and C get on and go across.
2. Player C gets off on the other side, and A and B go back across.
3. Player B gets off at the start, and A and D go back.
4. Player D gets off on the other side, and players A and C come back to start.
5. Player B gets on with players A and C, and they travel back to the finish.
6. Player C gets off at the finish, players A and B go back to the start.
7. Player B gets off, person E gets on with player A.
8. Player E gets off at the finish, players A and C go back to the start.
9. Player B gets on with A and C and goes to finish.
If you are wondering why the sequence looks so strange, the answer is that it is not trying to be intuitive - it is trying to preserve the valid crossing combinations while gradually moving the full group from one side to the other. The reason some players come back is because the disc cannot simply take any remaining person at any time. The successful trio has to be reused as a bridge structure to bring the whole party across.
So the general idea is:
This stage often feels confusing the first time because the movement pattern is not visually obvious like the platform puzzle. The best way to handle it is to assign clear names before you begin:
Then one person should call the steps out in voice or chat as the group follows the sequence. Trying to “remember it loosely” usually causes unnecessary resets.
In short, the Arcane Lava puzzle is not about speed. It is about discipline. First determine the correct trio, then follow the established transfer order without improvising. Once your group understands that structure, this step becomes much more reliable than it first appears.
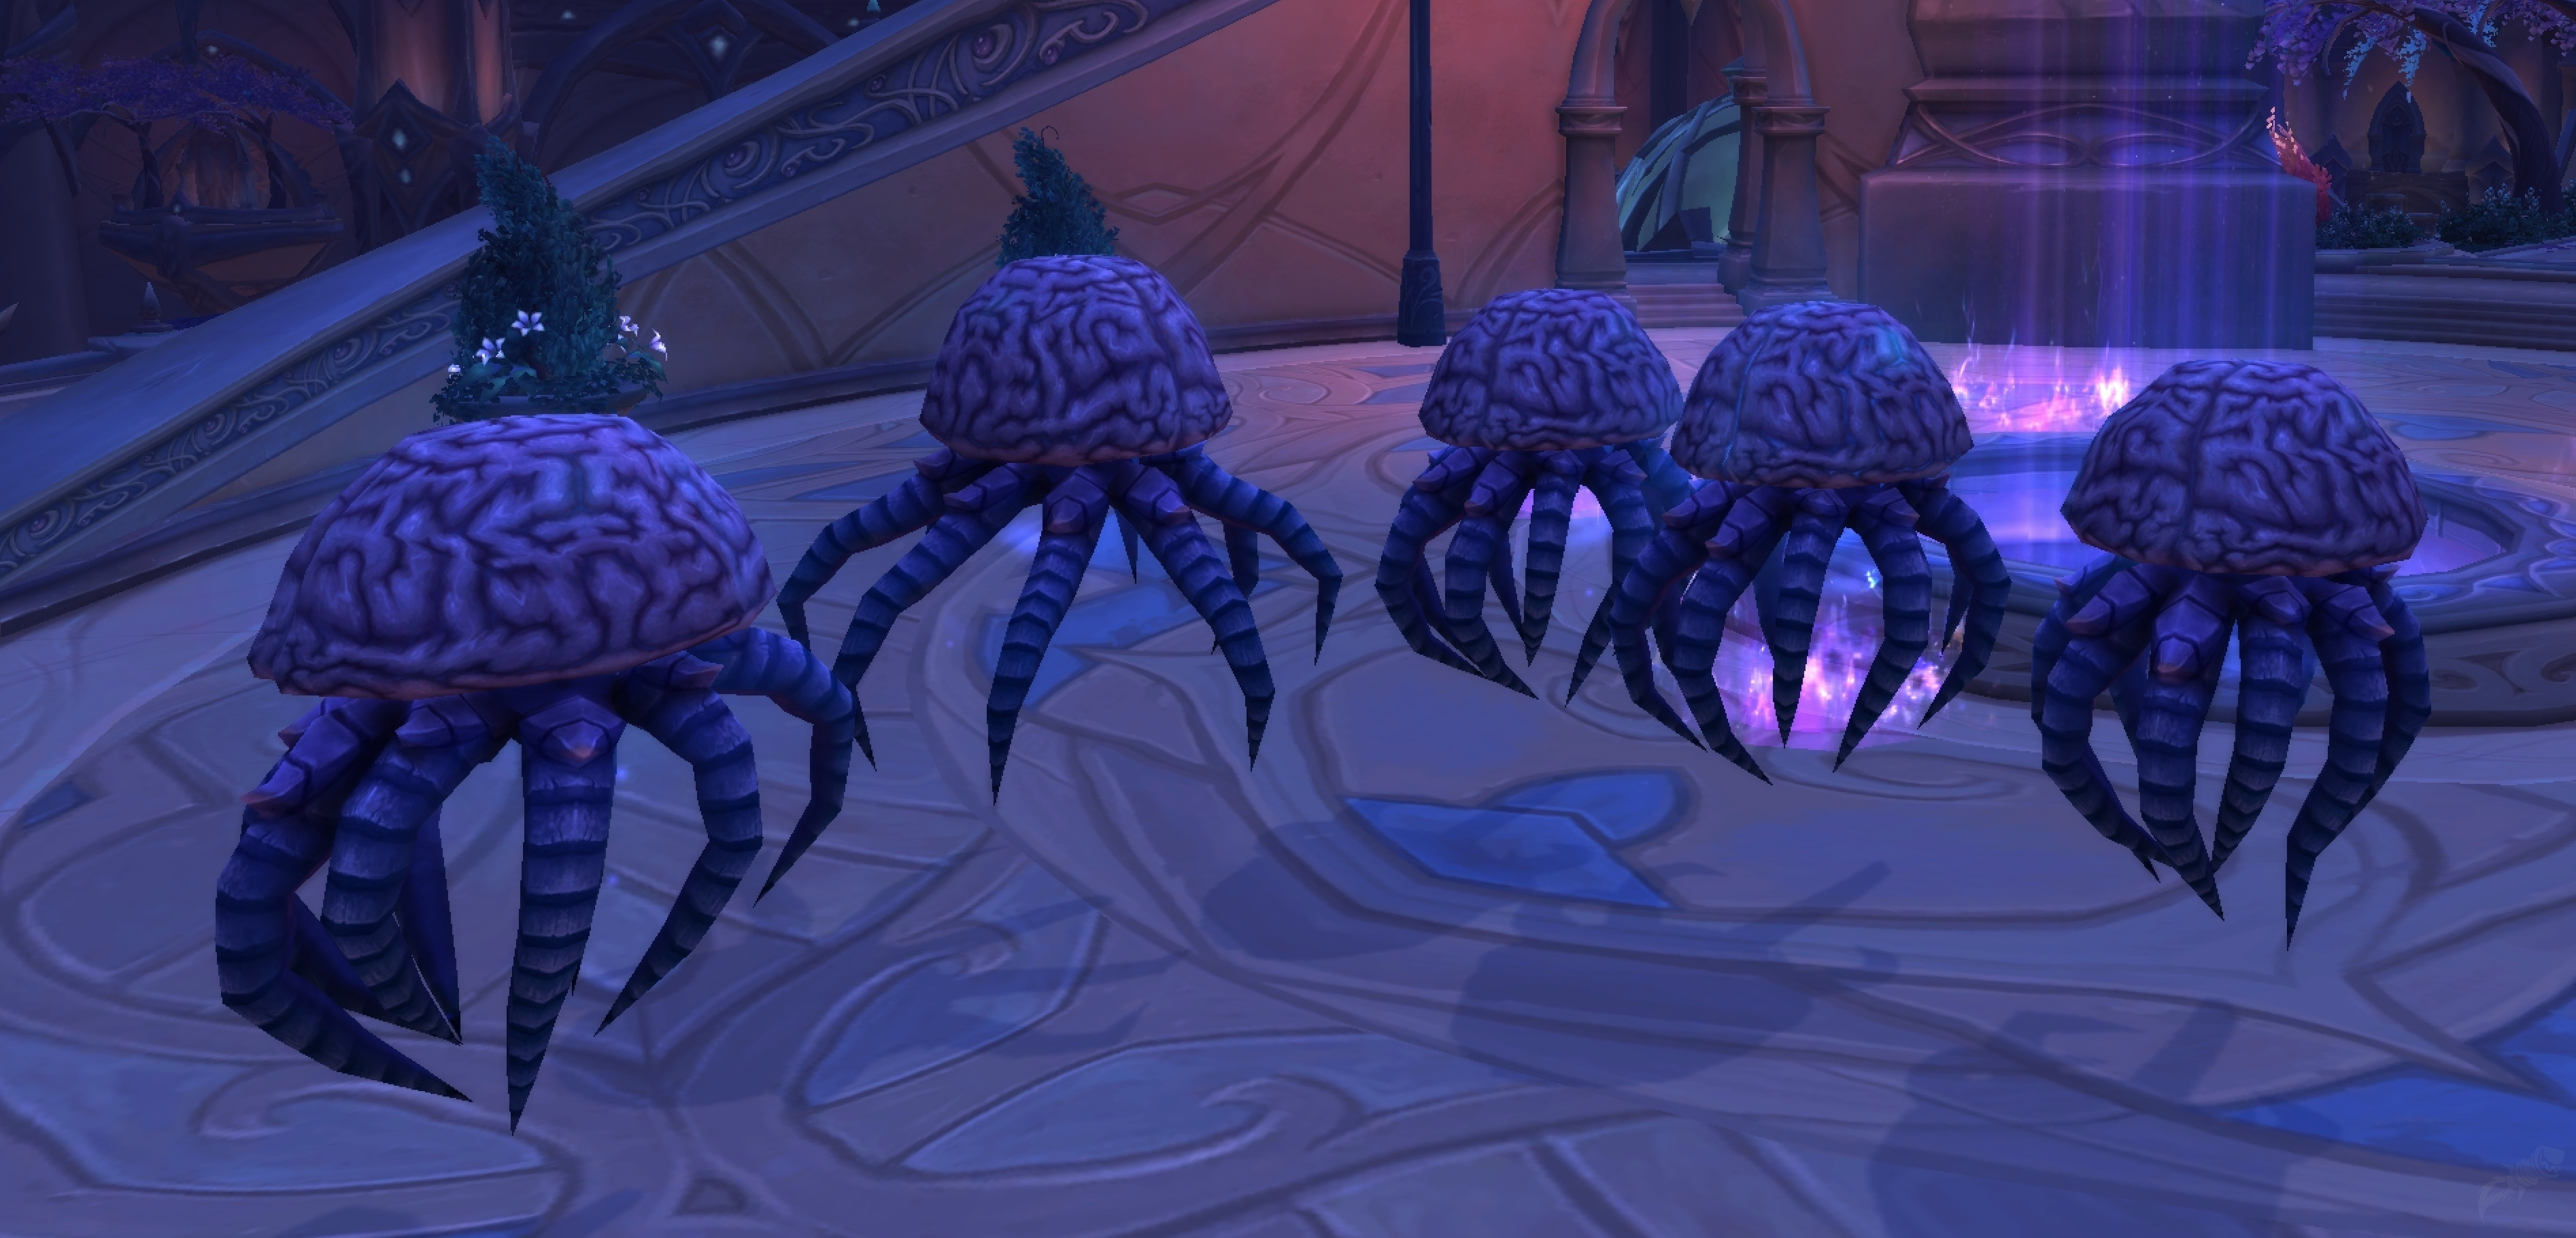
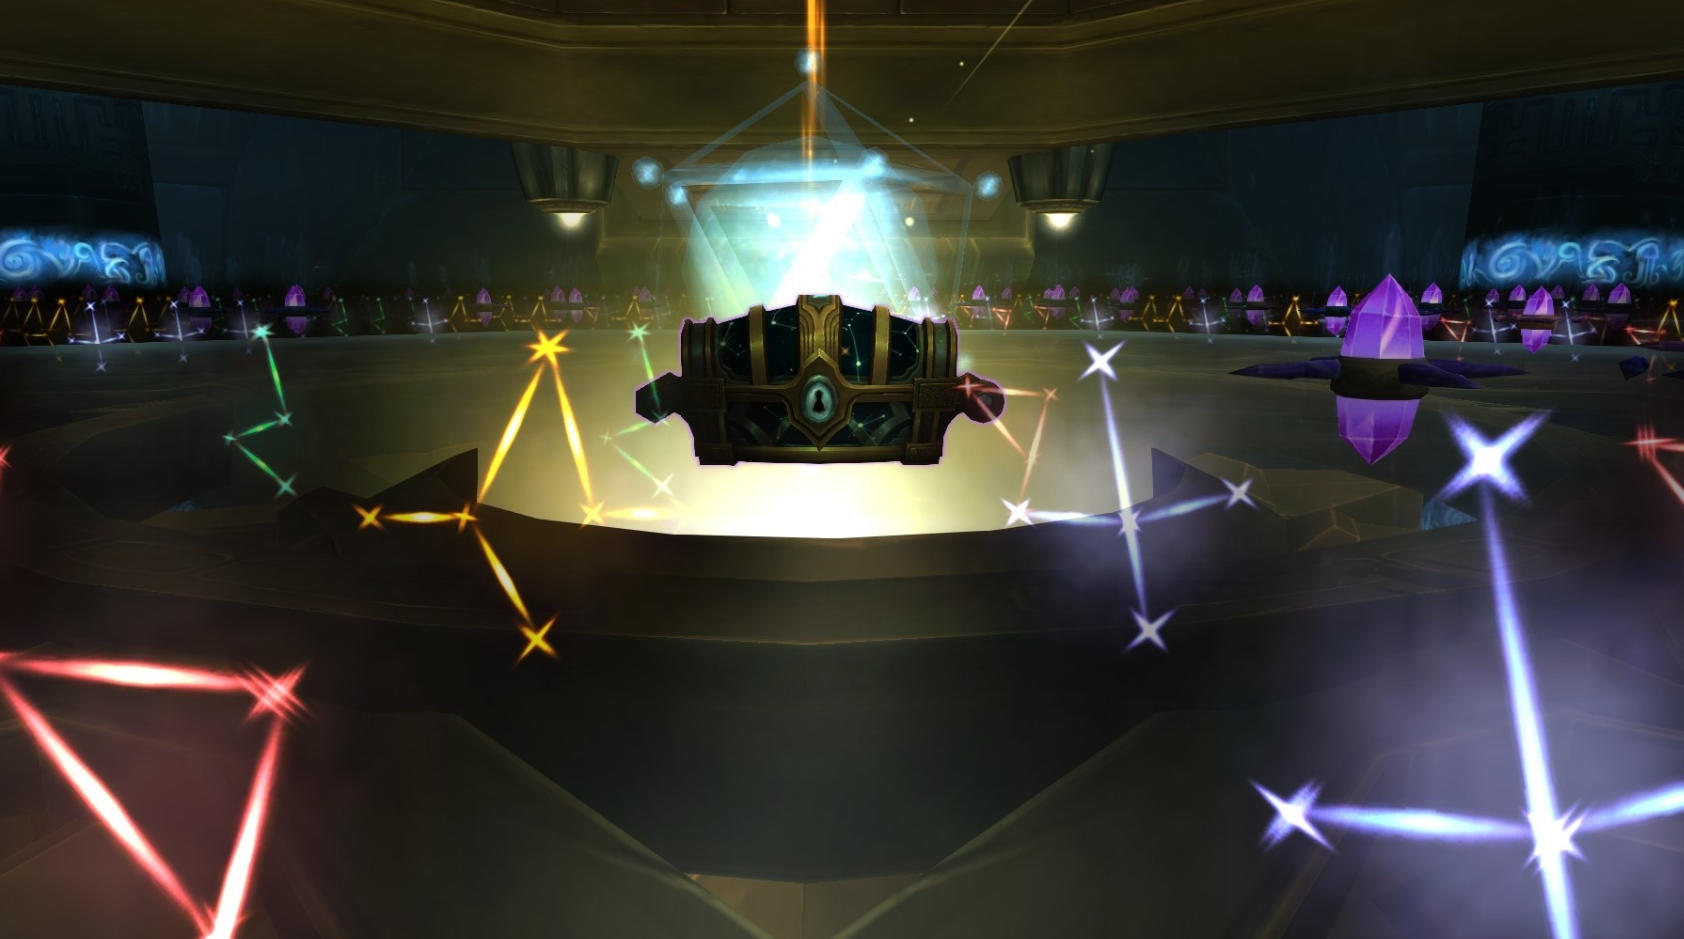
Once everyone has crossed the lava room, move into the final chamber with the Hivemind itself. Around the room are five arcane pads. Every member of the group must stand on one pad, and once all five players are in position, interact with the Hivemind object to begin the channel. When the cast completes successfully, everyone in the group receives The Hivemind.
That completes one of the longest and most elaborate secret mount chains ever created in WoW. The real challenge of this mount is not raw combat power - it is discipline, coordination, and correctly following the exact logic of each puzzle without breaking the shared progression state.
Because this mount depends on precise routing, repeated travel, puzzle tracking, and coordinated multiplayer execution, a few addons can make the process much easier to manage.
For this secret specifically, TomTom is by far the most valuable tool because of how many location-specific interactions are involved. Paste is also surprisingly useful, since several parts of the route are much easier when everyone can copy the same exact code or movement solution without retyping it manually.
Even if your group already has the full solution, the biggest danger is still human error. Many failed attempts come not from misunderstanding the puzzle, but from someone missing one condition, wearing the wrong monocle, forgetting the talisman, recording the wrong damage total, or moving too early during a group step.
If your goal is simply to get the mount once with the least amount of friction, preparation matters far more than speed. A calm, organized group usually clears the Hivemind route much more cleanly than a faster but sloppy group.
While our expertise spans countless gaming achievements, our true passion lies in hunting down World of Warcraft's most elusive mounts. We specialize in transforming what many consider endless grinds, hidden secrets, and coordination-heavy challenges into streamlined, guaranteed acquisitions. Our team knows how to handle everything from old raid farms to multi-player puzzle chains like The Hivemind.
You define the goal, and we deploy our refined methodology to make it reality. Through expert execution, route planning, and precise coordination, we remove wasted time, failed attempts, and group-setup frustration so your desired mount becomes a finished result rather than an abandoned project.