
Willkommen zu Mythic+ Saison 2 von The War Within! Wenn du es kaum erwarten kannst, wieder in Dungeons einzutauchen, bist du mit diesem Guide bestens gerüstet. Saison 2 bietet eine frische Rotation von Dungeons (darunter ein brandneues), neue Affixe, die das Gameplay aufmischen, und jede Menge Belohnungen, von glänzenden Reittieren bis hin zu Teleportportalen.
In diesem Guide gehen wir alles durch, was du für den Erfolg in Mythic+ Saison 2 brauchst: die Dungeons in der Rotation (mit Schlüsselmechaniken und Strategien), die saisonalen Affixe (und wie man sie meistert), allgemeine Tipps zum Bezwingen deiner Schlüsselsteine, eine Übersicht über die Belohnungen (und wie man sie erhält) und sogar ein paar praktische Tricks aus der Community!
Wie immer gibt es in einer WoW Mythic+ Saison 8 Dungeons, die Spieler erobern können, und Saison 2 macht da keine Ausnahme. Allerdings gibt es eine bemerkenswerte Änderung am üblichen Schema: In vergangenen Saisons sahen wir oft eine Mischung aus 4 neuen Dungeons der aktuellen Erweiterung und 4 wiederkehrenden Favoriten aus älteren World of Warcraft-Zeiten. Dieses Mal ist das Line-up jedoch etwas anders.
Anstatt einer Rückkehr von 4 klassischen Dungeons führt The War Within Saison 2 mit dem brandneuen Patch 11.1 Dungeon namens "Operation: Floodgate" eine frische Ergänzung ein. Das wird Spieler begeistern, die gerne neue Inhalte angehen, mag jedoch diejenigen enttäuschen, die auf überarbeitete Versionen älterer Dungeons gehofft haben.
| Dungeon | Timer (+1) | +2 | +3 |
| Cinderbrew Meadery (TWW) | 30:00 | 24:00 | 18:00 |
| Darkflame Cleft (TWW) | 30:00 | 24:00 | 18:00 |
| The Rookery (TWW) | 30:00 | 24:00 | 18:00 |
| Priory of the Sacred Flame (TWW) | 30:00 | 24:00 | 18:00 |
| Operation: Floodgate (TWW) | 32:00 | 25:36 | 19:12 |
| Das RIESENFLÖZ!!! (BFA) | 39:00 | 31:12 | 23:24 |
| Theater der Schmerzen (Shadowlands) | 38:00 | 30:24 | 22:48 |
| Operation: Mechagon – Werkstatt (BFA) | 32:00 | 25:36 | 19:12 |
Jeder Dungeon hat ein festes Zeitlimit und erforderliche Zeiten für den Abschluss mit +2 oder +3. Zum Beispiel haben die meisten TWW-Dungeons einen 30:00-Timer (24:00 für +2, 18:00 für +3), während größere wie Das RIESENFLÖZ!!! etwa 39:00 haben.
Werfen wir nun einen Blick auf jeden Dungeon mit wichtigen Mechaniken und Strategien, die es zu beachten gilt:
Cinderbrew Meadery ist eine spaßige, braufreudige Schlägerei – lass dich aber nicht von der Party-Atmosphäre täuschen. Die Trash-Gegner im Anfangsbereich können sich enragen (sie erhalten den "Thirsty"-Buff), was sie deutlich härter zuschlagen lässt. Tanks sollten vorsichtig sein, nicht zu viele auf einmal zu pullen – verwende Soothe-Effekte, um Enrages zu entfernen, oder Defensiv-Cooldowns, um den Burst zu überleben.
Im Verkostungsraum wirf ein Auge auf die Hired Muscle-Mobs: Sie werfen regelmäßig Volatile Keg aus, einen Dungeon-weiten DoT für alle Spieler. Mehr als einen Hired Muscle gleichzeitig zu bekämpfen, kann deinen Heiler überfordern, also versuche, nicht mehrere gleichzeitig zu pullen. Unterbrich oder CC die Venture Co. Pyromaniacs – ihr Boiling Flames-Cast kann einen Mitspieler grillen, wenn er nicht gestoppt wird.
Was die Bosse angeht, hat jeder der vier Bosse einen eigenen Kniff:
Tipp: Wenn jemand in deiner Gruppe mindestens 25 Khaz Algar Cooking oder Alchemy hat, gibt es vor dem ersten Boss einen interaktiven Sticky Honey-Topf, der eine einmalig nutzbare Fähigkeit verleiht. Es ist ein klebriger Bann, der Gegnerbewegung und -tempo für kurze Zeit stark verlangsamt. Kein Gamechanger (und er kann sogar Spieler treffen, wenn er unvorsichtig eingesetzt wird), aber er kann helfen, einen großen Pull oder eine Boss-Burn-Phase etwas zu entschärfen. Wenn du möchtest, schnapp ihn dir als zusätzliche klebrig-süße Massenkontrolle!
Darkflame Cleft führt dich in eine schattige Höhle voller Kultisten und feuriger Feinde. Der Dungeon enthält jede Menge Flächeneffekte und Frontalangriffe, daher ist räumliches Bewusstsein unerlässlich. Zu den Trash-Gegnern gehören Blazebound Cultists, die Blazing Eruption wirken – unterbrich oder betäube sie, oder sei bereit, den Feuerflächen auszuweichen.
Cleft Scorchers haben einen üblen Frontal-Konus; Tanks sollten sie von der Gruppe wegdrehen und alle anderen sollten aus dem Kegel herausbleiben. Außerdem lauern Shadowblade Ambushers, die sich tarnen und Spieler von hinten attackieren – nutze AoE-Fähigkeiten (wie Flare oder AoE-CC), um sie aufzudecken, und lass sie nicht deinen Heiler ausschalten.
Darkflame hat drei Bosse:
Tipp: Viele Trash-Gegner hier sind anfällig für Crowd Control – scheue dich nicht, Stuns, Fears und Verlangsamungen großzügig einzusetzen. Besonders gut lässt sich dadurch manch harter Pull (z.B. große Gruppen von Kultisten) in kleinere, ungefährlichere Happen aufteilen. Das ist in den engen Gängen von Darkflame extrem hilfreich, denn ein versehentlicher Massenpull kann direkt zum Untergang führen.
Der Priory of the Sacred Flame ist ein tempelartiger Dungeon, in dem Eiferer heiliges Feuer nutzen. Erwarte viel reinigendes Feuer und heiliges Licht – was spielerisch Dispels und genaues Positionsspiel bedeutet.
Bei Trash-Gegnern achte auf Sacred Priests, die Blinding Faith wirken – verstecke dich hinter Wänden oder unterbrich den Cast, da er sonst die ganze Gruppe desorientiert. Flame Wardens setzen Schilde auf sich oder Verbündete; nutze Purge oder Mass Dispel, um diese Defensiv-Buffs schnell zu entfernen. Außerdem solltest du auf den Magmataur-Miniboss achten, der durch die Hallen streift – er verursacht hohen Tank-Schaden und hat einen Enrage; setze eine Soothe-Fähigkeit ein oder spare große Defensivs für ihn.
Bemerkenswerte Priory of the Sacred Flame Bosse:
Tipp: Im Priory fliegen viele Buffs und Debuffs umher. Klassen, die magische Effekte entfernen können (um fiese DoTs von Mobs zu entfernen oder Feuer-Debuffs von Spielern zu reinigen), erleichtern das Leben hier erheblich. Ebenso ist ein Bloodlust großartig, um die harte letzte Phase des Endbosses zu durchbrechen – hebe es dir für die Ardent Canoness auf, sofern du nicht bei einem früheren Boss massive Schwierigkeiten hast.
The Rookery ist ein dunkler, verschlungener Dungeon, in dem es vor gruseligen Krabbeltieren und verbotenen Experimenten nur so wimmelt. Wenn du Arachnophobie hast … mach dich auf einige Spinnen gefasst! Bei den Trash-Gegnern sind große Gruppen kleiner Kreaturen die größte Gefahr – sie können eine unvorsichtige Gruppe schnell überrollen. Spiderlings explodieren beim Tod mit Gift – steht nicht zu dicht zusammen, wenn gleich mehrere sterben, sonst kassiert jeder mehrfach Giftschaden. Rookery Researchers wirken Mutate auf Verbündete und verstärken sie – unterbrich oder entferne Mutate (Purge), sonst könnte ein mutierter Laborassistent rasch zu einem viel größeren Problem werden.
The Rookerys Bosse sind entsprechend gruselig gestaltet:
Tipp: The Rookery ist voller enger Räume und Ecken, die man zum Aus-der-Sicht-Pullen nutzen kann. Das kann helfen, Fernkämpfer-Mobs zu bündeln und AoE- sowie Unterbrechungs-Effekte effizient einzusetzen. Achte nur darauf, nicht rückwärts in ein weiteres Gegnerpack zu laufen. Gleichmäßige, kontrollierte Pulls und Zielpriorisierung (z.B. erst Alchemisten und Mutanten töten, bevor man sich um endlose Spinnenadds kümmert) sorgen dafür, dass der Dungeon nicht über die Gruppe hereinbricht.
Operation: Floodgate ist der neue Dungeon, der mit Patch 11.1 eingeführt wird, und er ist nur auf Mythic und höher verfügbar. Das Szenario ist eine unterirdische Titanenanlage in den Ringing Deeps, die von Wasserelementaren und Leerenwesen überrannt wurde – stelle dich also sowohl aquatischen Bedrohungen als auch Dienern der Alten Götter. Da der Dungeon neu ist, lernen viele Spieler ihn in dieser Saison zum ersten Mal, also schäme dich nicht, in Random-Gruppen kurz die Boss-Mechaniken zu erklären.
Wichtige Trash-Hinweise: Im ersten Bereich findest du Unstable Aquaelementals, die Spieler fixieren und beim Tod explodieren – kite sie von der Gruppe weg, bevor sie sterben, um großen AoE-Schaden zu vermeiden. Es gibt außerdem Voidmancers, die Umbral Torrent wirken, was Spieler in Furcht versetzt; unterbrich oder betäube das, sonst rennt deine Gruppe womöglich in weitere Gegner. Im Unterwassertunnel patrouillieren versteckte Aale – sei wachsam, damit sie dich nicht von hinten überraschen.
Besondere Boss-Highlights:
Tipp: In Operation: Floodgate lassen sich nach bestimmten Bossen Teleporter freischalten, die euch tiefer in die Anlage bringen. Klickt unbedingt auf diese Teleportkonsolen, sobald ein Boss besiegt ist, damit ihr nicht den ganzen Weg zurücklaufen müsst, falls ihr später wiped. Da der Dungeon komplett neu ist, mag er anfangs etwas länger oder schwieriger erscheinen, bis alle Taktiken bekannt sind; nehmt euch ruhig etwas extra Zeit, um über Pulls und Prioritäten zu sprechen – insbesondere über gefährliche Gegner wie die Voidmancers.
Das RIESENFLÖZ!!! ist ein Knaller aus Battle for Azeroth – im wahrsten Sinne, denn es ist voller Explosionen, Goblin-Mechs und gieriger Horden. Es ist einer der umfangreicheren Dungeons in dieser Rotation, mit 4 Bossen und vielen Trashgruppen dazwischen. Der Timer ist großzügig (39 Minuten), doch wenn man unbedacht zu große Pulls macht, kann es schnell brenzlig werden.
Tipps zu den Bossen im RIESENFLÖZ!!!:
Trash-Tipps: Zu Beginn lauern zahlreiche Goblin-Gegner. Mechanized Peacekeepers stürmen die Gruppe und können betäuben – Tanks sollten rasch Aggro gewinnen und dem Charge ausweichen. Venture Co. War Machines wirken Gatling Gun, was einen tödlichen Frontal-Angriff bedeutet – betäube sie oder nutze Hindernisse, um nicht zerschossen zu werden. Achte auch auf Assassins, die sich tarnen und Spieler von hinten mit einem Stun überfallen. Nutze AoE-Effekte, um sie aufzudecken, bevor sie deinen Heiler ausschalten.
Das Theater der Schmerzen ist eine gladiatorartige Arena, in der nur die Stärksten überleben. Es ist nicht linear – nach dem ersten Boss kannst du die nächsten zwei Bereiche in beliebiger Reihenfolge angehen. Die Atmosphäre ist chaotisch und spaßig, aber einige Bosse können tödlich für zufällige Gruppen sein, wenn man unvorbereitet ist.
Der Dungeon ist in mehrere Abschnitte unterteilt. Auf den oberen Tribünen (vor dem ersten Boss) triffst du auf Dessias Krieger – sie wirbeln herum (nicht darin stehen) und enragen bei niedriger Gesundheit (nutze einen Soothe oder kite sie). In Xavs Abschnitt warten Gorechops Schlächter, die Spieler mit Haken heranziehen – betäube oder erledige sie schnell. In Kul’tharoks Bereich kannst du auf Spectral Mages stoßen, die Shadow Bolt Volley wirken – unterbrich diesen AoE-Schaden und DoT, wenn du kein Gruppenauslöschen riskieren möchtest.
Boss-Übersicht:
Tipp: Viele Gruppen scheitern an Mordretha. Geht den Kampf ruhig an, erklärt Neulingen den Charge-Mechanismus und verwendet einen Battle Res für einen wichtigen DPS, wenn er früh stirbt. Unterbrecht außerdem Death Bolt, wann immer möglich, sonst häuft sich schnell zu viel Schaden an.
Abschließend kehren wir in die hochmodernen Hallen von Mechagon zurück – dieses Mal in den Werkstatt-Abschnitt. Dieser Dungeon ist ein wilder Ritt durch mechanische Bosse und schräge Gadgets. Ursprünglich Teil des reinen Mythic-Megadungeons Mechagon in BFA, wurde er für The War Within Mythic+ neu ausbalanciert.
Wichtige Änderungen beim Trash: Im Eingangsbereich warten Rocket Tonks und Blastatron X-80, deren Angriffe deutlich telegraphiert werden (große rote Kreise) – man kann ihnen gut ausweichen. Die Pistonhead Mechanics versuchen, Roboter zu reparieren oder Bomben zu werfen – fokussiere sie zuerst. Früher war der erste Boss (ein Doppel-Mini-Boss), der nun zeitgleich sterben muss, sonst wütet der überlebende. Der massenhafte AoE-Schaden ihres Vent Jet wurde jedoch reduziert, damit das Ganze weniger frustrierend ist. Insgesamt sind viele Gegner jetzt schneller im Cast und schlagen härter zu, doch auch einige nervige Mechaniken wurden abgeschwächt, sodass es ein faires Erlebnis bleibt.
Die Mechagon-Werkstatt Bosse:
Tipp: Die Mechagon Werkstatt hat viele Mechaniken, die früher Tricks erforderten (z.B. cleveres Aus-der-Sicht-Gehen oder spezielles Bomben-Handling). Teilt vor schwierigen Bossen wie HK-8 Rollen zu (wer übernimmt Orbs, wer kitet Bomben?) und kommuniziert im Kampf. Mit etwas Vorbereitung ist es jedoch gut machbar. Und denk daran: Fast alle Gegner in Mechagon sind mechanisch, also können Klassen mit Effekten gegen Maschinerie (z.B. betäubende oder enrage-entfernende Fähigkeiten bei Robos) hier glänzen.
In Saison 2 von TWW gibt es keinen klassischen „Saisonal Affix“ wie in früheren Erweiterungen, sondern die sogenannten Xal’atath’s Bargains – eine Reihe rotierender Affixe, die bei verschiedenen Schlüsselstein-Stufen zusätzliche Herausforderungen (und Boni) hinzufügen. Außerdem hat Blizzard in dieser Saison bedeutende Änderungen am Mythic+-Affix-System vorgenommen, sodass selbst erfahrene Mythic+-Veteranen einige Unterschiede feststellen werden.
Keystone Level 2+: Von Schlüsselstein-Stufe 2 bis 6 gibt es keinen speziellen Affix (nur die Basis-Dungeon-Mechaniken). Wichtig: Das pro Stufe steigende Lebens- und Schadenswachstum wurde angepasst – jeder Level zwischen +2 und +10 erhöht jetzt das Leben und den Schaden der Gegner um 7% statt wie früher 10%. Dadurch sind die unteren bis mittleren Schlüsselsteine etwas weniger hart, was den Progress ein wenig glättet.
| Mythic+ Level | Modifier | Mythic+ Level | Modifier |
|---|---|---|---|
| 2 | +7% | 9 | +72% |
| 3 | +14% | 10 | +84% |
| 4 | +23% | 11 | +102% |
| 5 | +31% | 12 | +122% |
| 6 | +40% | 13 | +132% |
| 7 | +50% | 14 | +142% |
| 8 | +61% | 15 | +152% |
Ab Mythischer Schlüsselstein-Stufe 4 trifft man erstmals auf einen der Affixe Xal’atath’s Bargain: Ascendant, Xal’atath’s Bargain: Voidbound, Xal’atath’s Bargain: Pulsar oder Xal’atath’s Bargain: Devour, je nach Woche. Diese Affixe funktionieren wie folgt:
Xal’atath’s Bargain: Ascendant: Ungefähr jede Minute erscheint Xal’atath und beschwört 10 Orbs of Ascendance, die Cosmic Ascension wirken. Wenn diese Casts durchkommen, erhält jeder Gegner in der Nähe eines Orbs +20% Bewegungstempo und +20% Tempo. Unterbrechen, verschieben, CCen oder „purgen“ die Spieler jedoch das Wirken, bekommen stattdessen die Spieler selbst pro Orb einen Bonus von +2% auf Movement und Tempo (bis zu +20%) für 30 Sekunden.
Xal’atath’s Bargain: Voidbound: Im Kampf beschwört Xal’atath einen Void Emissary, der nahe Feinde mit Dark Prayer stärkt. Dieses verleiht betroffenen Mobs alle 3 Sekunden 10% Schadenreduzierung, die sich stapelt. Sobald der Void Emissary besiegt ist, erhalten die Spieler 30 Sekunden lang eine erhöhte Abklingzeitreduktion von +30% und +20% Vielseitigkeit.
Xal’atath’s Bargain: Pulsar: Im Kampf lässt Xal’atath Pulsare entstehen, die sich 15 Sekunden lang an die Spieler binden und um sie kreisen. Die Spieler müssen diese Void Pulsars absorbieren, bevor die Zeit abläuft. Gelingt ihnen das, erhalten sie für 30 Sekunden erhöhten Meisterschafts- und Lebensraub-Wert. Schlägt man jedoch fehl, bekommen die Gegner in der Nähe pro Orb einen +10%-Schadensbonus und 20% Schadenreduzierung.
Xal’atath’s Bargain: Devour: Periodisch wirkt Xal’atath Devouring Rift, das allen fünf Spielern einen Schild-Debuff auflegt. Dieser Schild lässt sich durch Heilung oder Dispels entfernen – es ist kein Heilabsorptionsschild. Entfernt man den Schild nicht rechtzeitig, heilen sich die Gegner um 10% ihrer Gesundheit. Wird der Schild jedoch entfernt, erhält jeder Spieler einen Stapel Rift Essence, was das maximale Leben um 2% und den Kritischen Trefferwert um 4% für 30 Sekunden erhöht.
Ab Schlüsselstein-Stufe 7 ist entweder Tyrannical oder Fortified aktiv, wobei diese beiden Affixe wöchentlich wechseln. Tyrannical erhöht die Lebenspunkte von Dungeonbossen um 30% und ihren Schaden um 15%, während Fortified die Lebenspunkte der Trash-Gegner um 20% und ihren Schaden um bis zu 20% steigert. Da sich diese beiden Affixe abwechseln, wird man nicht zwei Wochen hintereinander dasselbe sehen.
Ab Stufe 10 sind sowohl Tyrannical als auch Fortified gleichzeitig aktiv. Das Affix, das bei Stufe 7 nicht aktiv war, wird nun auf Stufe 10 hinzugeschaltet. Da diese beiden Affixe wöchentlich rotieren, gilt: Wenn in einer Woche Tyrannical bei 7 aktiv ist, dann erscheint in der folgenden Woche Tyrannical erst bei 10.
Ab Stufe 12 macht Xal’atath keine „Bargains“ mehr mit euch. Stattdessen verhängt sie Xal’atath’s Guile, das im Grunde eine Wiederbelebung des alten Challenger’s Peril-Effekts aus Saison 1 ist. Was das bedeutet? Kurz gesagt: Stirbt ein Spieler, wird die Dungeonzeit um 15 Sekunden verkürzt. Dieser Affix bleibt über +12 bestehen und ersetzt die bisherigen Bargain-Affixe. Die gute Nachricht: Blizzard hat beschlossen, den Gegnern ab +12 keine zusätzlichen Skalierungen mehr zu verpassen (früher gab es an +12 nochmal +10% Stats). Somit bleibt es bei der normalen Skalierung pro Stufe, während das Hauptproblem in der Vermeidung von Toden liegt – denn jeder Tod kostet Zeit und gefährdet euren Run.
Nach einer Welle von Kritik in der ersten Saison von The War Within hat Blizzard beschlossen, das Feedback ernst zu nehmen. Als Reaktion darauf wurden einige wichtige Anpassungen vorgenommen, um die Spielerzufriedenheit zu erhöhen und das gesamte Erlebnis zu verbessern. Hier sind die wichtigsten Neuerungen für die kommende Saison:
Um den Erfolg zu bekommen, müsst ihr lediglich alle Mythic+ Saison 2 Dungeons auf Schlüsselstein-Stufe 12 innerhalb des Zeitlimits abschließen. Ihr fragt euch vielleicht: „Es ist doch nur ein Erfolg – warum sollte das große Auswirkungen auf mein Mythic+-Erlebnis haben?“ Nun, tatsächlich ist der Effekt ziemlich bedeutsam, da euch dadurch neue Vorteile freigeschaltet werden:
Für alle, die ihre Keys pushen wollen und sich bisher bei Level 12 geärgert haben, wenn der Schlüsselstein bei Fehlschlag sofort wieder gesunken ist, ist das eine Riesen-Neuigkeit! Mit den neuen Änderungen kann man seinen Key immer wieder versuchen, ohne dass er ständig runtergestuft wird. Danke, Blizzard?
Der einzige "Nachteil" an diesem System ist, dass ihr zunächst alle Dungeons auf Stufe 12 abschließen müsst, um diese tollen Features freizuschalten. Aber kein Problem – ConquestCapped steht bereit! Unsere PROs können helfen, die Dungeons schnell und ohne ermüdenden Grind zu erledigen, damit ihr alle Boni freischaltet, die ihr braucht!
Seien wir ehrlich – wir kommen nicht nur wegen der Herausforderung, sondern auch wegen der tollen Belohnungen! In Saison 2 gibt es höhere Gegenstandsstufen und frische Goodies, die es sich zu jagen lohnt, von Gear-Upgrades bis hin zu Titeln, Reittieren und mehr. Hier eine umfassende Übersicht darüber, was ihr verdienen könnt und wie:
| Keystone Level | End of Dungeon | Initial Upgrade Level | Great Vault | Initial Upgrade Level | Crest Rewarded |
| 2 | 639 | Champion 2/8 | 649 | Hero 1/6 | Runed Harbinger Crest x10 |
| 3 | 639 | Champion 2/8 | 649 | Hero 1/6 | Runed Harbinger Crest x12 |
| 4 | 642 | Champion 3/8 | 652 | Hero 2/6 | Runed Harbinger Crest x14 |
| 5 | 645 | Champion 4/8 | 652 | Hero 2/6 | Runed Harbinger Crest x16 |
| 6 | 649 | Hero 1/6 | 655 | Hero 3/6 | Runed Harbinger Crest x18 |
| 7 | 649 | Hero 1/6 | 658 | Hero 4/6 | Gilded Harbinger Crest x10 |
| 8 | 652 | Hero 2/6 | 658 | Hero 4/6 | Gilded Harbinger Crest x12 |
| 9 | 652 | Hero 2/6 | 658 | Hero 4/6 | Gilded Harbinger Crest x14 |
| 10 | 655 | Hero 3/6 | 662 | Myth 1/6 | Gilded Harbinger Crest x16 |
| 11 | 655 | Hero 3/6 | 662 | Myth 1/6 | Gilded Harbinger Crest x18 |
| 12 | 655 | Hero 3/6 | 662 | Myth 1/6 | Gilded Harbinger Crest x20 |
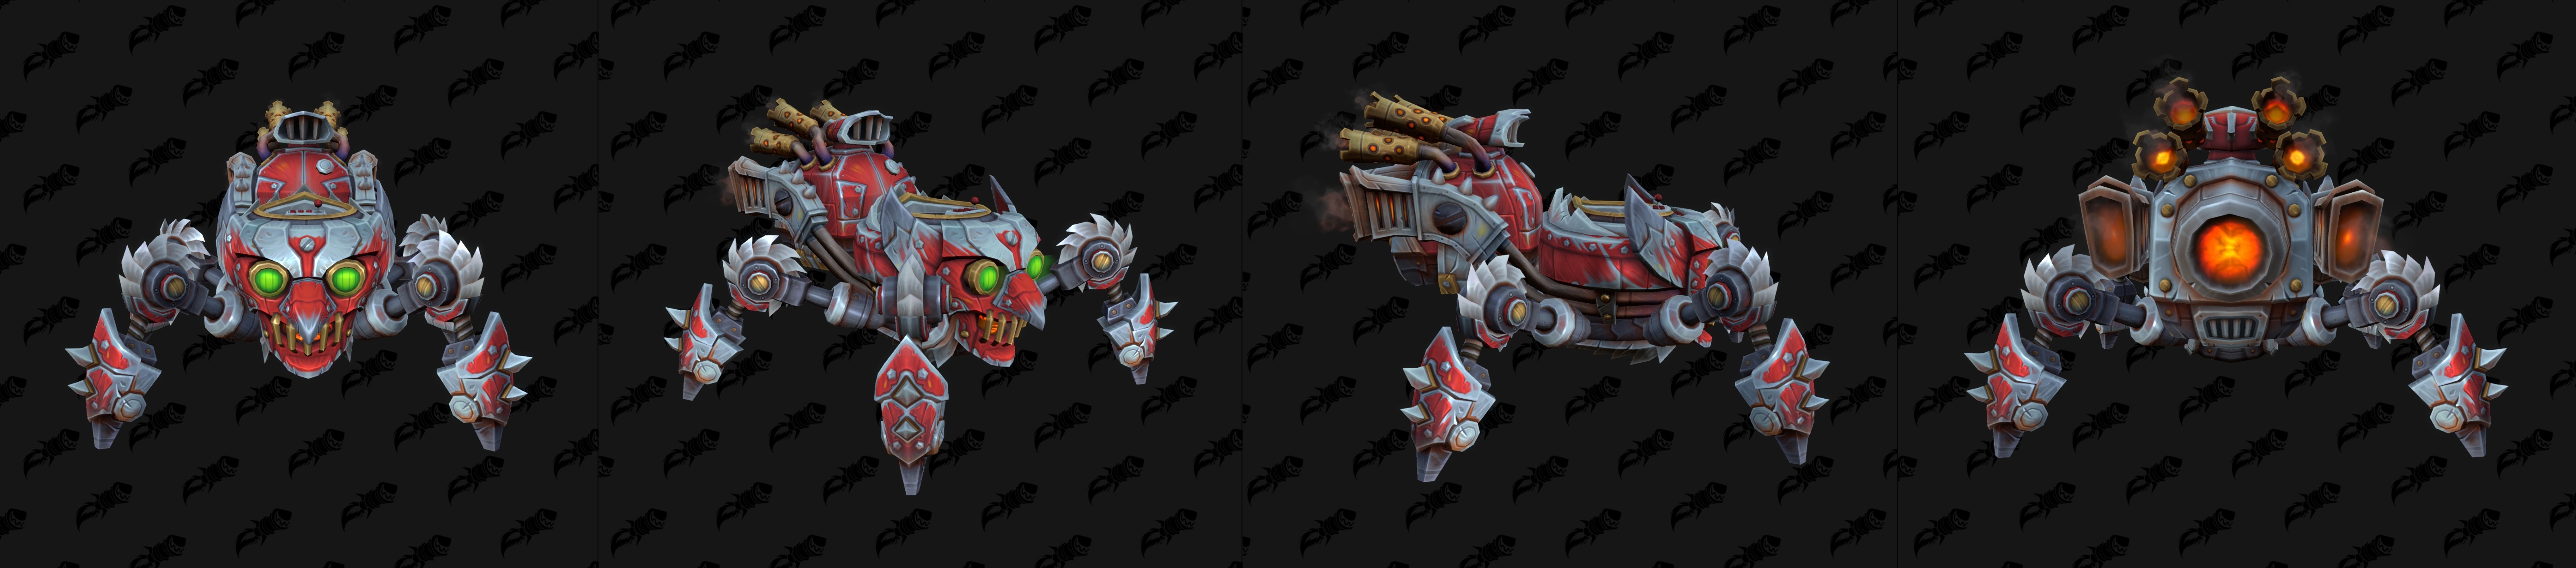
Wer den Erfolg Keystone Master erreicht, indem er 2000 Wertung in der Mythic+ Saison 2 sammelt, erhält als Belohnung das Reittier Crimson Shreddertank.
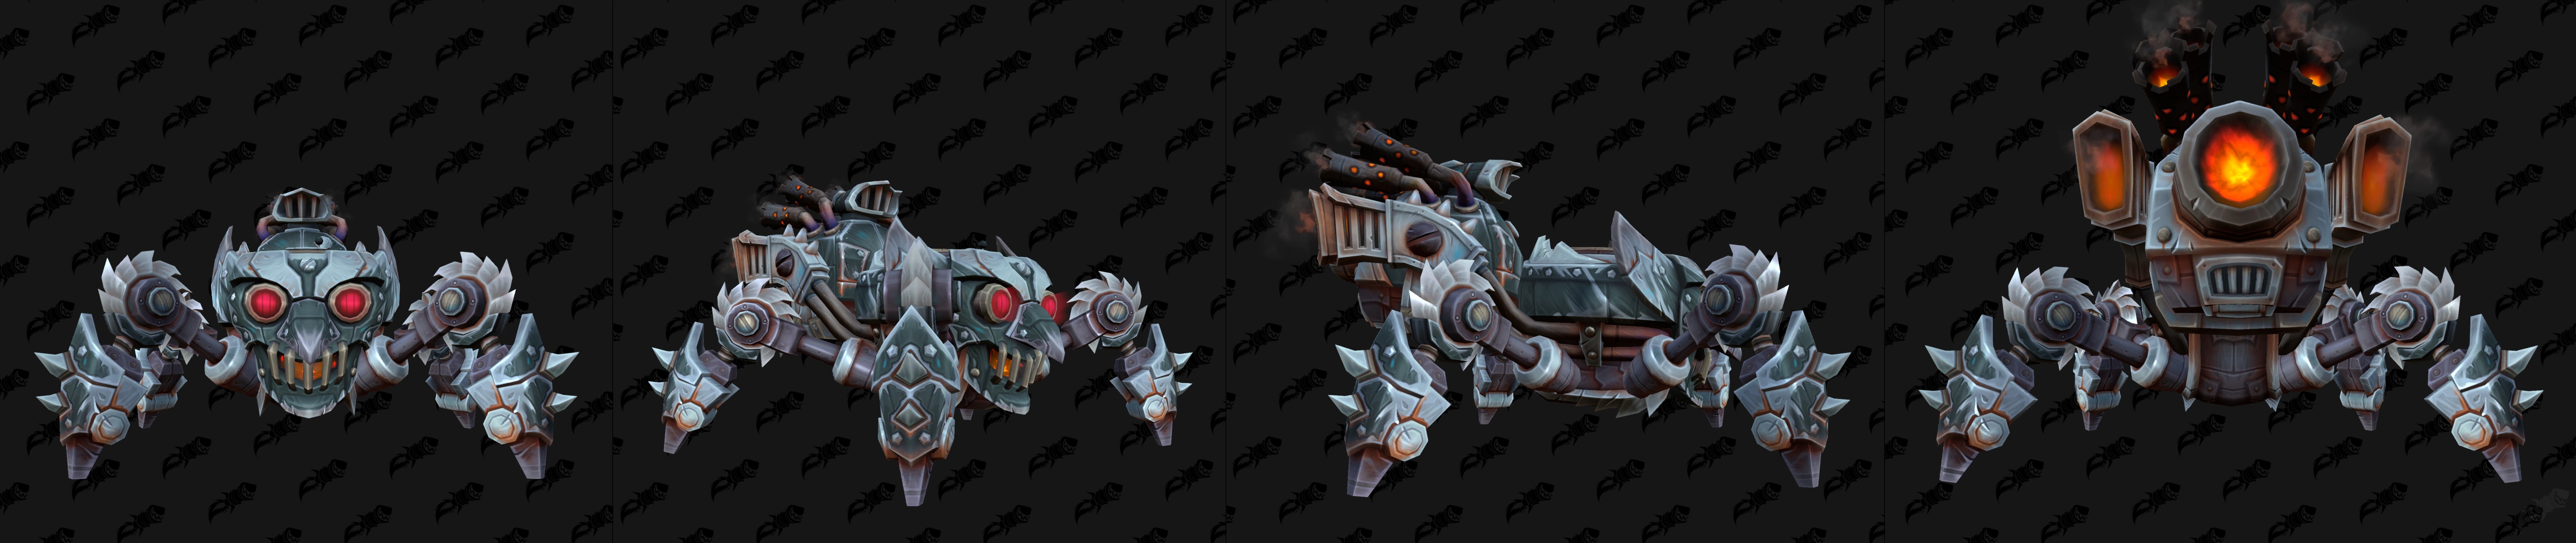
Wer den brandneuen Erfolg Keystone Legend erreicht, indem er 3000 Wertung in der Mythic+ Saison 2 sammelt, bekommt das Reittier Enterprising Shreddertank geschenkt. Dieses Mount ähnelt dem Crimson Shreddertank, hat jedoch ein Chrom-Finish anstelle des roten Designs.
The War Within Keystone Conqueror: Saison Two: Erreicht eine Mythic+-Wertung von mindestens 1500 in The War Within Saison 2. Titelbelohnung: the Enterprising.
The War Within Keystone Hero: Saison Two: Erreicht eine Mythic+-Wertung von mindestens 2500 in The War Within Saison 2. Belohnung: Gallagio’s Highroller Bombstone.
Enterprising Hero: The War Within Saison Two: Beendet The War Within Saison 2 mit einer Mythic+-Wertung in den obersten 0,1 % aller Spieler eurer Region. Titelbelohnung: the Enterprising Hero.
In The War Within Saison 2 gibt es zudem individuelle Erfolge für das Abschließen jedes Mythic+-Dungeons ab Stufe 10 oder höher innerhalb des Zeitlimits. Jeder dieser Erfolge gewährt ein Portal zum Eingang dieses Dungeons. Dank Warbands sind diese Portale, sobald sie auf einem Charakter freigeschaltet sind, für alle Charaktere auf eurem Account verfügbar!
Keystone Hero: Darkflame Cleft: Schließe Darkflame Cleft auf Mythisch+ 10 oder höher innerhalb der Zeit ab.
Keystone Hero: Cinderbrew Meadery: Schließe Cinderbrew Meadery auf Mythisch+ 10 oder höher innerhalb der Zeit ab.
Keystone Hero: Priory of the Sacred Flame: Schließe Priory of the Sacred Flame auf Mythisch+ 10 oder höher innerhalb der Zeit ab.
Keystone Hero: The Rookery: Schließe The Rookery auf Mythisch+ 10 oder höher innerhalb der Zeit ab.
Keystone Hero: Operation: Floodgate: Schließe Operation: Floodgate auf Mythisch+ 10 oder höher innerhalb der Zeit ab.
Keystone Hero: Operation: Mechagon – Workshop: Schließe Operation: Mechagon – Workshop auf Mythisch+ 10 oder höher innerhalb der Zeit ab.
Keystone Hero: Theater der Schmerzen: Schließe Theater der Schmerzen auf Mythisch+ 10 oder höher innerhalb der Zeit ab.
Keystone Hero: Das RIESENFLÖZ!!!: Schließe Das RIESENFLÖZ!!! auf Mythisch+ 10 oder höher innerhalb der Zeit ab.