
Path of Exile 2 has a reputation for being brutal to learn, and almost all of that fear is about the menus, not the monsters. The campaign itself is a guided ramp. The real problem is that the game hands you a dozen interlocking systems at once and barely explains any of them, so a new player drowns in skill gems, passive nodes, and orb names before the first act ends. This guide fixes that. It covers everything you need to read item rarities, slot gems, spend passive points, cap resistances, and beat the campaign — no endgame theory, no third-party apps, just the foundation!
Every system here is one you meet on your first character, in the order you bump into it. By the last act you will know why a blue item can beat a yellow one, which defense is keeping you alive, and how to read a skill before committing a gem to it. Get these basics down and you are clearing your first campaign under your own power, making your own build calls instead of copying someone else's tree node for node.
Before you ever see your character, the game asks two questions that trip up new players: which league, and which difficulty options. Neither is as permanent as it sounds, so do not overthink them.
A league is a separate server with its own economy and ladder, and you only party and trade with players in the same one. Standard is permanent, where characters live forever. A Challenge League is temporary: it runs three to four months, ships a fresh league mechanic, and wipes everyone to zero at launch. The current one is Runes of Aldur, and you should pick it. Your drops and currency are worth more in a fresh league because the whole economy started over when you did.
Two optional modifiers sit on top of whatever league you pick, and a beginner should leave both alone. Hardcore (HC) sends your character to Standard the moment it dies. One careless pull, days of progress gone. Solo Self-Found (SSF) switches off trading and partying, so you only use items you found or crafted yourself. Both are challenge modes for players who already know the game. Buying a cheap upgrade off another player is one of the best crutches while learning, and SSF throws that crutch away.
PC gives you three control schemes, and the pick shapes how the whole game feels. Mouse and keyboard is the classic point-and-click ARPG (action RPG) setup. WASD movement is new to the sequel, letting you move one way while aiming a skill in another, which feels great once it clicks. Controller has the cleanest UI but the clumsiest inventory management. Try them early and commit; swapping mid-campaign is miserable.
The 0.5 campaign is four acts plus three Interludes — short chapters named Darkness at Holten, Gifting of Water, and Vaal Vault that replaced the old Cruel-difficulty replay. You finish somewhere around level 60 to 65, and that is where the real game, the endgame Atlas, begins. The campaign is a ramp to that endgame, not the destination, so push through it instead of perfecting every gear slot on the way.

Path of Exile 2 is a largely classless game, which trips up anyone coming from an MMO. Your class does not lock your weapon, skills, or armour. It only sets your starting spot on the shared passive tree, the skills the game suggests, and the three ascendancies you can pick later. Any class can wield any weapon and use almost any skill, as long as you meet the stat requirements.
Because the tree is shared, you can path a Warrior into spellcaster nodes or a Witch into bow nodes if you really want. You usually will not. But the freedom means your first pick is a starting flavour, not a thousand-hour commitment, and you can respec later for gold. Choose on vibe. Want to throw fire and lightning? Sorceress. Want to stand at range and plink things? Ranger.
Some classes forgive mistakes better than others while you learn to dodge and manage flasks. The roster grows each patch; these are today's archetypes.
| Class | Playstyle | New-player notes |
|---|---|---|
| Ranger | Mobile bow attacker, ranged and kiting | Forgiving and strong. Lightning Arrow is a top beginner clear skill. |
| Witch | Summoner, undead minions and curses | Minions tank for you. The most hands-off, safest campaign. |
| Sorceress | Elemental spellcaster | Huge early damage, fast clear, but squishy. Respect dangerous packs. |
| Monk | Fast quarterstaff hybrid | Flashy and quick, leans on evasion and energy shield. Mid difficulty. |
| Huntress | Spear and javelin hybrid, melee and thrown | Agile and very mobile. Lightning Spear is a strong, forgiving clear skill. Mid difficulty. |
| Mercenary | Crossbow, grenades, ammo swaps | Gun-feel and satisfying, but more buttons to juggle. |
| Warrior | Heavy two-handed melee, armor stacker | Tanky and durable, but slow, and his damage starts rough. |
| Druid | Shapeshifter, swaps between human spells and Bear, Wolf, or Wyvern forms | The most hands-busy pick. Weaving forms is satisfying but a lot to juggle on a first run. |
If you genuinely cannot decide, roll a Ranger or a Witch. Both carry a fresh character through the story with very little fuss.
Clicking a class previews its three ascendancies, the sub-classes you choose partway through the campaign that grant a passive identity the base class lacks. A Witch, for instance, can become a fire-and-demon caster, a life-fuelled blood mage, or an energy-shield lich. Do not agonize over this at creation. You pick it later, you can change it, and the campaign plays fine before you ascend at all.
Three attributes sit under every character, and your gear and gems list them as requirements to equip or cut. You build them mostly through passive points and the stats on your gear, not at character creation, so you rarely plan around them early, just keeping enough of each to use what you want.
| Attribute | What it grants | What it gates |
|---|---|---|
| Strength | +2 maximum Life per point | Armour gear, melee weapons and skills |
| Dexterity | +5 Accuracy Rating per point | Evasion gear, ranged weapons and skills |
| Intelligence | +2 maximum Mana per point | Energy Shield gear, spell weapons and skills |
Past meeting requirements, none of the three raises your damage on its own. Your skills, supports, and passive tree do that. Take a look:
PoE 2 Best League Starter Builds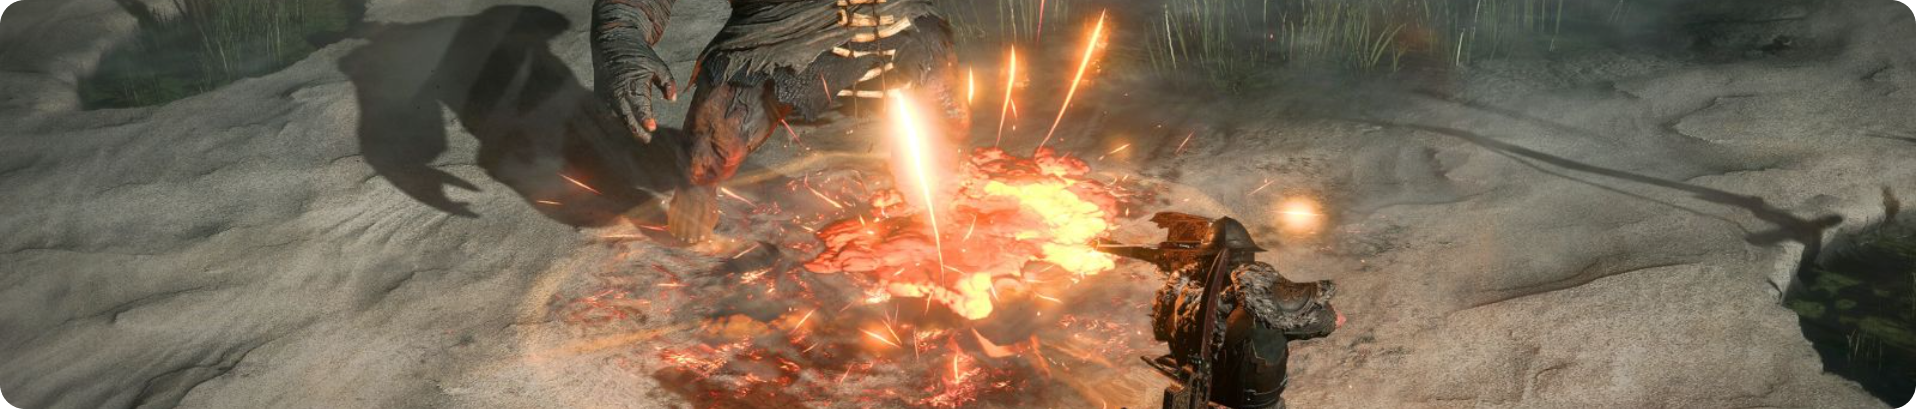
This is the system that confuses new players the most, so slow down here. In Path of Exile 2 your skills are items called gems, not abilities tied to your class. There are three kinds: skill gems (the abilities you actively cast), support gems (modifiers that bolt onto a skill), and spirit gems (passive buffs you toggle on).
Skill gems begin as Uncut Skill Gems, dropping as you play and from quest rewards. Click one and the gem-cutting menu shows every skill you can carve it into, sorted by weapon type and tier. You can only cut a skill if you meet its requirements: the right attributes, the right weapon equipped, and an uncut gem of high enough level. Some skills are weapon-locked — Lightning Arrow needs a bow, while a totem or a bomb works with anything. Gems level 1 to 20, and a higher-level uncut gem can be poured into a skill you already use to level it instead of cutting a new one. Keep your main damage skill leveled. That one habit carries you through the campaign.
One genuinely useful detail most players skip: hovering a skill in the cut menu plays a short clip of how it works and combos. Watch those clips — they show which skills get stronger when you set up a corpse, freeze a pack, or stack a debuff first.
Support gems make a skill hit harder or behave differently, slotting into sockets on each skill. Every skill starts with two sockets. You widen that with Jeweller's Orbs: a Lesser takes it to three, a Greater to four, a Perfect to five, those orbs dropping from around level 25, 45, and 65. Supports come in three colours tied to attributes: red for Strength, green for Dexterity, blue for Intelligence.
Here is the part that changed and matters: the same support gem can now sit in several skills at once, so a damage support can ride your main attack and your backup both. You still cannot stack two copies on one skill, and some supports raise the modified skill's mana cost. Read higher-tier supports before you engrave them — a few trade a bigger bonus for a steep drawback, like more attack speed at the cost of a chunk of your damage.
Spirit is a separate resource bar that keeps persistent effects running. Spirit gems are passives you toggle on: auras, heralds that explode enemies, permanent minions. Each reserves a slice of your Spirit while active. You start with none, and earn permanent Spirit from a specific Act 1 quest reward and from certain sceptres in your off-hand. If your Spirit bar reads full, you forgot to turn a buff on.

The passive skill tree is the screen that scares people off the game, and it should not. It looks like a galaxy of a thousand-plus nodes because every class shares one tree, each simply starting at a different spot on the rim. You earn a point per level and from some quests, spend it on a node connected to one you own, and build outward. That is the whole system.
Every node is one of three kinds, and learning to tell them apart makes the web readable.
Scattered across the tree are jewel sockets, empty slots that hold jewel items granting up to four random stats each for one point. Related nodes also cluster, so lightning damage sits beside shock and crit, life recovery beside leech and healing; find one node you like and several more are usually right next to it.
Let the clusters guide you.
Do not try to read the whole tree. That is the mistake. Zoom all the way in, look only at the nodes near your character, and grab the closest notable that fits your skills. When nothing nearby looks good, use the search bar: type lightning or life and every matching node lights up across the tree. Match the search to the tags on your main skill and you cannot go far wrong.
Changed your mind? The Hooded One, whom you unlock in Act 1, refunds passive points for a gold fee, so a bad early choice is never permanent; it just costs a little coin, and stays cheap as long as you are not respeccing constantly. The weapon swap itself, carrying two weapon sets and hotkeying between them, is worth using from the start. Only the layer on top, Weapon Set Passive Skills, is a hybrid-build tool you can skip on a first character.
Loot drops with coloured names, and the colour tells you the rarity, which tells you how many random modifiers the item can carry. This is the fastest thing to learn, because you make the call on every drop.
| Rarity | Name color | Random modifiers |
|---|---|---|
| Normal | White | None. Base stats only. |
| Magic | Blue | Up to two. |
| Rare | Yellow | Up to six. Your workhorse gear all campaign. |
| Unique | Dark orange | Fixed special stats. Build-defining or useless, never random. |
Anything above normal rarity drops unidentified and must be read with a Scroll of Wisdom before you equip it. Scrolls drop constantly early on, and later in Act 1 The Hooded One identifies your whole inventory for free whenever you visit town. Two items of the same base at the same level share the same base stats, so the modifiers are the only thing that decides an upgrade. Increased fire damage on a wand does nothing if you only cast lightning. Read before you equip.
Look, that dark orange name is exciting, and it is also a trap. A good rare will beat a bad unique constantly, because plenty of uniques are niche or build-around items that actively hurt the wrong character. Some are game-breakingly strong. Most you see during a first campaign are not. Read a unique's stats against what you are actually playing, like any other drop, and equip it only if it wins.
Staying alive runs on two layers. The first is your defensive stat (armour, evasion, or energy shield), which decides how you handle a hit. The second is resistances, which cut elemental damage before it touches that first layer. New players ignore one or both, then blame the game.
Each defense comes from gear tied to one attribute, and each behaves differently in a fight. Most builds specialize in one, sometimes two.
| Defense | Comes from | How it behaves |
|---|---|---|
| Armour | Strength gear | Reduces physical damage from hits. Great against lots of small hits, weak against single big slams. |
| Evasion | Dexterity gear | A chance to avoid a hit entirely. Heals less often, but the hits that land hurt more. |
| Energy Shield | Intelligence gear | A buffer over your life that recharges after a few seconds without damage. Soak a few hits, then back off to refill. |
Gear that needs two attributes gives a split of both defenses in smaller amounts. You do not have to match the defense to your class — wear what keeps you alive, as long as you meet the stat requirements.
Resistances reduce damage of a specific type: fire, cold, lightning, and chaos. The cap is 75%, and you want your three elemental resistances pinned there for the entire campaign, early acts included. The part nobody warns you about: as you clear acts and interludes, the game stacks an escalating penalty on your resistances, piling up to roughly -60% to all resistances by the end, so a fresh drop that looked fine in Act 1 quietly leaves you exposed later. You counter it by constantly replacing gear and slotting runes for resistance. Chaos resistance is rare and hard to stack, so do not chase it during the campaign.
PoE 2 Gearing & Resistances Guide
Thing is, "currency" means something specific here, and getting it backwards confuses new players for hours. Path of Exile 2 has two separate things: gold, and currency items. They do different jobs, and you treat them differently.
Gold drops in small piles, gets picked up automatically, and only buys NPC services: vendor gear, respec costs, that sort of thing. You cannot trade gold to other players, and it is shared across every character in your league, so a stash of it makes leveling an alt smoother. Currency items are different animals. They are consumable orbs that modify your gear, they hold real value, and they are the actual money players trade with. When a guide says an item is worth "three Divine," it means three Divine Orbs, not gold.
Crafting early is just upgrading an item's rarity with orbs, and it is simpler than its reputation. You take a good base, push it up the rarity ladder, and hope for useful modifiers. These are the orbs that do the work.
| Orb | What it does |
|---|---|
| Orb of Transmutation | Turns a normal (white) item into a magic (blue) one with one modifier. |
| Orb of Augmentation | Adds a second modifier to a magic item. |
| Regal Orb | Upgrades a magic item to rare and adds a modifier. |
| Exalted Orb | Adds a modifier to a rare item that has an open slot. |
| Chaos Orb | Removes one modifier and adds a new random one. |
| Divine Orb | Rerolls the numeric values of an item's existing modifiers. |
The common orbs are meant to be used, not hoarded. Transmutations and Augmentations drop in piles, so slam them on promising bases while leveling and see what rolls. Worst case, you waste one and find another in ten minutes. Save the rarer Exalts, Chaos, and Divines for gear you mean to keep.
Some gear drops with empty rune sockets, and runes are a crafting resource you slot straight in for a flat buff: resistances on armour, added damage on a weapon. They are one of the easiest ways to keep elemental resistances capped, so never leave a socket empty. An Artificer's Orb adds a socket to gear that has none. Late in Act 1 you unlock the Salvage Bench, which breaks items with quality or sockets into crafting shards, and ten matching shards combine into one orb. You can also disenchant magic and rare junk at town vendors for shards. Recycle the trash instead of vendoring it for gold.
Trading is your fastest shortcut out of a gear wall. A weapon or a resistance piece that would take you hours to find usually sells for a handful of orbs from someone sitting on a spare, and the currency you collect along the way buys your own upgrades. Listings live on the official trade site, you whisper the seller in-game, and they invite you in to swap — the full how-to, bulk currency exchange included, is its own guide.
Past gear, a few core mechanics decide whether you survive a tough pack or a boss. None are complicated, and all are things new players forget to use.
You get exactly two flasks: one life, one mana. They run on charges, refilled at the Well in any town or by killing enemies, so you can drink your way through a fight by feeding off what you kill. Always run the biggest flasks you have found, and apply an orb to upgrade one to magic for bonus modifiers. Charms are the newer piece, slotting into your belt in place of the old utility flasks. You start with one charm slot and earn up to two more from campaign quests like Ancient Vows, so fill them as they open. A charm stores charges and fires automatically when its condition triggers, handing you resistance after an elemental hit or breaking a freeze. Check both flasks and charms every few levels.
Your dodge roll, bound to spacebar by default, gets you clear of most attacks and is the main thing keeping you alive against bosses. It is not full immunity, so do not treat it as a panic button that shrugs off everything. Hold the roll button and you break into a sprint, much faster but slow to turn. Take a hit mid-sprint and you are heavily stunned and knocked down, which often means death, so cancel the sprint with a skill or a roll the second a fight starts.
Roll before the hit lands.
Checkpoints unlock as you move through a zone. Passing one fully heals you and refills flask and charm charges, and you can teleport between any checkpoints in the zone for free. Die, and you respawn at the last one — but every monster you killed since respawns too, so a death can mean refighting half the zone. A party is gentler: you only get sent back when the whole group is down, and living teammates revive you by standing near your body. This safety net is campaign-only. In the endgame, dying kicks you out of the zone entirely.
Getting stronger goes well past levels and bigger numbers on gear. A surprising amount of your power comes from progression systems you have to go out of your way for, and skipping them leaves you permanently weaker than the campaign expects.
Plenty of side quests and optional bosses hand out permanent rewards: extra passive points, more maximum Spirit, flat resistances, more life. These are not flavour. They are raw power you keep forever, and a character that skips them is measurably worse off in every later fight. You do not even have to formally accept a quest to complete it: run in, do the thing, collect the reward. Watch your map for optional-quest markers and clear them as you go.
Killing things grants experience, with magic and rare monsters worth far more than trash. Each level up fully heals you, nudges life and mana up, and hands you a passive point. Gear and gems carry level requirements, so keep yours current. One thing to know before the endgame: dying there costs up to 10% of your progress to the next level, though it can never drag you back a full level. Campaign deaths cost nothing but the walk back, so experiment freely while you can.
Ascending is the biggest single power spike your character gets. Your ascendancy is a sub-class with its own small passive tree, unlocked partway through the story by clearing a trial. The first comes in Act 2 through the Trial of the Sekhemas, with more points in Act 3 via the Trial of Chaos, building toward eight in total. Ascend the moment you can. The catch is that the trials are a real difficulty spike, and they punish an undergeared character hard.
PoE 2 All 8 Ascendancy Points GuideA handful of out-of-combat tools make the game smoother, and most new players underuse all of them. None take more than a minute to set up.
Every town has three main vendors: one for armour and weapons, one for magic gear, jewellery, and flasks, and one for gambling unidentified items with gold. Their stock refreshes every time you gain a level, so a quick browse after dinging can hand you a real upgrade for pocket change. Spend your gold here freely. The Hooded One, meanwhile, identifies your entire inventory for free on every town visit.
A loot filter hides worthless drops and highlights valuable ones, and it is the one outside tool worth setting up on day one. The community standard is NeverSink's filter, with no shady downloads involved. Grab it through the official Path of Exile website's item-filter page and follow it to your account, or customize one on FilterBlade. New players should run the Semi-Strict preset. In game: open Options, go to the Game tab, pick the filter from the Item Filter dropdown, and hit Save. That is the whole process.
Build guides are fine as a jumping-off point, and following one is never required to beat the campaign. Honestly, copying a tree node-for-node on your first run strips out a lot of the fun, so use a guide for direction, not as a script. Path of Building (PoB) is a different beast — a deep planning tool that simulates an entire build down to the damage numbers. It is genuinely powerful and genuinely overwhelming, menus on menus of text, and you do not need it to finish the story. Leave it until you reach the endgame and actually want to optimize.
Most of what wrecks a new character comes down to a few small habits piling up. Fix them early and the campaign gets dramatically smoother.
When you are genuinely stuck, the answer is almost always one of two things: read the thing you skipped, or fix your resistances. The game is hard on purpose, and it tells you how it works if you let it.
Ranger, Witch, or Sorceress. The Ranger is mobile and forgiving with a strong ranged playstyle, the Witch lets minions tank the danger for you, and the Sorceress brings huge early clear if you are willing to dodge. The class is largely cosmetic at the start anyway, since any class can use any skill, so pick the one whose vibe you like.
No. You can beat the campaign making your own choices, and figuring the tree out yourself is half the fun. A build guide is a fine direction-setter if you want one, but Path of Building is an optimization tool best left until the endgame.
Almost always uncapped resistances. The game piles on resistance penalties as you finish acts, so gear that was fine an act ago now leaves you exposed. Keep your fire, cold, and lightning resistances at the 75% cap, slot runes for more, and the difficulty falls back in line.
Yes. The same support gem can sit in multiple skills at once. You just cannot stack two copies of it on a single skill, and each skill is capped at five support sockets once you have used the right Jeweller's Orbs.
Use the common ones and save the rare ones. Slam Orbs of Transmutation and Augmentation on leveling bases to roll upgrades, since they drop constantly. Hang onto Exalted, Chaos, and Divine Orbs for gear you mean to keep.
No. Rarity only sets how many modifiers an item can have, not how good they are. A magic item with two perfect modifiers for your build beats a rare with six useless ones. Always read the actual stats before you equip.
No. Hardcore deletes a character to Standard on death, and Solo Self-Found switches off trading, which removes one of your best tools for catching up on gear while learning. Play a normal Challenge League character first and add the challenge modes once you know the game.