
Scarlet Monastery presents an image of righteous order - sunlit courtyards, pristine chapel halls, and zealots standing in perfect formation. But beneath this veneer of zealous discipline lies a fanatical inferno. The corridors are narrow and unforgiving, packed with disciplined casters whose coordinated assaults can overwhelm the unprepared. Every pull is a test of control, where a single missed interrupt can trigger a chain reaction of devastating heals and deadly magic. This is a fortress that rewards ruthless efficiency, flawless interrupt rotations, and the strategic use of its own architecture against its defenders.
In this guide, we will dissect the Scarlet Monastery Challenge Mode, turning its chaotic zeal into a predictable, conquerable path. We will lay out the essential framework for a Gold Run, from managing the unforgiving timer to optimizing your route with clever skips and precise enemy count management. Expect a detailed walkthrough of each wing, with strategies for handling the relentless casters and patrols. We will provide focused tactics for each boss encounter and show you exactly how to break the Scarlet Crusade and secure your timer with time to spare.
Scarlet Monastery is often considered one of the more accessible Challenge Modes, but its reputation is built on a razor's edge. Its seemingly open courtyards and straightforward halls are filled with dense packs of lethal casters, and the brisk pace is dictated by unforgiving interrupt checks. Progress is born from controlled aggression, impeccable crowd control, and minimizing the chaos of its fanatical defenders.
What truly defines this dungeon is how it rewards flawless group coordination. Precise pull strategies, masterful use of Line of Sight to group up enemies, and synchronized cooldowns are what separate a chaotic struggle from a clean, efficient run. With a solid plan, the Monastery becomes a highly predictable - a perfect arena to hone a team's fundamental interrupt discipline.
Before we detail the optimal routes and boss tactics needed to conquer the Crusade and secure a Gold Medal, let’s first establish the framework of Challenge Modes themselves - their scaling mechanics, the pressure of the timer, and the core principles that define every run.
New from our creator Poizy: an in-depth, step-by-step Scarlet Monastery Challenge Mode run that maps out a reliable path to a Gold Medal. You’ll see the route from first pull to final boss with clear pacing, where to commit cooldowns and BL, how to bundle packs safely in the narrow corridors, when to kite, and how to keep interrupts and stuns rolling so your timer never slips.
If Gold is the plan, press play first. Prefer to study on the page? Keep scrolling for thorough pull notes, boss-by-boss strategies and backup options when things go sideways.
Challenge Modes were Mists of Pandaria's answer to endgame competitive PvE, serving as the direct precursor to the Mythic+ system we know today. They were designed from the ground up to be a pure test of skill, featuring aggressive timers, dangerous trash pulls, and a strict focus on execution over gear. The format established a benchmark for coordinated dungeon-running that Mythic+ would later build upon.
To ensure the challenge remained consistent throughout the expansion, Blizzard implemented gear scaling, fixing player stats to a baseline. You couldn't simply overpower the dungeons with better equipment; success was entirely dependent on strategic planning, tight coordination, and precise gameplay.
Instead of offering powerful gear, completing MoP Challenge Modes unlocks a set of exclusive, cosmetic rewards: unique class-specific armor sets, a prestigious mount, and an exclusive title. For a full breakdown of the rules, restrictions, and the incredible rewards on offer, look at our comprehensive Challenge Mode guides in Pandaria Classic:
Read the Overview and the List of Rewards? Excellent - now you understand the what and the why of Challenge Modes. Let's apply that knowledge and dissect the dungeon itself: Scarlet Monastery.
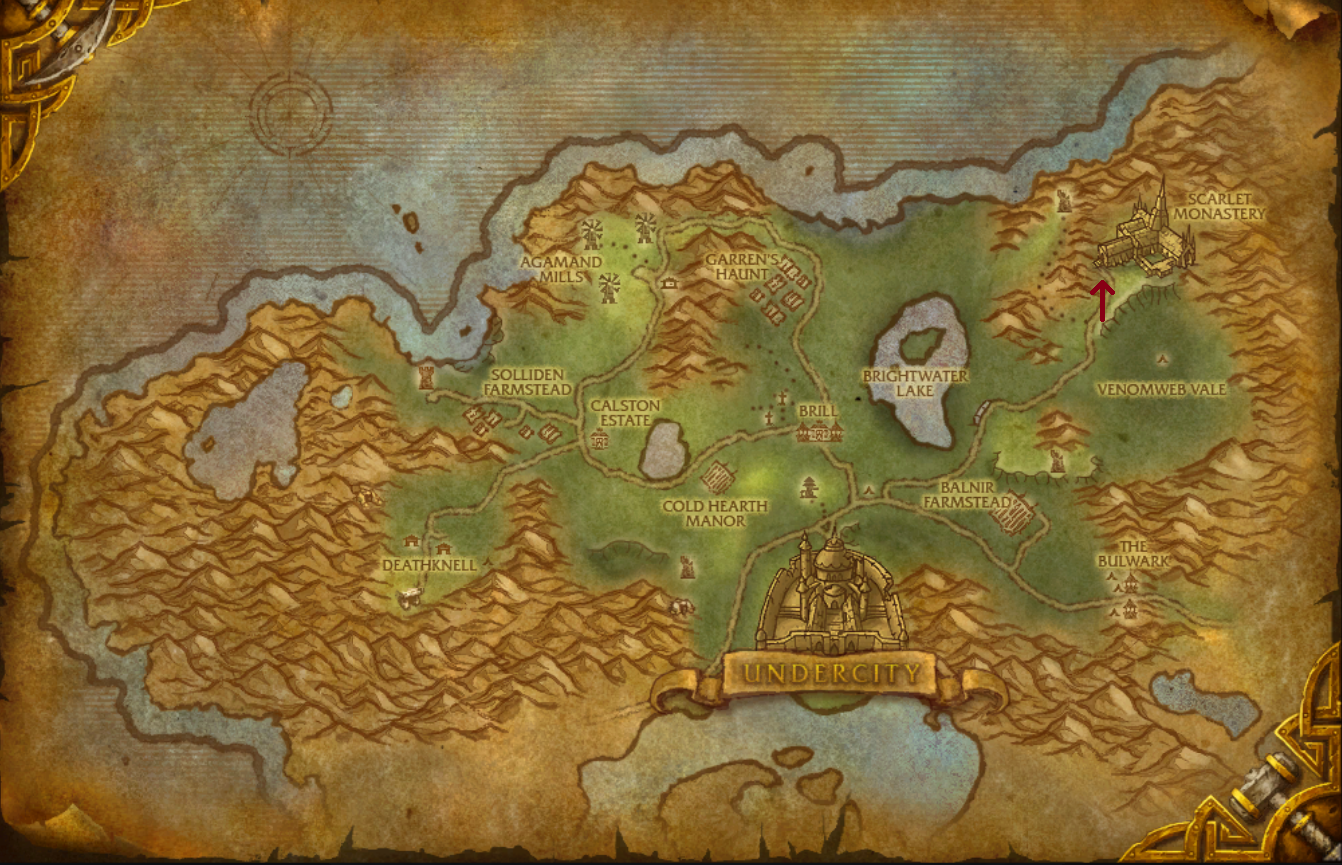
The iconic Scarlet Monastery is located in the northeastern corner of Tirisfal Glades, overlooking Brill and the Undercity from its fortified position. The portal hub for its wings is found within the main cathedral building at coordinates /way 85.0 30.0. You'll see the meeting stone outside the main gates.
To activate the Challenge Mode version of the dungeon, you'll need to form a group and zone in. Just inside, you will find the Challenge Mode Console, a new addition for MoP Classic that allows groups to begin their timed runs instantly, a significant convenience compared to the original system in 2012.
Every Challenge Mode is a race against the clock, and Scarlet Monastery is defined by its demand for a relentless, aggressive pace. The Bronze and Silver timers are forgiving; they offer enough breathing room to learn the pulls, recover from a missed interrupt, or even survive a death without failing the run.
Gold is an entirely different beast. With one of the tightest timers in Pandaria at thirteen minutes, you must execute with intent. This requires a meticulously planned route, zero downtime between pulls, perfect interrupt chains to control the casters, and immediate, clean use of crowd control. Success comes from controlled aggression and flawless coordination.
| Medal | Timer | Reward |
| Gold | 00:13:00 | 85 Valor Points |
| Silver | 00:22:00 | 70 Valor Points |
| Bronze | 00:45:00 | 55 Valor Points |
Remember that progress is always being made. Every completed run, regardless of the outcome, rewards your character with Valor Points. This ensures that even failed attempts are productive, turning practice sessions into tangible character progression as you build the confidence needed for a flawless Gold run.
Now we move to the heart of the guide: a step-by-step operational plan for every pull and boss encounter. This isn't about improvisation; it's about imposing a ruthlessly efficient strategy on the Crusade's fanaticism, transforming their fortress into a predictable, timed gauntlet.
Let's be clear: this guide is written with one objective in mind - achieving a Gold Medal. Therefore, every strategy that follows is built for speed and precision. We will focus on aggressive pulls, flawless interrupt chains, and the complete control required to dismantle the dungeon's defenses efficiently.
Here is the checklist for a successful Gold run in Scarlet Monastery:
The moment the timer begins, the run is live. There are no checkpoints or do-overs. Your group must commit to the plan, execute with precision, and adapt instantly to any unexpected variables. Now, let's dive into the optimal route - a path designed for speed and control that has proven effective for countless Gold runs.
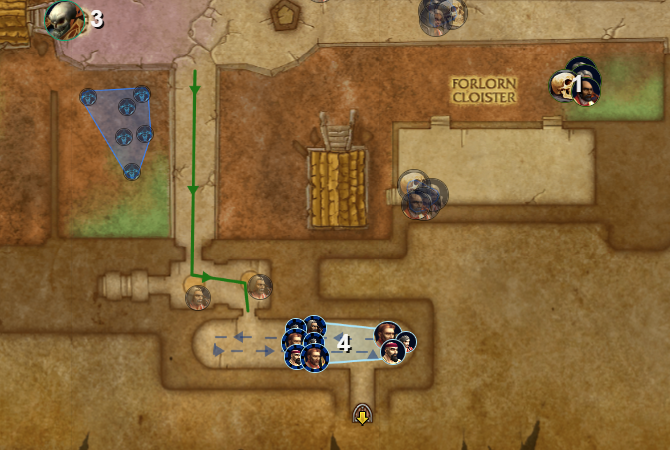
As you begin the dungeon, you'll encounter a fairly straightforward pull containing three types of mobs. Your absolute priority target should be the Pile of Corpses. This enemy will periodically summon additional, non-threatening Zombified Corpse adds. To keep the fight clean and avoid being overwhelmed by numbers, all players should focus their damage on the Pile of Corpses until it is defeated. This is the most efficient way to handle the pull.
The remaining mobs are two Scarlet Centurions and a single Scarlet Flamethrower. The Centurions possess a Cleave that hits nearby targets for 125% weapon damage, so melee players should watch their positioning. Their other ability, Retaliation, can be ignored to maximize your DPS. The Flamethrower has only one channeled spell, Flamethrower, which must be interrupted, since it's the only cast in the pack, make sure to kick it, as its 4-second channel will inflict heavy, avoidable damage on the group.
Once all the mobs are defeated, you can proceed, but do so with extreme caution. Hug the left wall as tightly as possible to avoid pulling any extra enemies along the way.
Next, you will have to deal with 12 Frenzied Spirit. They have only one, but very nasty, ability: Frenzied Spirit. It increases their damage and attack speed by 15%, but also slows their movement speed by 5% per stack. Towards the end of the fight, they can easily have around 20 stacks, at which point they become a serious threat. However, these mobs have very little health, so you can likely "face-tank" them, relying on your group's damage to kill them before they kill your tank. AoE stuns will make this pull much easier. Also, remember that if you feel your damage is lacking, the tank can always kite them after establishing threat.
For highly coordinated teams seeking to optimize their time, the spoiler below details a more aggressive and challenging approach to these pulls:
For groups confident in their coordination and damage output, there's a high-risk, high-reward strategy that can save a massive amount of time: pulling all the initial trash directly to the boss.
To execute this, your group must first burn down the Pile of Corpses. Immediately after it's defeated, move forward and gather all the Frenzied Spirit, pulling them onto the boss. It is crucial to assign one player to consistently interrupt the Scarlet Flamethrower while you are gathering up the mobs; this prevents it from falling behind and casting into the group's back. Once everything is tightly stacked on the boss, pop Bloodlust/Heroism and unleash your full AoE burst to cleave everything down.
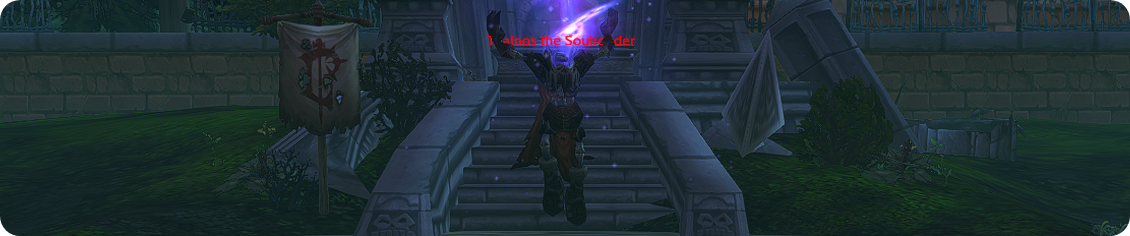
The fight against Thalnos the Soulrender is relatively easy by Challenge Mode standards. Despite the large number of summoned adds, they do not pose a significant threat and can be ignored, allowing your group to concentrate all of its damage on the boss. The only mechanics to worry about are dispelling Evict Soul and interrupting Spirit Gale. Don't hesitate to pop Bloodlust/Heroism here. The fight might be simple, but there's a chance it will be off cooldown again for the last boss, depending on your group's speed, so there's no reason to hold onto it.
To summarize, this fight is a simple "burn" strategy where your group's primary focus should be on Thalnos himself. The only essential tasks are to assign a dedicated interrupt for Spirit Gale and for the healer to instantly dispel Evict Soul. The tank should gather all the minor adds, but the DPS should ignore them completely, focusing solely on the boss. By ignoring the adds and correctly handling these two simple mechanics, you can defeat Thalnos quickly and efficiently.
Pull 4
Brother Korloff
After the boss is defeated, you can move forward to what is likely the most dangerous trash pull in the entire dungeon. It contains a large number of casters, so we will break them down in order of importance. No new mob types will appear after this pull.
The Scarlet Zealot has several abilities, but the highest priority is Heal. If this cast is not interrupted, the Zealots will waste a significant amount of your time, forcing your healer to spend more mana and complicating the pull overall. Their Smite ability deals a small amount of Holy Damage and can be ignored to save your interrupts for more important spells. Most interestingly, they can cast Resurrection, which has a 10-second cast time. However, since the mobs in this pack tend to die around the same time, the Zealot will likely be at low health and die before it can finish casting, making it a non-threat, but still keep an eye on this cast.
The Scarlet Purifier has two abilities. The most important is Flamestrike, which deals heavy AoE damage to your entire group and creates major problems for your healer. Since there are three of these mobs in the pack, missing several of these casts can easily lead to a wipe, so be extremely attentive to this spell. Their second cast, Purifying Flames, also deals significant damage but is more manageable, making it a lower priority.
Finally, the Scarlet Fanatic and Scarlet Judicator are mobs that primarily cause problems for the tank. The Fanatic uses Fanatical Strike, which deals minor damage to both its target and itself, and also buffs itself with Hands of Purity, which can be purged. The Judicator has only one ability, Pass Judgment, an inconvenient 1.5-second stun that is the least of your problems in this pull.
To handle this pull more easily, coordinate your crowd control assignments with your group before engaging. Remember, for a lower-risk approach, you can pull these packs one at a time instead of all together.
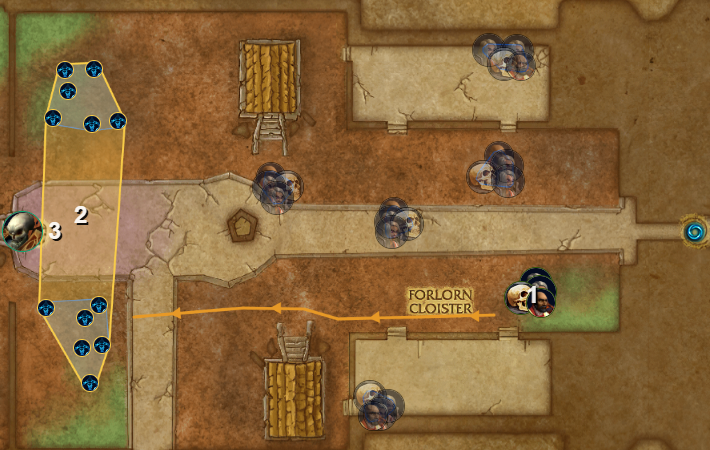
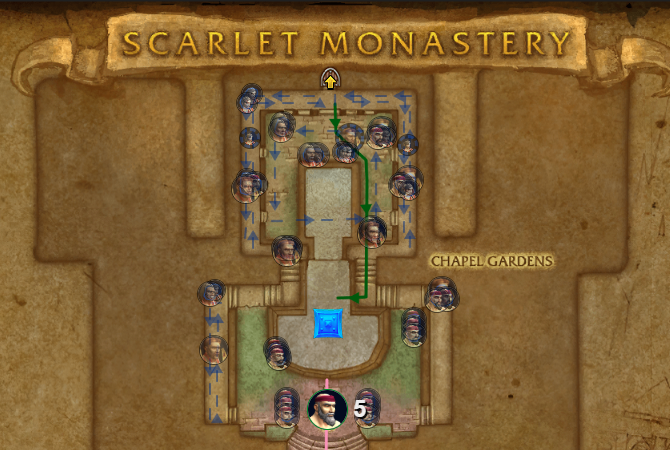
Next up is a straightforward Invisibility Potion skip. The path is short and easily covered in 18 seconds, so you won't need movement cooldowns, but use them if you have them for a safer run. On a "three" count, everyone should use their potion and follow the route marked in the picture.
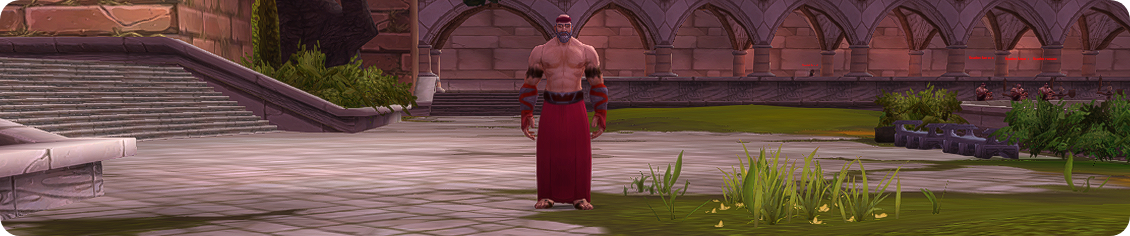
Brother Korloff is a pure positioning check. Pull him very carefully when he is positioned centrally in the plaza, between the two packs of Scarlet Fanatic, to avoid engaging them. Fight him near the fountain in the position marked by the "Square" on the image, keep his front aimed away from the party, and pre-assign a farthest “bait” player to control Firestorm Kick. The kill is clean if you respect the frontal, dodge the leap, and keep his fire trails confined after 50%.
Success in this fight hinges entirely on disciplined positioning and controlling the boss's location. By correctly baiting Firestorm Kick to a designated spot and minimizing all other movement, your group can easily manage the hazards and secure a clean victory.
With Brother Korloff defeated, your path forward lies through the plaza leading to the temple entrance. Your movement here must be deliberate and precise. The area is flanked by two stationary packs of Scarlet Fanatics, and engaging them is an unnecessary time loss. To avoid pulling them, your entire party must walk directly down the center of the plaza, maintaining an equal distance from both groups. Once you are safely past them, you can proceed to the main hall to begin the next phase.
However, before you engage the final encounter, there is a critical mechanic on this difficulty that differs from the Heroic version: you are required to clear every single trash mob within the temple hall. Failure to do so will result in all remaining enemies in the hall joining the boss fight the moment you pull. However, for highly coordinated groups, this can be leveraged as an advanced, high-risk strategy. By intentionally leaving a few packs alive, you can group everything with the boss to save a significant amount of time through massive AoE cleave - a tactic reserved for those pushing for record times or seeking an extra challenge.
While most of the enemies will be familiar, the final pull before the boss introduces a new mob type: the Scarlet Initiate. These acolytes will attempt to cast weakened versions of Heal and Smite, but they pose a minimal threat due to their very low health pools. This means they'll die while stunned/controlled, long before they can cast anything.
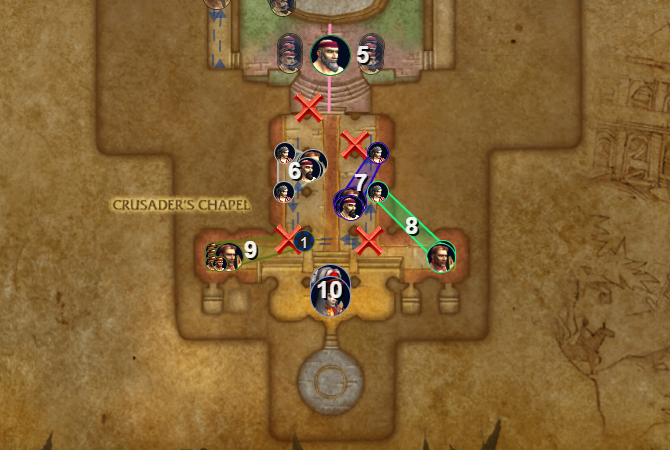
The most crucial tactic for managing the pulls in the hall, especially with the large number of casters, is to consistently use Line of Sight (LoS). Have your tank pull a group and immediately retreat behind a solid object, like a large pillar or a corner. The image shows several effective spots for this, marked with an "X". This forces the enemy casters to stop casting and run into a predictable, tightly-packed cluster around the corner, allowing your group to efficiently cleave them down with maximum effect.
This final encounter is a three-part fight that tests your group's coordination, interrupt discipline, and raw damage output. Success requires flawless handling of Whitemane's key abilities while managing the constant pressure from Commander Durand. Proper positioning is essential to maximize your uptime and beat the strict DPS checks. Before pulling, be sure to check the status of your Bloodlust/Heroism cooldown. Depending on your group's pace through the dungeon, it may be available again for this final push.
Phase One: The encounter begins with Commander Durand as the sole active boss. He will consistently pressure the group with his abilities Flash of Steel & Dashing Strike, which inflict moderate Physical Damage. To manage this effectively, your group should adopt a loose spread formation. However, it is better to keep the spread tight enough that your melee DPS can stay on the boss at all times and maintain maximum DPS uptime without having to chase him across the room.
Phase Two: Once Commander Durand is defeated, High Inquisitor Whitemane enters the arena, and you must now fight her. In addition to Power Word: Shield (a simple magic absorb shield that can be purged), she has three interruptible abilities, with the most important being Mass Resurrection and Dominate Mind. The first will bring all Scarlet Judicator back to life in a very large radius, which will significantly complicate the fight, while the second, Dominate Mind, will cause the boss to take control of a random player, which is completely unacceptable. You must assign a responsible player to interrupt each of these abilities. Meanwhile, her last ability, Holy Smite, can mostly be ignored to save your interrupts for more important spells, as it only deals insignificant damage. When the boss reaches approximately 50% health, she will put everyone to Deep Sleep for 10 seconds and cast Scarlet Resurrection, which restores her to full health and resurrects Commander Durand, after which the third phase will begin.
Phase Three: In this final phase, nothing new will happen - you simply need to execute the mechanics of both bosses at once. The core strategy remains the same: maintain a loose spread formation to manage Commander Durand's damage, but do not move too far apart. Concurrently, your top priority is still interrupting High Inquisitor Whitemane's key spells. Focus on clean execution of these two core principles - positioning and interrupting - to secure the victory.
Armed with this guide, your team now has the strategic blueprint to dismantle the Scarlet Crusade. You understand the route, the critical interrupt assignments, and the Line-of-Sight tactics that transform fanatical chaos into controlled execution. From this point on, mastery comes from repetition and composure - turning theory into the muscle memory of flawless pulls, synchronized crowd control, and a timer that never dips into the red. We wish you the best in your attempts; may your interrupts be swift and your path to Gold be clear.
However, we understand that coordinating a dedicated team for a challenge this demanding can be a significant hurdle. If finding a group is proving difficult, or if you're hitting a wall after numerous attempts, our professional players are ready to step in. Reach out to us, and we can pilot you directly through the challenges to claim the rewards you're fighting for: the prestigious titles, the exclusive transmog sets, and everything else Pandaria's Challenge Modes have to offer.