
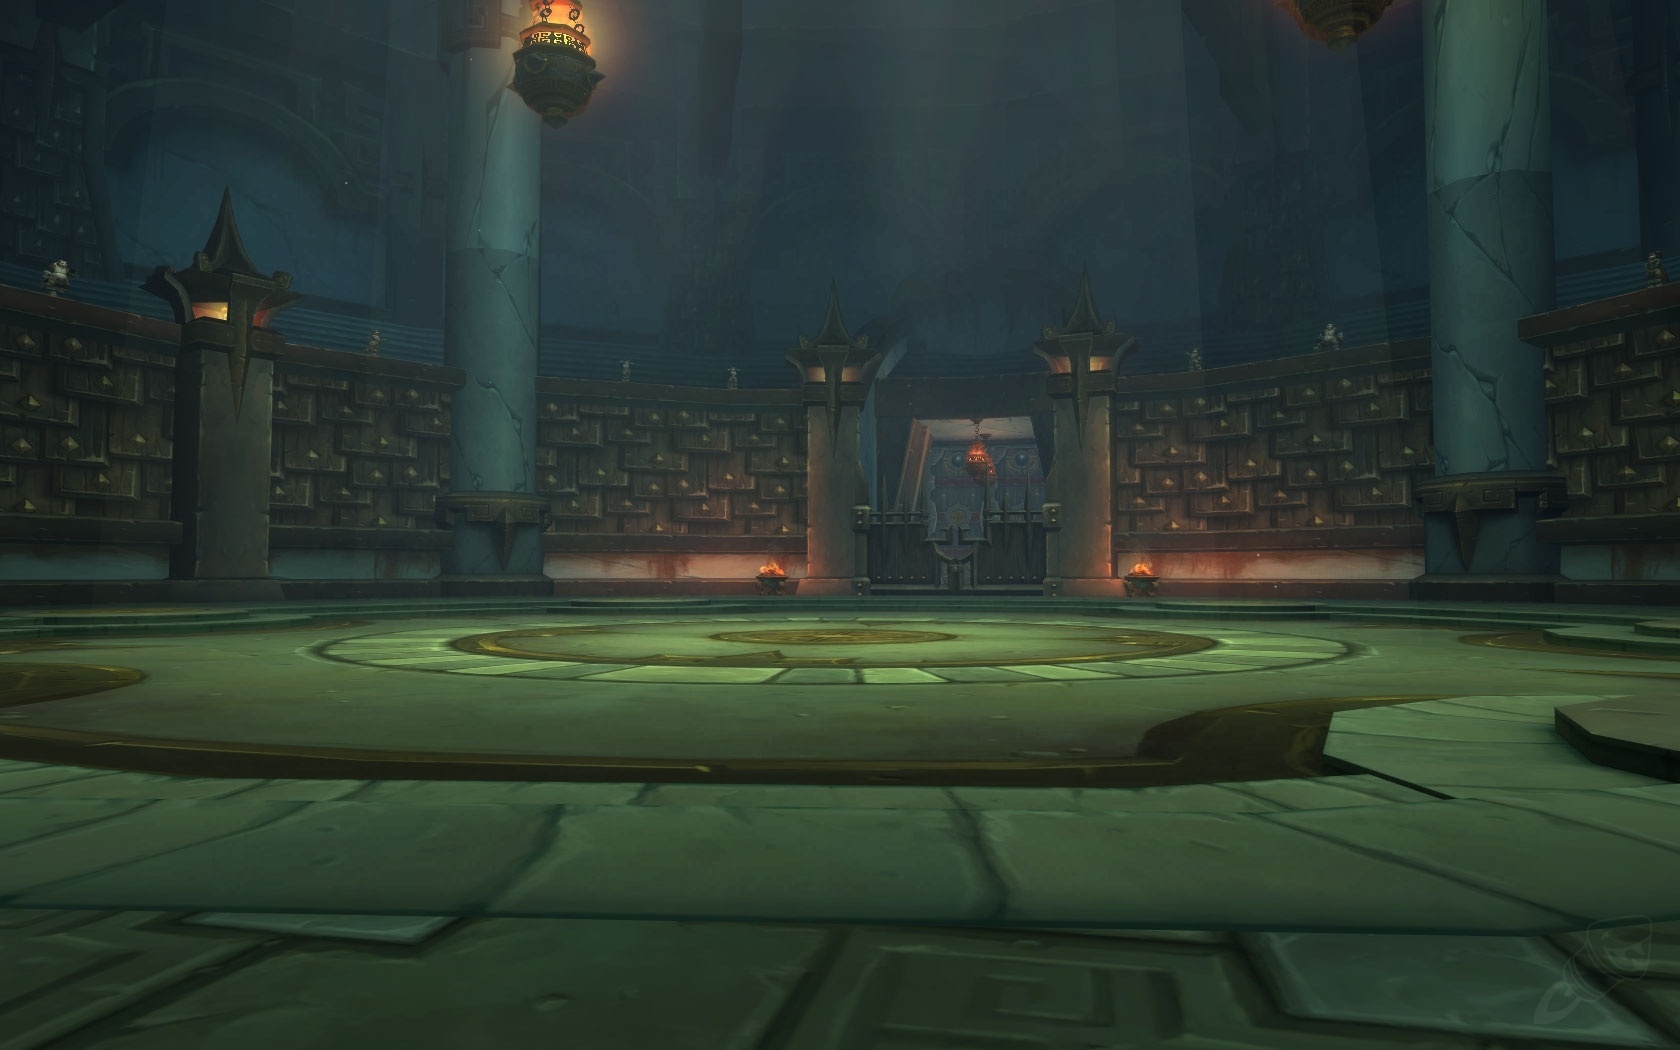
Snow thins to mist around the Temple of the White Tiger, where a stone arena waits — simple, circular, unforgiving. This is the Arena of Annihilation, Pandaria’s answer to the old Ring of Blood trials: a level 90 proving ground where challengers step in, one after another, to test steel and resolve.
Gurgthock, the ogre showman, presides with a booming voice and a ledger full of names, eyeing each contender for the next headline bout. Torches flare, the crowd tightens its circle, and the air hums with wagers and whispered doubts. No sprawling questlines here — just the ring, the roar, and the promise that when the last foe drops, you’ll walk out carrying more than just bragging rights.
Open the Dungeon Finder (gold shield icon next to the minimap), click the Scenarios tab, and at level 90 you’ll see Arena of Annihilation in the list. Pick your role — any DPS, tank, or healer works — and hit Find Group. You can queue alone or as a premade trio. When the pop‑up appears, click Accept within 30 seconds or the spot goes to someone else.
The loading screen drops you straight onto the arena platform beside Gurgthock, with no trash packs or travel time. If a friend missed the queue they can use "Join Party" before the first pull, but once all three players click Ready at the gong the gates close and the first challenger spawns. That’s it: one click in Dungeon Finder, a quick confirmation, and you’re inside and fighting.
The moment you load into the Arena of Annihilation scenario, speak to Gurgthock (the ogre ringmaster who stands near the starting gong) and accept the quest The Arena of Annihilation. Alternatively, you can also get the quest before entering the Scenario by talking to the same Gurgthock, who's located in Temple of the White Tiger, Kun‑Lai Summit (coordinates: /way 67.8 46.6).
If someone in your trio has already picked it up, they can simply share it with you as well; the objective is shared across the group. The quest is available only at level 90 and can be completed once per character, so be sure every alt grabs it before the first pull.
Clear the short series of boss rounds, turn the quest back in to Gurgthock right inside the arena, and you’ll choose from a selection of rare item‑level 450 weapons: ranged, melee, caster, or healer options tailored to most specs:
It’s a quick upgrade that beats early dungeon drops and positions fresh level‑90 characters for heroic dungeons and daily hubs with minimal effort. But you'll probably still need to know the very basics about the bosses:
You’ll face five successive bosses in this scenario, each tougher than the last. There’s no timer, so take your time and focus on survival. After each victory, hit the gong to summon the next challenger. Here’s a breakdown of each stage and strategy:
Stage 1 – Scar-Shell: A massive dragon turtle. Watch out for his Piercing Bite, which cuts armor in half, and be ready to dodge when he spins wildly around the arena. Anyone caught in his spinning path takes heavy damage. Once Scar-Shell finishes his whirlwind spin, he’s momentarily dazed and takes extra damage – that’s your cue to burst him down quickly.
Stage 2 – Jol’Grum: A hulking yeti-like horror. He has a Headbutt that knocks his target back and applies a short DoT, as well as a ground-shaking Slam from the center of the ring that flings everyone to the walls. Jol’Grum also builds rage (energy) when he moves; if it reaches 100, he goes "Angry" and his attack speed skyrockets for a few seconds. Limit how much you kite him to avoid triggering that frenzy. If he does enrage, back off until it passes, then finish him off.
Stage 3 – Little Liuyang: A feisty fire elemental. Interrupt his rapid Fireball casts and sidestep the flaming line attack he periodically shoots out. Every so often, Liuyang will summon three rotating fire walls along with three Flamecoaxing Spirit adds. Kill those spirits ASAP to extinguish the moving walls. Important: while the flame walls are up, Liuyang reflects 50% of damage back at attackers, so don’t burn yourself – focus the adds and avoid all fire until the hazards disappear.
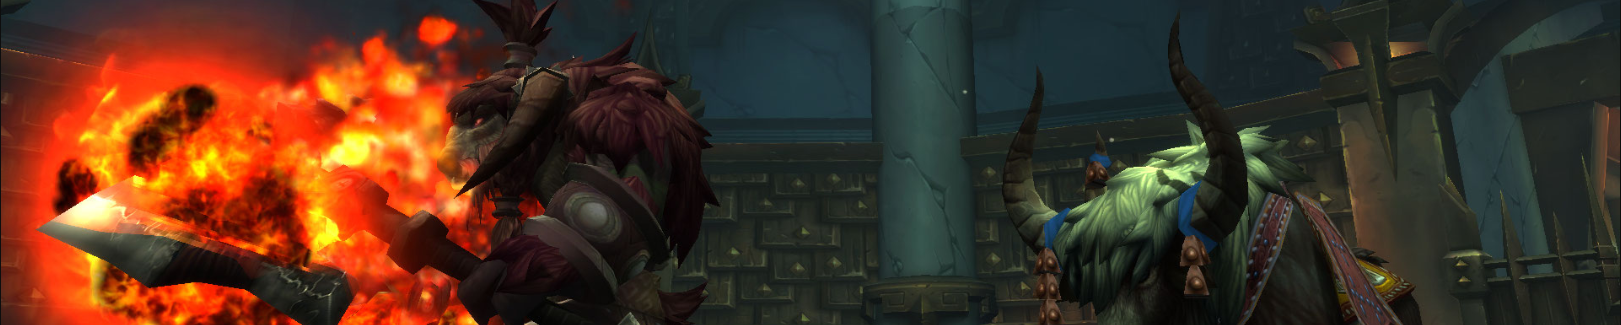
Stage 4 – Chagan Firehoof: A battle-hardened yaungol warrior mounted on a huge yak named Batu. Ignore the yak (it retreats once Chagan dies) and focus on Chagan himself. He’ll slam the ground with his hammer, which is a point-blank AoE – stay back or sidestep when he’s winding up. He also casts Trailblaze, sending several streaks of flame across the floor. Keep moving to avoid standing in the fire lanes. Kite if needed when he does a big attack, but continue DPS on Chagan to take him down and end the threat (the yak will trot off after).
Final Stage – The Final Challenger: The last opponent is randomly chosen from three possible contenders . Each has a unique gimmick:
With these quick tactics in your pocket, you’re no longer a guest in the arena — you’re running it. Buff up, line up your burst, and treat each final challenger like another puzzle to solve.
Speaking of achievements, there are a couple of extra challenges in the Arena of Annihilation: Beat the Heat requires that no one in your party get hit by Little Liuyang’s flame walls during Stage 3 (in other words, don’t stand in the fire!). There’s also In the Eye of the Tiger, earned by defeating all three of the possible final challengers over multiple runs. If you’re an achievement hunter, you might revisit the arena a few times until you’ve seen Maki, Satay, and Kobo each in action.
If chasing every feat sounds like a time‑sink, let our seasoned PROs handle the grind for you. We’ll sweep you through the Arena — and every other MoP Scenario — so the achievements and loot land in your bags while you sit back and enjoy the ride: